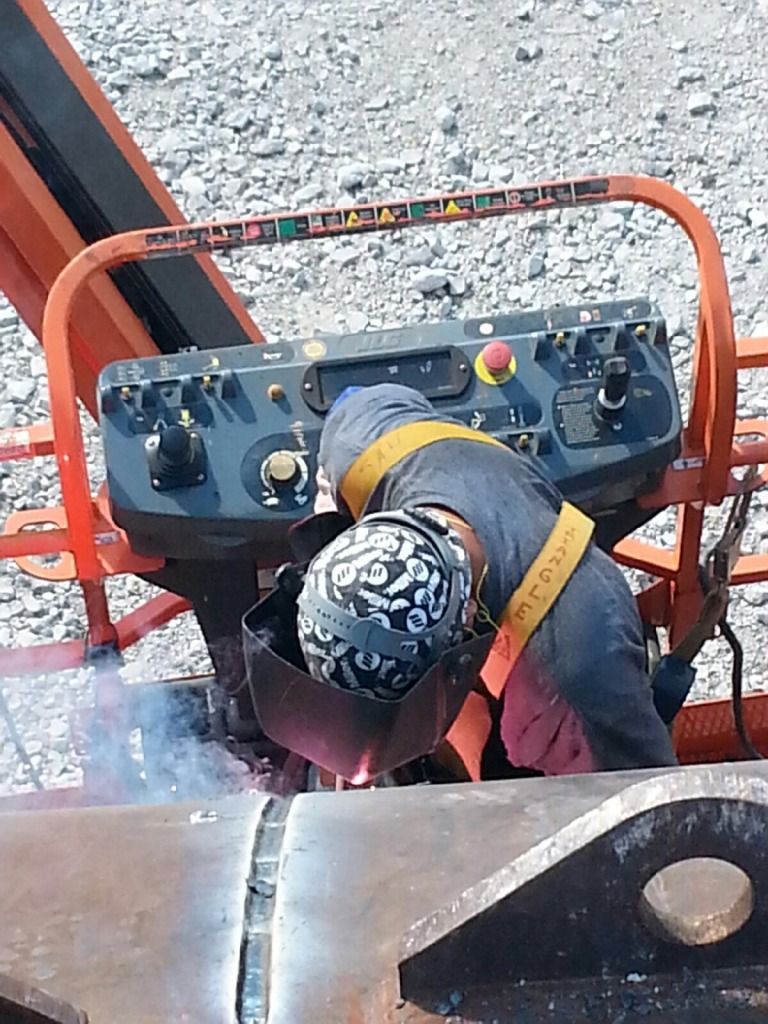
What welding projects are you working on? Are you proud of something you built?
How about posting some pics so other welders can get some ideas?
ImLow78
  • Posts:
  • Joined:
    Fri Aug 22, 2014 9:22 pm
  • Location:
    In a state of confusion.

Image

Image

Image

Image

Image

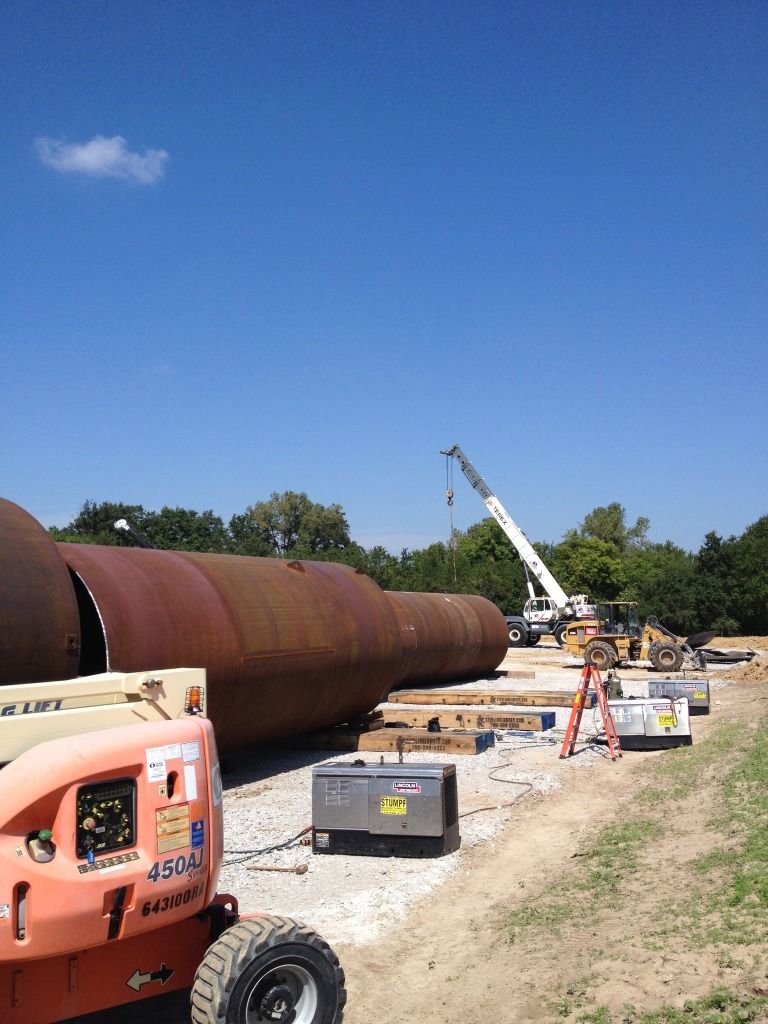
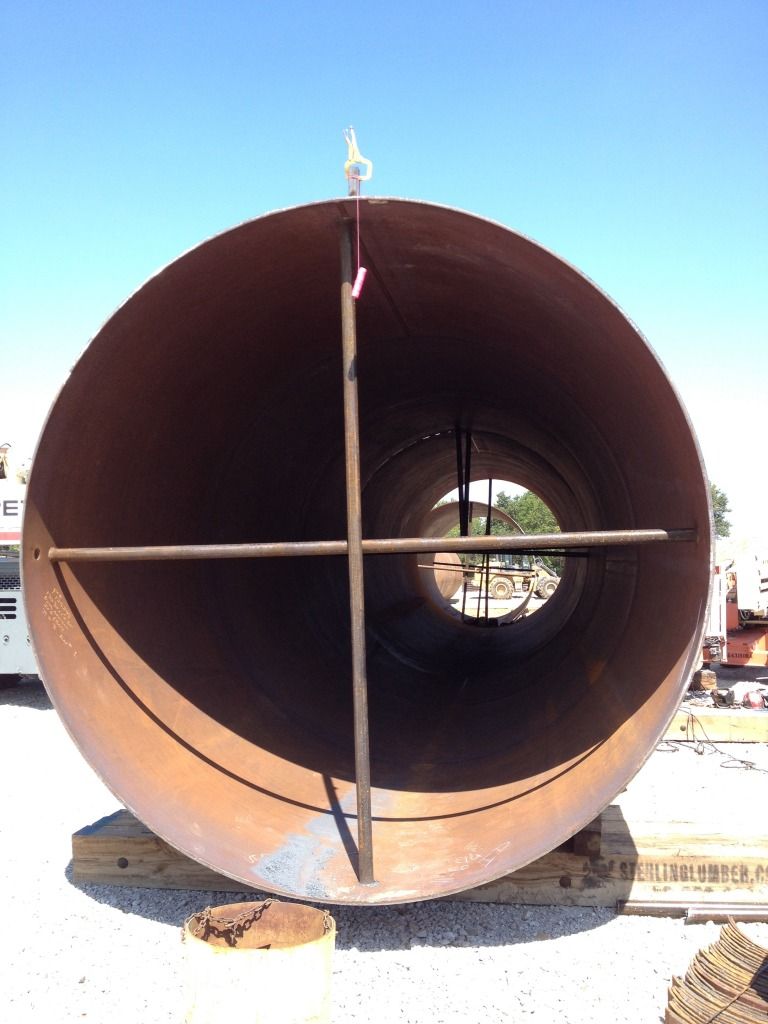
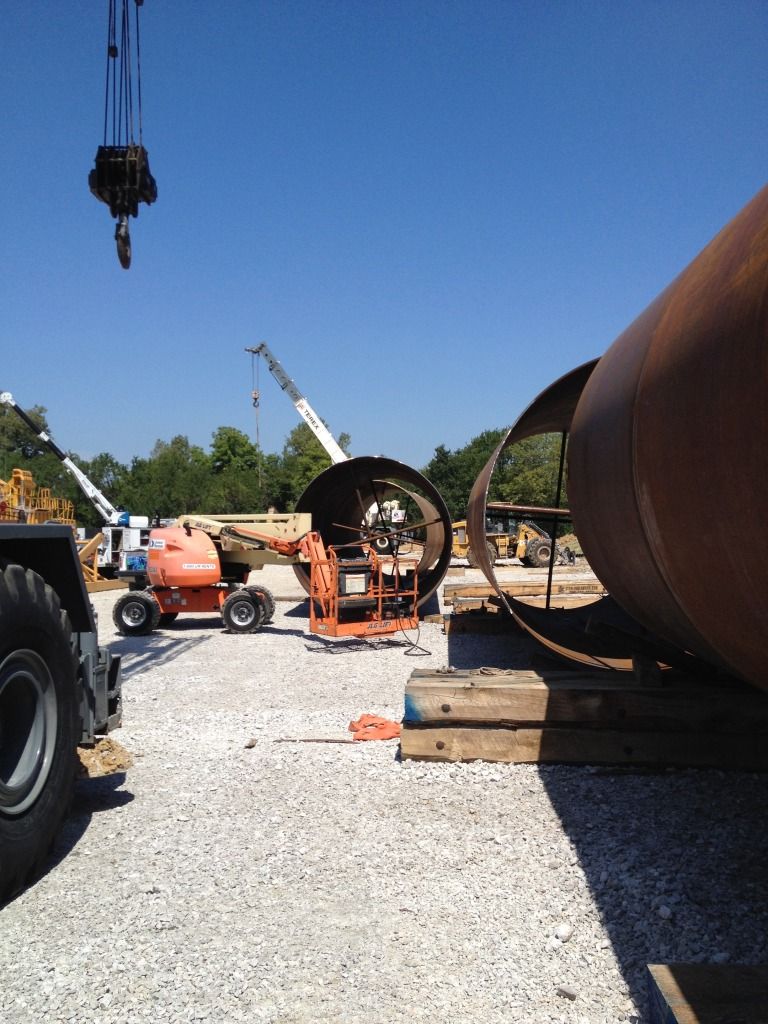
12' dia 1" thick welded in 5g with .068 NR-233

Shannon
Last edited by ImLow78 on Tue Sep 09, 2014 10:48 pm, edited 1 time in total.
ImLow78
  • Posts:
  • Joined:
    Fri Aug 22, 2014 9:22 pm
  • Location:
    In a state of confusion.

Image

Image

Image

Vertical up

root, hot, cover and cap.

Shannon
Last edited by ImLow78 on Tue Sep 09, 2014 10:40 pm, edited 1 time in total.
ImLow78
  • Posts:
  • Joined:
    Fri Aug 22, 2014 9:22 pm
  • Location:
    In a state of confusion.

Image

Image

Image

Flat

hot, cover and cap.

Shannon
Last edited by ImLow78 on Wed Sep 10, 2014 7:46 pm, edited 1 time in total.
ImLow78
  • Posts:
  • Joined:
    Fri Aug 22, 2014 9:22 pm
  • Location:
    In a state of confusion.

Now for the POOP that I was left to fix after a first time welder (with NR-233) decided to go a little to long before asking for help.

Image

Image

Image

Image

Image

Image

Shannon
User avatar
  • Posts:
  • Joined:
    Wed Aug 06, 2014 12:48 am
  • Location:
    Melbourne, Australia

Well Shannon, all I can say is that I'm sure impressed with the gargantuan size of this project. Some serious runs involved there boy.

How many rods / packets / lbs do you reckon were required to complete a full joint around the circumference including root passes and cap etc?

PS: I don't envy you having to fix the under-cut and the slag inclusion....

Trev
EWM Phonenix 355 Pulse MIG set mainly for Aluminum, CIGWeld 300Amp AC/DC TIG, TRANSMIG S3C 300 Amp MIG, etc, etc
Artie F. Emm
  • Posts:
  • Joined:
    Thu Jul 24, 2014 7:53 am

Sure is a beautiful day in your neighborhood!

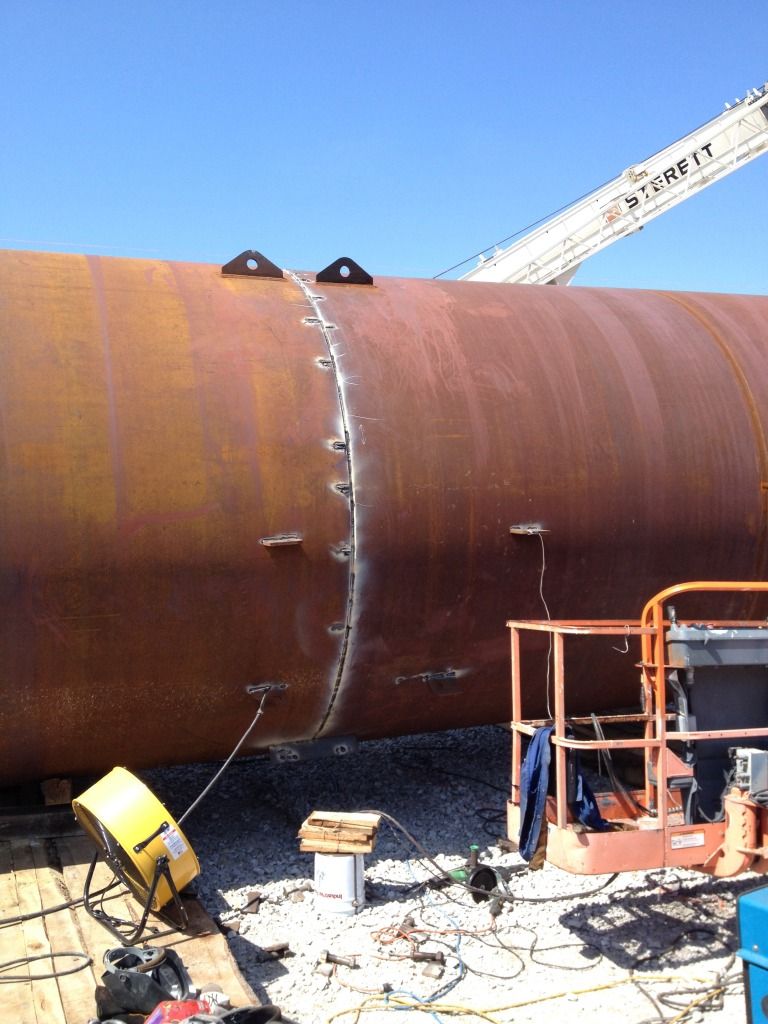
In photo #4, what is the purpose of the 2" (or so) welds that are perpendicular to the main weld joint?
Dave
aka "RTFM"
weekendwelder70
  • Posts:
  • Joined:
    Tue Dec 17, 2013 4:16 pm
  • Location:
    Salem, OR

In photo #4, what is the purpose of the 2" (or so) welds that are perpendicular to the main weld joint?
I am thinking they are left behind from bar that was welded on for lining up the two pipes.
motox
  • Posts:
  • Joined:
    Thu Nov 28, 2013 12:49 pm
  • Location:
    Delaware

how are you planing on fixing those bad welds, girding?
htp invertig 221
syncrowave 250
miller 140 mig
hypertherm plasma
morse 14 metal devil
ImLow78
  • Posts:
  • Joined:
    Fri Aug 22, 2014 9:22 pm
  • Location:
    In a state of confusion.

TRACKRANGER wrote:Well Shannon, all I can say is that I'm sure impressed with the gargantuan size of this project. Some serious runs involved there boy.

How many rods / packets / lbs do you reckon were required to complete a full joint around the circumference including root passes and cap etc?

PS: I don't envy you having to fix the under-cut and the slag inclusion....

Trev
Trev,

In just welding the cans together there was 21 rolls of wire used. We still had to laminate some 2" thick plate for lifting eyes on the end sections (on the side of the cans) and lifting eyes on the top side of the cans.
Artie F. Emm wrote:Sure is a beautiful day in your neighborhood!

In photo #4, what is the purpose of the 2" (or so) welds that are perpendicular to the main weld joint?
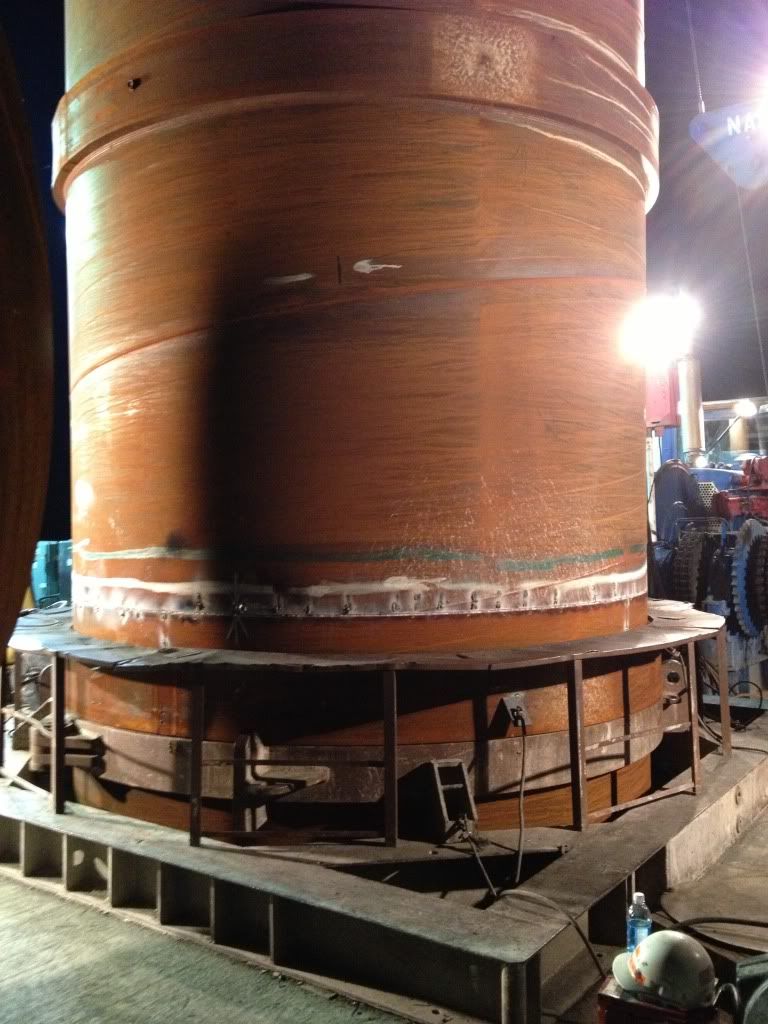
What's you see is the reminence of welds where we placed the "dogs" on the cans to push and pull the joints around to get them to align.
weekendwelder70 wrote:
In photo #4, what is the purpose of the 2" (or so) welds that are perpendicular to the main weld joint?
I am thinking they are left behind from bar that was welded on for lining up the two pipes.
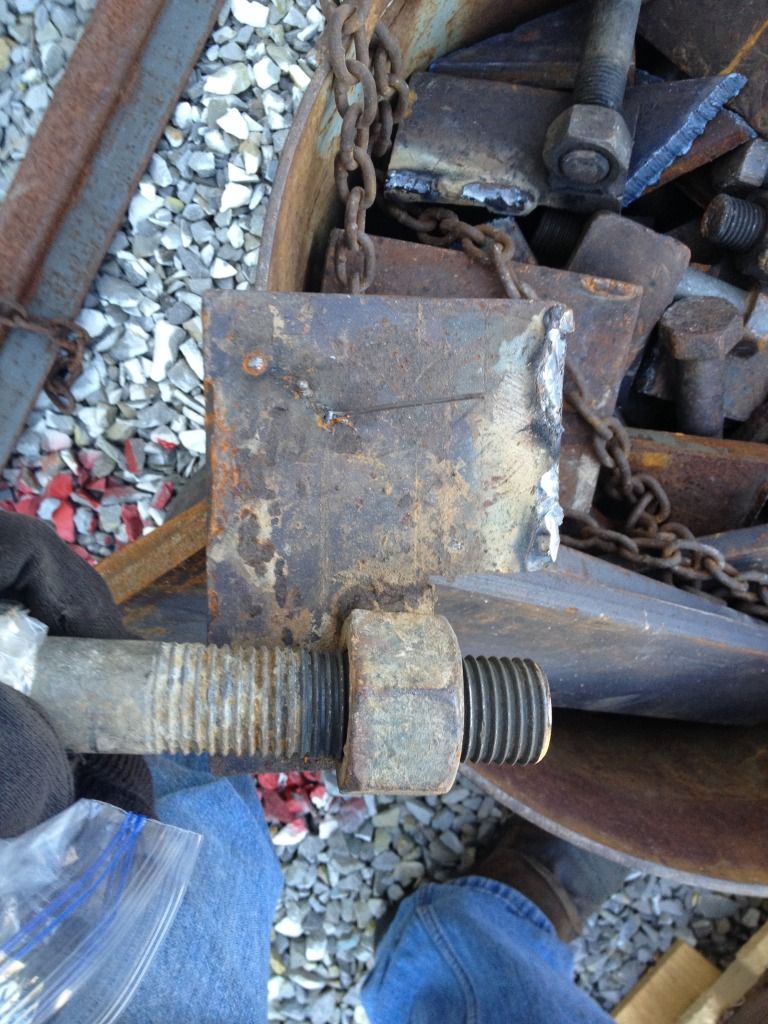
What we use is a piece of 1" thick plate that is cut in the shape of an "L" with a 2" bolt that has the nut welded to the plate that is used for clamping and pushing force.
motox wrote:how are you planing on fixing those bad welds, girding?
This one was with scarfing tip and a 8" grinder but I have had to use a air arc before.

Also keep in mind guys that cap pass is roughly 2" wide. LoL

Those cans are 30' long and we was making the five cans into two sections because the drilling company didn't get a large enough crane to lift it in one piece. (Each can weighed 48,000 lbs.)

Shannon
User avatar
  • Posts:
  • Joined:
    Thu Jan 06, 2011 11:40 pm
  • Location:
    Near New Orleans

Awright....

If I've got to scroll through 30+ pictures of your weldsto get to the point,

Here's a play on your topic title...

https://www.youtube.com/watch?v=CNj-wu3mE3c

8-)

Steve S
User avatar
  • Posts:
  • Joined:
    Wed Aug 06, 2014 12:48 am
  • Location:
    Melbourne, Australia

Shannon, what will the pipeline be used for?

Some serious capacity there...
EWM Phonenix 355 Pulse MIG set mainly for Aluminum, CIGWeld 300Amp AC/DC TIG, TRANSMIG S3C 300 Amp MIG, etc, etc
ImLow78
  • Posts:
  • Joined:
    Fri Aug 22, 2014 9:22 pm
  • Location:
    In a state of confusion.

TRACKRANGER wrote:Shannon, what will the pipeline be used for?

Some serious capacity there...
Coal mine air shaft that just had a fire in a old works. This is just the surface casing. Once it's set and concreted in the ground they will drill another hole through that string of cans to shaft depth. Once they pop through we will start running 8' dia in the ground to the mine.

When it rains it will have enough air pushing out of the hole to suspend water in mid-air.

Shannon
User avatar
  • Posts:
  • Joined:
    Wed Sep 17, 2014 8:19 am

@ImLow
Which clamps did you use?
I always use chain clamps http://www.dwt-gmbh.de/en/pipe-chain-clamps.html but don't know if it's the best solution for that size

Greets from Germany, Achim
ImLow78
  • Posts:
  • Joined:
    Fri Aug 22, 2014 9:22 pm
  • Location:
    In a state of confusion.

CutKiller wrote:@ImLow
Which clamps did you use?
I always use chain clamps http://www.dwt-gmbh.de/en/pipe-chain-clamps.html but don't know if it's the best solution for that size

Greets from Germany, Achim
Achim,

I don think that type of system would work for this size of pipe. I'll be going back to finish the job next week. When I get there I'll shoot some photos of the "dogs" we use.

Shannon
User avatar
  • Posts:
  • Joined:
    Sat Jul 06, 2013 11:16 am
  • Location:
    Near Pittsburgh,Pennsylvania. Steel Buckle of the Rust Belt

I've always been impressed with the simple key plate, lug and wedge system used in building large tanks and welding sections of large pipe. Once installed you can use the wedges to either open or close the gap as you progress and change the alignment in and out.

The only downside is the fact that they need to have the key plate lug welded to the surface that will later need removed with a torch and grinder. This proves to be a little more troublesome when dealing with SS or Aluminum but in the age of the plasma cutter it is getting easier.

Len
Now go melt something.
Instagram @lenny_gforce

Len
User avatar
  • Posts:
  • Joined:
    Wed Sep 17, 2014 8:19 am

@shannon
that would be great, looking forward to it

greets achim
ImLow78
  • Posts:
  • Joined:
    Fri Aug 22, 2014 9:22 pm
  • Location:
    In a state of confusion.

CutKiller wrote:@shannon
that would be great, looking forward to it

greets achim
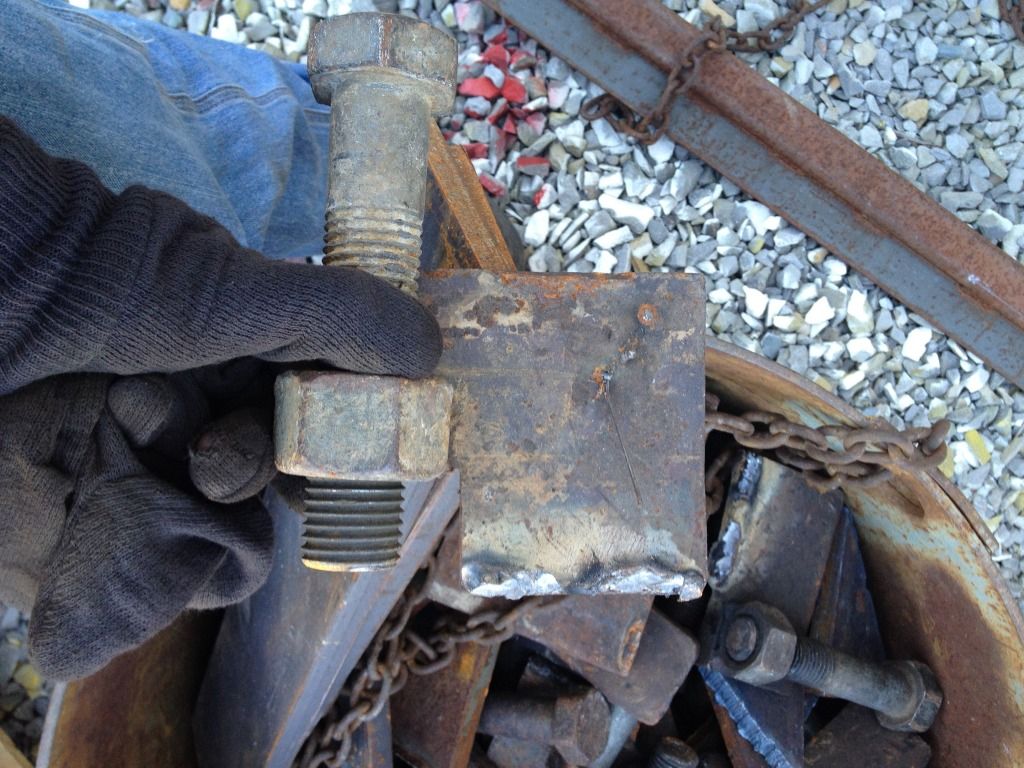
This is what we call a "dog". With this piece you can align your joint. The check marks on the outside of the cans that was asked about is where there was a dog welded on to get that joint aligned.

Image

Image


Shannon
User avatar
  • Posts:
  • Joined:
    Thu Jan 06, 2011 11:40 pm
  • Location:
    Near New Orleans

That is what I call a "screw-dog". I also have "wedge-dogs", which are quite similar, only a wedge is driven where your threads and nut are. For plate work, I FAR prefer the wedge dog for speed and efficiency. For pipe work, the screw-dog can't be beat.

Steve S
User avatar
  • Posts:
  • Joined:
    Thu Jan 06, 2011 11:40 pm
  • Location:
    Near New Orleans

I also have "gap dogs", that I tack 120* apart on pipe to push/pull the gap to where I want it.

Steve S
ImLow78
  • Posts:
  • Joined:
    Fri Aug 22, 2014 9:22 pm
  • Location:
    In a state of confusion.

Otto Nobedder wrote:That is what I call a "screw-dog". I also have "wedge-dogs", which are quite similar, only a wedge is driven where your threads and nut are. For plate work, I FAR prefer the wedge dog for speed and efficiency. For pipe work, the screw-dog can't be beat.

Steve S
It's amazing the amount of pressure you can exert with that little bolt. But I've also had them pop off and bite me. Had three stacked tight and as soon as I felt the weld give on the one I was tightening I couldn't get away fast enought. Blew all three off and took one to the chest. Needless to say I don't crank on them to that point any longer. I just add more dogs to help distribute the work load over a larger area.

(*photo addition edit*)

Image

This was the job I was dodging dogs. We cut the first can to get it to root gap right and after that every joint was a PITA to dog and we cut every can after that. Never heard if the can sequence got screwed up or if it was just a poopy string of cans.

Shannon
Post Reply