What welding projects are you working on? Are you proud of something you built?
How about posting some pics so other welders can get some ideas?
How about posting some pics so other welders can get some ideas?
If you could fabricate some riser blocks a dirt bike handlebar would go on there and look pretty nice. You might want to cut down the width but that's no big deal. Nice looking frame so far. Almost looks like a BMW telelever type front end. If you don't already have your engine look online at the SmallEngineWarehouse.com. I bought a couple of replacement lawnmower engines from them and their prices were much better than a mower dealer could give me.

Thanks for the heads up. I'm in from the shop, now, and will head back after lunch. I've finished the axle portion of the shock support and making the support that goes to the frame. I was thinking of something similar to the front, but, the location is too far to one side and will have to stick to the original design. I should have some photos tonight.
I thought I would work on the bike this week, but, finances took over. I drummed up a little work to earn a little extra money. Install a toilet, fix a table, things like that. I forgot I'm still a contractor. I picked up an easy grand. These bike parts aren't cheap. I'll resume work on the bike on Monday.
Literally, everyone I've mentioned the bike to, has responded with unusual excitement, it's hard to believe. I should have started this project a long time ago. Who knew.
There are alot of helpful hints on this forum, which I appreciate greatly. Fat Bob, I must have missed your post, which I just read. The cotter pins is a good idea. I've actually had problems with this. If I'm gonna do that, which I probably will, I'll use a castellated nut.

Just trying save you some headaches down the road, "been there, done that". In general axles aren't real hard and drill pretty easily on your drill press.CraigLam wrote: ...I've actually had problems with this...
Go break something, then you can weld it back the right way.


- Otto Nobedder
-
Weldmonger

-
Posts:
-
Joined:Thu Jan 06, 2011 11:40 pm
-
Location:Near New Orleans
Fat Bob has raised a good point that I'd like to expand on.
A typical axle has a hardness typically equivalent to a "grade 5" bolt, and can be drilled fairly easily (preferrably in a drill press with lubricant).
The part I would like to expand on is in the use of hardware. I often encounter people who believe if a "grade 5" bolt is good, then a "grade 8" is better. This is not necessarily true. It depends entirely on how the fastener is loaded.
A "grade 8" has a higher tensile strength, but lower shear strenght than a "grade 5", and vice-versa.
A "grade 8" is a better choice for a main bearing saddle, for example, when it's primary load is tension (stressed along it's length), while a "grade 5" is a better choice for a shock-absorber bolt that is loaded in shear (loaded on it's width).
Maybe tomorrow I'll be up to finding some tables to substantiate this, if anyone is interested.
Steve S
delraydella
- delraydella
-
Weldmonger
-
Posts:
-
Joined:Mon Apr 25, 2011 7:35 pm
-
Location:Detroit, MI
The minimum tensile strength of an SAE grade 5 bolt is 120,000 psi. The minimum for an SAE Grade 8 is 150,000 psi.
The Grade 5 bolt uses medium carbon steel, the Grade 8 uses a medium-carbon alloy steel.
The Grade 5 bolt uses medium carbon steel, the Grade 8 uses a medium-carbon alloy steel.
Welding☞Syncrowave 250,Millermatic 252,30a Spoolgun Cutting☞12" Hi-speed Cutoff Saw, 9x 12 Horizontal Bandsaw Milling☞Gorton 8d Vertical Mill Turning☞Monarch EE Precision Lathe Grinding ☞Brown & Sharpe #5 Surface Grinder
nightowlll
- nightowlll
-
New Member

-
Posts:
-
Joined:Thu Mar 21, 2013 5:51 pm
regarding the pipe bending....why not heat up your pipes with a oxyacetylene rig and then bend them while they are hot. use a rosebud or something...? 
Hi guys, I'm back. My van was acting up. I bought a code reader 'cause I have to register my van and get it smogged. The plug was dead. I joined a forum like this one, for ford vans, and some guy said to look under the dash. The fuse that powers the cigarette lighter also powers the pin for the code reader. It worked! Unbelievable.
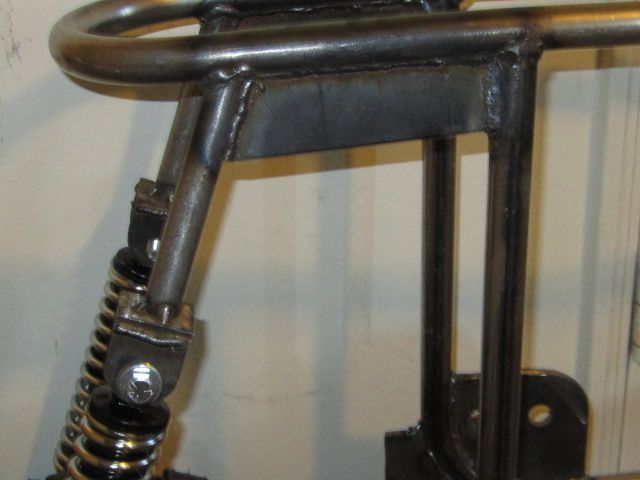
Anyway, the rear shocks are in and now I'm going to finish the bike. When I originally set the distance for the rear shocks, they were way too low. What I mean is, the shocks were too short for this design of the frame. I did not want to change the design. So I made a saddle, like the front ones, and welded a tube to it and was going to weld it, but, came up with another problem. The new upper mount for the shock was perpendicular to the frame. The shock was at an angle. So, I cut the tube off and welded a longer piece on the saddle and will position the bike level and mark where to cut the tube. This is where I stopped. Next week, I will start the final pieces for the frame and post photos. The pictures will show everything.
Delray, as for the grade of hardness of bolts, absolutely correct. Grade 8's are harder, but, more brittle. I'm not sure what grade the axles are, but, I think they're grade 5. I will absolutely drill and set a cotter key and castelated bolt on the axles.
Night, as far as heating, I'm not sure why I would do this. The tubes bend really well without heating them. What on earth is a rosebud?


- weldin mike 27
-
Weldmonger
-
Posts:
-
Joined:Fri Apr 01, 2011 10:59 pm
-
Location:Australia; Victoria
Hey,
A rose bud heating tip for the oxy torch. A tip that gives increased heat output for heating/ forming.
Mick
A rose bud heating tip for the oxy torch. A tip that gives increased heat output for heating/ forming.
Mick
- Otto Nobedder
-
Weldmonger
-
Posts:
-
Joined:Thu Jan 06, 2011 11:40 pm
-
Location:Near New Orleans
Yep. If this were a mandrel bender and the pipe were heavy or a readily work-hardening alloy, heating could make sense.
For a die-press bender, heat would be counter-productive, allowing much stretch (and ovalling) of the pipe.
For a radius at the limit of the pipe's formability, heat could be used after to anneal the metal, but it's very unlikey you'd need this unless you're building frames from 40XX alloys!
Can't wait to see the pics,
Steve S
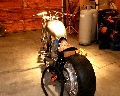
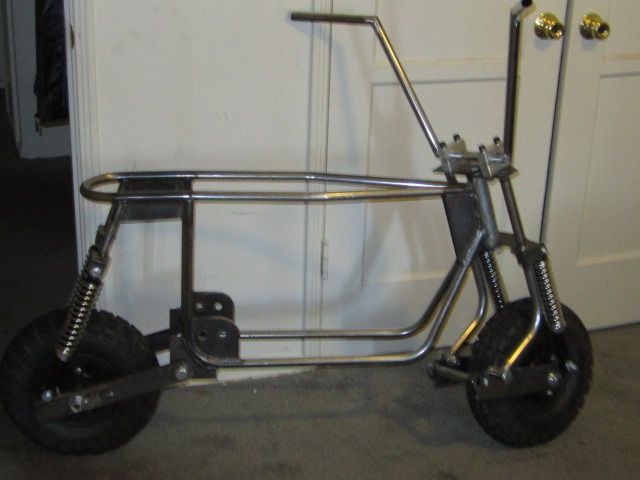
Hi, guys. After all that fussing with my van, I finally got it smogged and registered. Today, I got around to finishing the rear shock assembly. You can notice how far down the struts extend. I you notice on the other picture of the 100b, there is too much angle on the rear fork assembly and it looks like the shocks will bind. The angle here is a little less but the shocks are more in a straight line. The back of the front fork arms are going to get cut down a little, but, didn't have the time today.
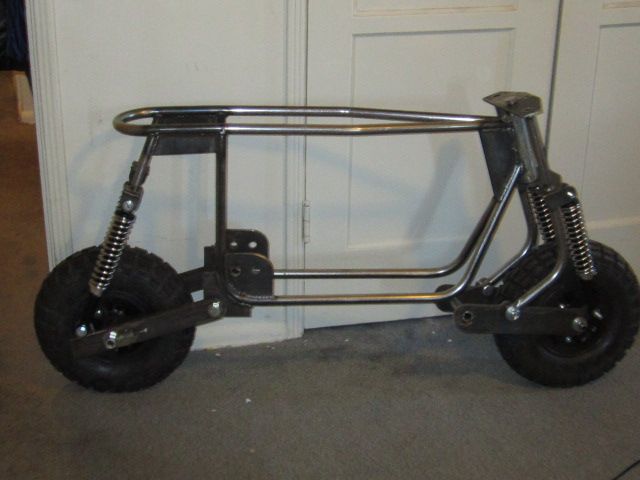
Also, notice how level the bike is. That wasn't easy. Actually, the bike tilts up more in the back to compensate for weight.
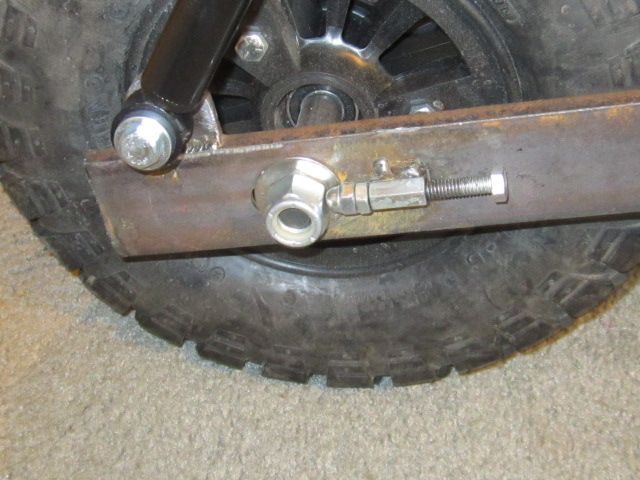
You can see my design for the chain tensioner. I still plan to use a castellated nut and cotter key.
I really had to come up with a way to make the rear shocks fit right with the design of the bike. I originally was going to just make it from 1/4" flat steel and extend it down with a few adjustable holes. It looked really hokey. So, I came up with this idea and strengthened it with a flat support. I got alot of clean up work.
That pretty much finishes up the body of the bike. Next, is the sprocket, chain, brake, and jack shaft. After that, I'm going to start working on the handle bars. At that point the bike is finished, except for the motor and seat. I'm going to paint it black and chrome.
Also, notice how level the bike is. That wasn't easy. Actually, the bike tilts up more in the back to compensate for weight.
You can see my design for the chain tensioner. I still plan to use a castellated nut and cotter key.
I really had to come up with a way to make the rear shocks fit right with the design of the bike. I originally was going to just make it from 1/4" flat steel and extend it down with a few adjustable holes. It looked really hokey. So, I came up with this idea and strengthened it with a flat support. I got alot of clean up work.
That pretty much finishes up the body of the bike. Next, is the sprocket, chain, brake, and jack shaft. After that, I'm going to start working on the handle bars. At that point the bike is finished, except for the motor and seat. I'm going to paint it black and chrome.
I worked on the bike a little and was able to put together the handle bars and the mount clamps. I originally was going to drill and tap the fork plate, but, if they stripped out, one would have to drill out the holes and put in longer bolts. The clamps are made of aluminum and drilled out 7/8" with a 1/8 spacer for clamping space. I was going to use the bender and have a handle bar with round corners. The bender I have will not do tight bends. I looked at the Harley handle bars on E-Bay, "Z" bars I think they call them, and really like the design. I sat on the bike and put my hands up where I wanted the bars to be, and measured up where my hands were. Played around with the angles and Voila! When I flap sanded the welds I was shocked. They really look nice. Some cracks and spaces here and there. Tomorrow, I'm going to over-weld the inside angles to build them up and them sand them smooth. It's gettin' real close.
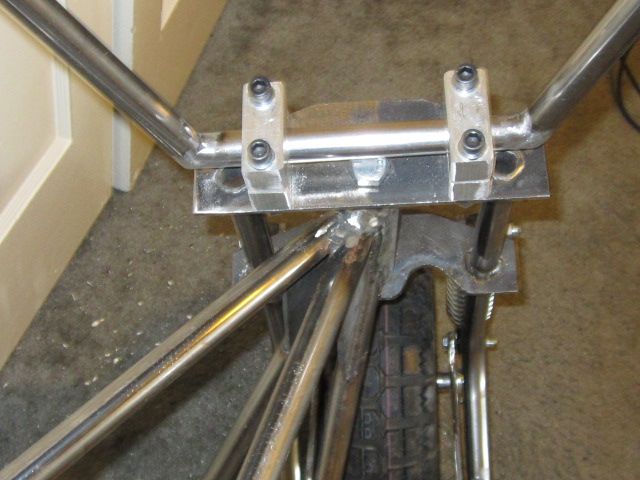
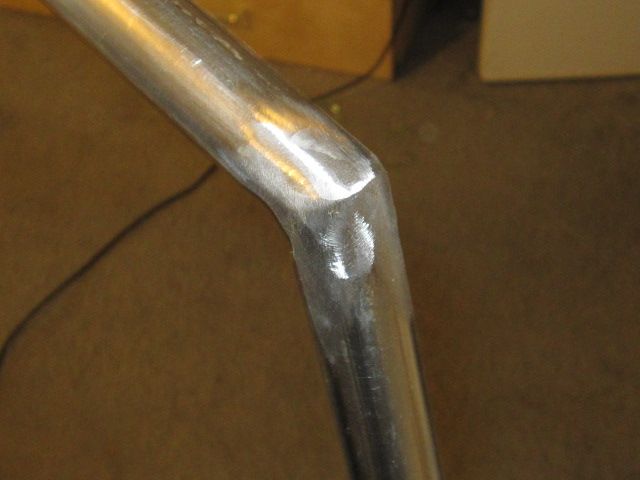
I kinda got a little worried about the welds breaking on the Z bar. Also, it was a little difficult to grind the welds at that angle. I was grinding too much of the tube. So, I laid out the angles pretty much the same as the Z bar. It came out great.

I'll trim the handle grips when I get the throttle and grips. The handle grips came out level.
I'll trim the handle grips when I get the throttle and grips. The handle grips came out level.
delraydella
- delraydella
-
Weldmonger
-
Posts:
-
Joined:Mon Apr 25, 2011 7:35 pm
-
Location:Detroit, MI
That's looking great! I think it looks a lot better with the handle bars bent as opposed to being welded. A lot stronger, too, I would imagine.
Welding☞Syncrowave 250,Millermatic 252,30a Spoolgun Cutting☞12" Hi-speed Cutoff Saw, 9x 12 Horizontal Bandsaw Milling☞Gorton 8d Vertical Mill Turning☞Monarch EE Precision Lathe Grinding ☞Brown & Sharpe #5 Surface Grinder
Here's a question. I called Home of Chrome and to chrome this would cost fifty bucks! If I did a lot of them, it would be less, of course. My neighbor said that if I polish the handle bars and put a clear coat on it, the shine would last awhile. Anybody hear of this? What clear coat would stick to metal?!
I think it would have to be a two part, LPU clear, which would not be cheap and highly dangerous to spray without specific protection. Perhaps Rustoleum makes a clear for it. Most of the dirt bikes I owned growing up had either black or silver painted bars. Rustoleum makes a metallic silver that would probably look just fine.
I have come across such situations in the past and it always occurs to me of the coatings that gets on tools and stays there when you don't want it to, seemingly forever. Try and do it intentionally, even with the same material and it never works.
I have come across such situations in the past and it always occurs to me of the coatings that gets on tools and stays there when you don't want it to, seemingly forever. Try and do it intentionally, even with the same material and it never works.
Miller ABP 330, Syncrowave 250, Dynasty 300 DX.
Honorary member of the Fraternity of Faded Tee Shirts.
Honorary member of the Fraternity of Faded Tee Shirts.
- Otto Nobedder
-
Weldmonger
-
Posts:
-
Joined:Thu Jan 06, 2011 11:40 pm
-
Location:Near New Orleans
How about a gun-bluing finish? It would be attractive, relatively inexpensive, and the metal would then have enough "tooth" for a one-part polyurethane clear-coat? I suppose you'd have to semi-polish it first to eliminate grinding/buffing marks...
Just thinking out loud...
Steve S
Just thinking out loud...
Steve S
Old school we used clear lacquer on bike parts after polishing. The problem with any applied finish is it's going to wear off. If you go black (or what ever color) you might check into powder coating them. It's easy to do as long as you have an oven the parts will fit in. <read, best done when the wife is away for awhile>CraigLam wrote:.. My neighbor said that if I polish the handle bars and put a clear coat on it, the shine would last awhile. Anybody hear of this? What clear coat would stick to metal?!
Some thing else to think about with your bars is knurling them at the contact point with the riser caps. Leaving them smooth is just asking for them to slip, usually at the most inopportune time.
Go break something, then you can weld it back the right way.
Fat Bob, I actually thought about that! I think there is a knurling tool that can be used that clamps on and imbeds knurl marks on the tube. Also, I was thinking about sand paper! Those adhesive strips for non-slip usage that companies use on slippery cement floors would be perfect. Hopefully, the glue that holds it on, would not break down. Another option is to put small pins in the hold downs. However, to adjust it, you would have to completely remove the bars and reset it, so, that idea probably wouldn't fly.
The suggestion for coloring are great. The "bluing" is really a good idea. It would look sharp too!I can check what other colors they have, too. I could sand the metal with 320 grit and the metal would have a "sparkly" finish. If I decide to paint it, that Rustoleum acid etch primer works great. Some options I can offer my potential customers.
True story. Mark, the apartment electrician, comes by the shop yesterday. "I'm here to replace the old sub-panel breakers. It should only take about an hour. He looks over to the right and sees the mini bike. HEY, A MINI BIKE!!! Wow, are you going to sell these. Mark's about 52. I guess these things cool at any age.
Dhazelton, thanks for the post. Sorry I was busy doing a side job for an old friend. Yes, as a matter of fact, I still have to use a flap sander to round off most of the corners before I paint.
I haven't done much on the bike lately. I've been doing small jobs and it's really helping out with the bills. My friends wife had a stroke and he wants a hoist installed over the tub. It involves welding. I have to be at his house tomorrow at 2. It's some type of plate that mounts to the ceiling with a track and an arm that extends out that lowers a sling into the tub. I'll take some photos. The hospital bed with all the stuff that hooks up to it, oxygen, etc., was delivered Saturday.
After this job is over, maybe a week, I'll then order the motor for the mini bike.
The work that I am doing on the bike is marketing! So far, Facebook business, E-bay, and possibly local advertising is about all the resources I have at this time.
BTW, I forgot to tell you guys. I was at the VA on the 9th and my doctor tells me that welding gives off UV rays. He suggests that all exposed areas of skin be covered with good sunscreen. Your exposure the welding light is many more times than exposed to the sun. I thought I'd share that safety tip.
- Otto Nobedder
-
Weldmonger
-
Posts:
-
Joined:Thu Jan 06, 2011 11:40 pm
-
Location:Near New Orleans
I've been recommending SPF 45 or better for years... I'll TIG in short sleeves, with a good slathering of sunblock, and never suffer flashburn. Glad your doc backs this up.
Steve S
Steve S
Return to “Welding Projects - Welding project Ideas - Welding project plans”
Jump to
- Introductions & How to Use the Forum
- ↳ Welcome!
- ↳ Member Introductions
- ↳ How to Use the Forum
- ↳ Moderator Applications
- Welding Discussion
- ↳ Metal Cutting
- ↳ Tig Welding - Tig Welding Aluminum - Tig Welding Techniques - Aluminum Tig Welding
- ↳ Mig and Flux Core - gas metal arc welding & flux cored arc welding
- ↳ Stick Welding/Arc Welding - Shielded Metal Arc Welding
- ↳ Welding Forum General Shop Talk
- ↳ Welding Certification - Stick/Arc Welding, Tig Welding, Mig Welding Certification tests - Welding Tests of all kinds
- ↳ Welding Projects - Welding project Ideas - Welding project plans
- ↳ Product Reviews
- ↳ Fuel Gas Heating
- Welding Tips & Tricks
- ↳ Video Discussion
- ↳ Wish List
- Announcements & Feedback
- ↳ Forum News
- ↳ Suggestions, Feedback and Support
- Welding Marketplace
- ↳ Welding Jobs - Industrial Welding Jobs - Pipe Welding Jobs - Tig Welding Jobs
- ↳ Classifieds - Buy, Sell, Trade Used Welding Equipment
- Welding Resources
- ↳ Tradeshows, Seminars and Events
- ↳ The Welding Library
- ↳ Education Opportunities