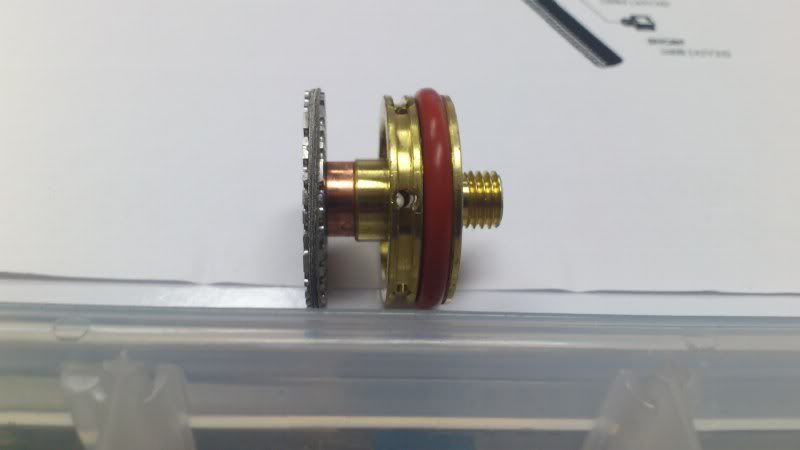
finally ordered my large pyrex gas lense for my wp-20 and wanted a little help with set up
ive read that an extra diffuser makes these work really well
but my question in does it go between the screen and adaptor (in the middle) or in front to the diffuser mesh (to the left)
Not sure where you'd fit one in, surely once it's defused it's defused. I think that the WP20 torches struggle with gas flow to start with due to their size, I would not be adding extra restrictions.
On another note, let us know how it goes. Be real keen to hear your opinion on them, I know Jody didn't particularly rate them but we are all individuals. Also pic's are good
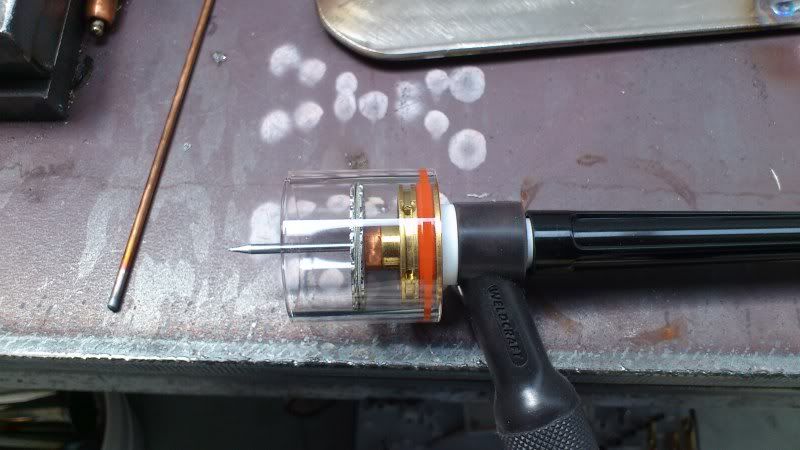
An extra diffuser does work really well for 'reaching'. I have never used that gas lens but Im gonna guess in front to the left. I used to weld a lot with one that was similar. I used a (I cant remember what number cup) 1-1/2 cup. Ten I cut a piece of clean scotch-brite pad the dia. of the cup so that it would fit inside. Then centered it and pushed it over the tungsten and into the cup. With the gas turned up I could get three inches of protrusion with the tungsten. With that I could reach deep into really tight areas to weld.
Welding everything from the crack of dawn to a broken heart.
Holy crap Caps, three inches! That's incredible!
Good thing we know what were talking about ay, my wife can't seem to understand why I'm getting excited about three inches getting deep into tight areas
Oh yeah man, 3". ya gotta use one of those really wide dia cups though.
Long and wide then ya can go really deep....MMMM penetration!
The scotch bright pad is unaffected really. Cause the heat is all down at the end of the tungsten. Though it will start melting around the tungsten when you have a shorter stick out.
I used it a lot on aluminum truss work were a tube saddled another at an extreme angle, if you can imagine.
Also on some complicated SS stuff that I had to reach inside of.
Welding everything from the crack of dawn to a broken heart.
They are to make the gas flow out of the torch in and ultra smooth blanket. Not swirling like normal cups/shrouds. For high quality work or materials that require extra shielding, like titanium.
I'm new to this forum, really any forums, but thought it would be fun to chat about welding.
The Pyrex cup should have came with a larger insulator. In my book if you're welding on DC you should have a Gas Lens. Just works so much better. The Pyrex ones are nice and have their place but just the normal gas lenses work. I use a #8 cup for just about everything.
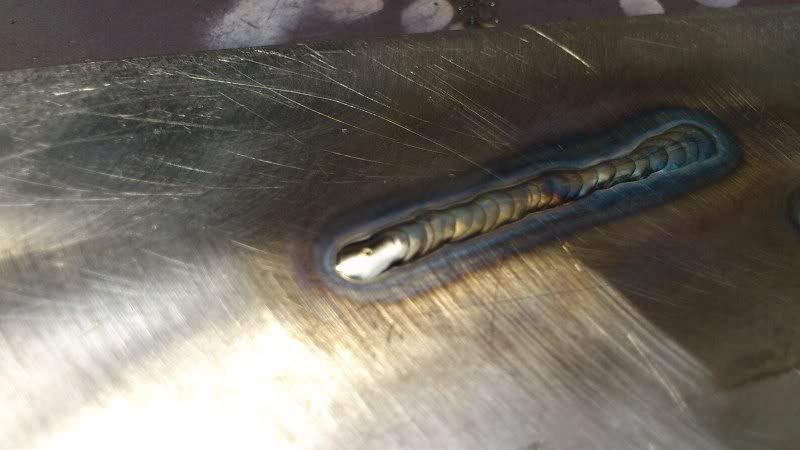
Too bad most of this weld gets machined or hand finished off...
Optimized-IMG_1438.JPG (105.01 KiB) Viewed 1404 times
mr32:
I noticed that your torch is a weldcraft brand. Just wanted to chime in with something I've noticed, is that CK's torches use a proprietary style of teflon cup insulator that is not compatible with non-CK brand torches.
So if there is anything wrong with the teflon insulator in your setup (maybe there isn't?) you might want to look at if any weldcraft telfon insulators are available to do what you're looking for an insulator to do.
i bought the gas lense kit from arc zone specially for the weldcaft torch, everything i have tried has been interchangable.
the problem i had as was said earlier was removing the standard insulator for the large pyrex gas lense, but that was my fault thinking it was like a large body tig torch