Tig welding tips, questions, equipment, applications, instructions, techniques, tig welding machines, troubleshooting tig welding process
Datsun510
  • Posts:
  • Joined:
    Fri Feb 16, 2018 1:10 am

Hey there, I'm finally getting some torch time on my new 2018 AHP 200x.

I was finally able to get to my LWS yesterday to get some gear. I wanted to get 2% Lanthanated but all they had was 2% Thoriated.

I sourced a bottle of 100% Argon off of CL, we'll see how that works out.

I don't have a welding table yet so this was my work area.
IMG_0488.jpg
IMG_0488.jpg (68.53 KiB) Viewed 4245 times
That's a HF welding blanket protecting the wooden table in case I blew hot metal through the plate. I thought it would be good to get some air flow under the work piece rather than flat on the blanket. Haha I charred the wood a few times with the beads closest to the edge. Smelled like welding and fire pit. Admittedly it was a pretty janky set up, but there is a fire extinguisher present off camera.

Despite what that picture looks like, under those welds were a huge clean patch of metal, I was lazy and just didn't clean the patch up in the middle.

I started with DC/ steel and these were the setting I tried.
IMG_0489.jpg
IMG_0489.jpg (45.08 KiB) Viewed 4245 times
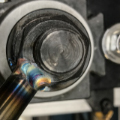
Tungsten grinding was done with a electric drill, and Aluminum Oxide grinding wheel mounted on bench grinder.
IMG_0487.jpg
IMG_0487.jpg (93.84 KiB) Viewed 4245 times
I had seen a few videos of people grinding the tungsten tip against (into) the rotational direction of the wheel, which seems counterintuitive. I did it that way anyway and managed to snap a 1" piece of tungsten off, which flew about 1/4" past my face. Thankfully I was wearing a full face shield, but my all of my subsequent grinds were WITH the rotation of the wheel...
Here's a tip/ grind pattern. I lightly blunted the end, per the advice of a video I saw.
IMG_0513.jpg
IMG_0513.jpg (21.4 KiB) Viewed 4245 times
Metal prep was with a Makita 4 1/2" angel grinder, a flap wheel and this guy
IMG_0486.jpg
IMG_0486.jpg (67.56 KiB) Viewed 4245 times
Plate thickness
IMG_0521.jpg
IMG_0521.jpg (51.3 KiB) Viewed 4245 times
At first I decided to NOT use filler rod, I just wanted to try fusion weld beads to see if I could create a puddle and basic pattern. I was also experimenting with arc length and torch angle

My first attempt at TIG welding started like this:
IMG_0494.jpg
IMG_0494.jpg (80.56 KiB) Viewed 4245 times
then #2
IMG_0495.jpg
IMG_0495.jpg (94.47 KiB) Viewed 4245 times
then #3 - First half of the weld
IMG_0496.jpg
IMG_0496.jpg (92.51 KiB) Viewed 4245 times
then #4 - 2nd half where I stared to put full pedal into it.
IMG_0497.jpg
IMG_0497.jpg (99.12 KiB) Viewed 4245 times
then #5
IMG_0498.jpg
IMG_0498.jpg (106.27 KiB) Viewed 4245 times
So I was getting some penetration and I hadn't dunked my tungsten in the puddle yet, so I decided to try some filler rod...
IMG_0499.jpg
IMG_0499.jpg (95.96 KiB) Viewed 4245 times
Oops. I realized I was using 4043 and forgotten to even buy steel filler rod. SO I went back to fusion welds.

This was my last one
IMG_0500.jpg
IMG_0500.jpg (75.39 KiB) Viewed 4245 times
Here's the back side of the plate. For positioning sake, my first "weld" is in the lower right corner (which you can't see from the back)
IMG_0501.jpg
IMG_0501.jpg (59.62 KiB) Viewed 4245 times
I switched to AC and found a piece of aluminum
Last edited by Datsun510 on Mon Mar 05, 2018 3:08 am, edited 6 times in total.
Datsun510
  • Posts:
  • Joined:
    Fri Feb 16, 2018 1:10 am

Aluminum settings were
IMG_0507.jpg
IMG_0507.jpg (47.71 KiB) Viewed 4240 times
the plate was this thick
IMG_0517.jpg
IMG_0517.jpg (44.34 KiB) Viewed 4240 times
My first aluminum welds 1-3, from top to bottom. The first one was without filler rod, and I totally forget to clean the surface this side
IMG_0508.jpg
IMG_0508.jpg (76.92 KiB) Viewed 4240 times
IMG_0509.jpg
IMG_0509.jpg (66.91 KiB) Viewed 4240 times
IMG_0510.jpg
IMG_0510.jpg (74.8 KiB) Viewed 4240 times
I was using 1/8' 4043 since that's all the LWS had in stock. It was really hard for me to get the rhythm of it.

I managed to ball up the end of my tungsten at one point.
IMG_0511.jpg
IMG_0511.jpg (21.6 KiB) Viewed 4240 times
And my filler rod was collecting clumps on occasion
IMG_0522.jpg
IMG_0522.jpg (26.56 KiB) Viewed 4240 times
I left the plate cool, flipped it over, ran some beads on the back side and then gave it a good brushing,
IMG_0516.jpg
IMG_0516.jpg (47.74 KiB) Viewed 4240 times
I hit them with a buffing wheel just to see what it would look like
IMG_0518.jpg
IMG_0518.jpg (94.02 KiB) Viewed 4240 times
Here's the tungsten's condition after my final bead
IMG_0514.jpg
IMG_0514.jpg (21.37 KiB) Viewed 4240 times
and filler rod
IMG_0523.jpg
IMG_0523.jpg (19.26 KiB) Viewed 4240 times

Well, that's about it. I've got a LONG long way to go. Pointers to any glaring errors in my set up or advice in technique would be appreciated.

My metal prep was just ok, I need to take better care at that. I only stuck my tungsten twice so I was pretty happy some of my arm motion. I think my arc distances were fairly consistent, but I wasn't sure on arc length. The steel plate was also starting to warp so I had to adjust a bit as the plate was rising. I hadn't realizing how long of an arc the TIG will throw. I'm pretty sure I had it 3/8" at one point (not on purpose).

I need a metal welding table, not only for safety, but for some heat exchange as well. or I''ll have to find a giant block of scrap aluminum

And it's official, I definitely need glasses! Seeing the puddle was an issue at times. Time to go get a few cheap pairs at the drugstore.

Thoughts or cheap shots are welcome.
tweake
  • Posts:
  • Joined:
    Mon Dec 18, 2017 4:53 am
  • Location:
    New Zealand

not trying to cheap shot ya,
but tig is the hardest to do, especially aluminum.
your really jumping in the deep end here.

i would switch that welder over to stick welding mode, grab some sticks and go weld beads with that first.
tweak it until it breaks
Datsun510
  • Posts:
  • Joined:
    Fri Feb 16, 2018 1:10 am

tweake wrote:not trying to cheap shot ya,
but tig is the hardest to do, especially aluminum.
your really jumping in the deep end here.

i would switch that welder over to stick welding mode, grab some sticks and go weld beads with that first.
Haha, well I'm competitive, stubborn, and I've got nothing but time to figure it out, so I've got that going for me ;-)

Good suggestion, though I'm not sure I can safely do stick in my garage (both from a ventilation and spark arrest perspective). I'll need to get a pretty beefy extension cord to get set up outside of the garage
tweake
  • Posts:
  • Joined:
    Mon Dec 18, 2017 4:53 am
  • Location:
    New Zealand

doing it without someone to show you is difficult, as i'm finding out the hard way.
one of the first bits of advice i found was starting with stick. i can see why. you still need to watch the same important things like arc length, but stick is easier than tig. plus its so useful even if its messy.

ventilation, you don't need much with tig and to much causes issues with the gas eg to much wind.
with arc, fan is good, mask if you have to.

your bench, well two weeks ago i was stick welding sitting on a bucket welding on a pile of fire bricks. use two hands to steady. however trying to learn tig on it was darn near impossible.
you need a really good comfortable welding position. i got a budget fold up welding table. my garage is not that big fold up is handy. plus a good seat.
tweak it until it breaks
User avatar
  • Posts:
  • Joined:
    Sun Nov 19, 2017 10:09 am

I love your persistence! Keep going; the only way to learn. Your beads aren't bad for the first time. They show a lot of promise. Watch Jody's videos, order (from Jody) some 2% laninated tungsten, keep you tungsten close to the puddle, back off, on the pedal towards the end of the bead, and practice practice practice.
Lincoln MP 210, Lincoln Square Wave 200,
Everlast 210 EXT
Thermal Dynamics 25 Plasma cutter

" Anything that carries your livelihood wants to be welded so that Thor can’t break it."
CJ737
cj737
  • Posts:
  • Joined:
    Thu Sep 29, 2016 8:59 am

Move the fan farther away. The negative air flow will pull your shielding gas away.

Your tungsten tip for DC does not want to be blunted; that’s a tip for AC. That grinding wheel is too coarse also. You should not have those grind marks visible. Get a diamond wheel or at least a silicon carbide wheel and ditch the alum/oxide until you need to sharpen a mower blade.

The aluminum welds won’t weld with using material and 135 amps. You need about 250-300 amps to weld aluminum that thick. Your initial ally welds show insufficient heat to break the oxide layer and that’s why your filler is clumped up too. Get some 1/8” sheet and some 3/32” filler for practicing,

If you can, get a 1/4-3/8” sheet of ally to lay down to weld against. It will be slightly pricey, but it will make a terrific surface for your shop. You can often find a MetalSupermarket branch near you, and they will cut you exactly the size you need in any material.
Datsun510
  • Posts:
  • Joined:
    Fri Feb 16, 2018 1:10 am

tweake wrote:doing it without someone to show you is difficult, as i'm finding out the hard way.
one of the first bits of advice i found was starting with stick. i can see why. you still need to watch the same important things like arc length, but stick is easier than tig. plus its so useful even if its messy.

ventilation, you don't need much with tig and to much causes issues with the gas eg to much wind.
with arc, fan is good, mask if you have to.

your bench, well two weeks ago i was stick welding sitting on a bucket welding on a pile of fire bricks. use two hands to steady. however trying to learn tig on it was darn near impossible.
you need a really good comfortable welding position. i got a budget fold up welding table. my garage is not that big fold up is handy. plus a good seat.
Yeah my setup is some thing to be desired at this point, but I'll sort some of that out this weekend.

I'll also try to give stick welding a try. Need to go find a pile of cheap steel scrap!
Last edited by Datsun510 on Mon Apr 02, 2018 5:53 pm, edited 1 time in total.
Datsun510
  • Posts:
  • Joined:
    Fri Feb 16, 2018 1:10 am

tungstendipper wrote:I love your persistence! Keep going; the only way to learn. Your beads aren't bad for the first time. They show a lot of promise. Watch Jody's videos, order (from Jody) some 2% laninated tungsten, keep you tungsten close to the puddle, back off, on the pedal towards the end of the bead, and practice practice practice.
Thanks TD, It's funny how even in your mid 40's a little encouragement goes a long way, so thanks for the "showing promise" comment. I plan on experimenting with pedal control this weekend, and making some Weldmonger purchases soon.
Last edited by Datsun510 on Mon Apr 02, 2018 5:53 pm, edited 1 time in total.
Datsun510
  • Posts:
  • Joined:
    Fri Feb 16, 2018 1:10 am

cj737 wrote:Move the fan farther away. The negative air flow will pull your shielding gas away.

Your tungsten tip for DC does not want to be blunted; that’s a tip for AC. That grinding wheel is too coarse also. You should not have those grind marks visible. Get a diamond wheel or at least a silicon carbide wheel and ditch the alum/oxide until you need to sharpen a mower blade.

The aluminum welds won’t weld with using material and 135 amps. You need about 250-300 amps to weld aluminum that thick. Your initial ally welds show insufficient heat to break the oxide layer and that’s why your filler is clumped up too. Get some 1/8” sheet and some 3/32” filler for practicing,

If you can, get a 1/4-3/8” sheet of ally to lay down to weld against. It will be slightly pricey, but it will make a terrific surface for your shop. You can often find a MetalSupermarket branch near you, and they will cut you exactly the size you need in any material.
Ok, I'll double check the fan distance and draw. It was set on low and I felt that it wasn't pulling any harder than a fume extractor I've seen in a few videos, but the input is noted and I'll be mindful of that.

Got it, I'll source a different grinding wheel.

That was the only alum scrap I had handy and the goal there was to just get a feel for handling the filler and torch at the same time. I'm headed to the metal supply this weekend to get more reasonable materials as you suggest. My LWS only had 1/8" filler so I was stuck with that, while being way way too impatient to try aluminum welding :oops:

There's another place out here called M&K Metals an old fabricator told me about that's nice and close.
I might need to start driving down alleys looking for old scrap metal...
Datsun510
  • Posts:
  • Joined:
    Fri Feb 16, 2018 1:10 am

Finally found some time last weekend to put down few beads and try out some new gear.

This hobby has shown me that I'm in need of some reading glasses. So I found this .75 magnifier and installed it in my helmet.
IMG_0539.jpg
IMG_0539.jpg (98.34 KiB) Viewed 3829 times
IMG_0540.jpg
IMG_0540.jpg (80.09 KiB) Viewed 3829 times
And while having pretty decent ventilation in my garage I wanted to cover my bases with toxic fume exposure.
IMG_0541.jpg
IMG_0541.jpg (84.16 KiB) Viewed 3829 times
To support the site, I ended up buying a gas lens and 3/32" 2% lanthanated tungsten
IMG_0542.jpg
IMG_0542.jpg (133.44 KiB) Viewed 3829 times
After reading a few forum post suggestions, I made a quick trip to HF and bought a cheap saw blade sharpener that has a diamond wheel (replacement wheels are only $10). I removed the guards and was able to get a nice point on my tungsten. I may have to play with the grind angle a bit to get the grind marks to run in parallel with the tungsten itself, though i'm not sure how critical that is?
IMG_0598.jpg
IMG_0598.jpg (104.53 KiB) Viewed 3829 times
IMG_0601.jpg
IMG_0601.jpg (22.68 KiB) Viewed 3829 times
I went down to M&K metals in LA and bought a bunch of remnants in alum, carbon steel and stainless. I got a big chuck for a welding surface.
IMG_0577.jpg
IMG_0577.jpg (52.33 KiB) Viewed 3829 times
This was my final work surface setup. It's crude but worked for the moment.
IMG_0583.jpg
IMG_0583.jpg (55.09 KiB) Viewed 3829 times
Here are my attempts. I quenched the metal every two to three welds. Since this was a few weeks ago, I can't remember what settings I was using, I'll write them down next time.
IMG_0582.jpg
IMG_0582.jpg (70.88 KiB) Viewed 3829 times
IMG_0581.jpg
IMG_0581.jpg (64.37 KiB) Viewed 3829 times
IMG_0585.jpg
IMG_0585.jpg (66.34 KiB) Viewed 3829 times
#5 seemed to be the best of the bunch. #7 started out well and then got funky after I stopped and started again. Maybe too much heat? At times I felt like I was getting in to a groove and then the wires in my brain would cross and I'd lose the rhythm.
IMG_0588.jpg
IMG_0588.jpg (46.62 KiB) Viewed 3829 times
I noted a repeating V-shape in the top of a few welds. Not sure what I was doing wrong to cause that.
IMG_0602.jpg
IMG_0602.jpg (65.48 KiB) Viewed 3829 times
A few of the welds burned through and discolored the aluminum work surface. I'm guess too much penetration or is this pretty much normal?
IMG_0586.jpg
IMG_0586.jpg (78.66 KiB) Viewed 3829 times
I had a few hits of filler against the tungsten along the way
IMG_0584.jpg
IMG_0584.jpg (65.97 KiB) Viewed 3829 times
I'm realizing I'm rushing finishing up the weld at the end. Trying to learn how to taper off and not just pull the torch out of there.

Either way I'm having some fun figuring all this out.
Last edited by Datsun510 on Mon Apr 02, 2018 2:20 am, edited 2 times in total.
Poland308
  • Posts:
  • Joined:
    Thu Sep 10, 2015 8:45 pm
  • Location:
    Iowa

I think the v shape is due too shrinkage from the weld having deeper penetration at that point.
I have more questions than answers

Josh
ljdm1956
  • Posts:
  • Joined:
    Wed Mar 19, 2014 6:29 pm
  • Location:
    East Durham, NY

Datsun510 wrote:
tweake wrote:not trying to cheap shot ya,
but tig is the hardest to do, especially aluminum.
your really jumping in the deep end here.

i would switch that welder over to stick welding mode, grab some sticks and go weld beads with that first.
Haha, well I'm competitive, stubborn, and I've got nothing but time to figure it out, so I've got that going for me ;-)

Good suggestion, though I'm not sure I can safely do stick in my garage (both from a ventilation and spark arrest perspective). I'll need to get a pretty beefy extension cord to get set up outside of the garage
I agree with you, I couldn't Tig to save my ass, but when I got an AC/DC Tig, I had to learn to Tig Al just to justify spending the extra money. Once you get the cleaning action going, and get used to moving faster. AL is the same as steel, dab, move dab, move, etc. OK, not exactly the same as steel, but same type procedure. Feet first into the fire, if you can do AL, steel will be a breeze. Of course if you have enough scrap metal available, enough Argon to waste some, filler rod to burn through, then if you choose to use it up learning.....go for it!
Lincoln Weld-Pak 180
Lincoln spool gun
Everlast PowerUltra 205p
AHP AlphaTig 200X
Assorted stuff
Datsun510
  • Posts:
  • Joined:
    Fri Feb 16, 2018 1:10 am

Poland308 wrote:I think the v shape is due too shrinkage from the weld having deeper penetration at that point.
That's interesting, I'll take another look at the back of the plate to see if there's a visible correlation
Datsun510
  • Posts:
  • Joined:
    Fri Feb 16, 2018 1:10 am

ljdm1956 wrote:
Datsun510 wrote:
tweake wrote:not trying to cheap shot ya,
but tig is the hardest to do, especially aluminum.
your really jumping in the deep end here.

i would switch that welder over to stick welding mode, grab some sticks and go weld beads with that first.
Haha, well I'm competitive, stubborn, and I've got nothing but time to figure it out, so I've got that going for me ;-)

Good suggestion, though I'm not sure I can safely do stick in my garage (both from a ventilation and spark arrest perspective). I'll need to get a pretty beefy extension cord to get set up outside of the garage
I agree with you, I couldn't Tig to save my ass, but when I got an AC/DC Tig, I had to learn to Tig Al just to justify spending the extra money. Once you get the cleaning action going, and get used to moving faster. AL is the same as steel, dab, move dab, move, etc. OK, not exactly the same as steel, but same type procedure. Feet first into the fire, if you can do AL, steel will be a breeze. Of course if you have enough scrap metal available, enough Argon to waste some, filler rod to burn through, then if you choose to use it up learning.....go for it!
haha yeah for whatever reason I certainly like learning the hard way.
cj737
  • Posts:
  • Joined:
    Thu Sep 29, 2016 8:59 am

You do not want grind marks on your tungsten. And if you have them, they want to be inline with the tungsten, not at an angle. It may not make a lot of difference as you learn the basics, but it will haunt you when it matters.

A helpful thing to do as you learn to add filler, scribe 2 parallel lines on your practice metal about 1/8" wide. Establish your puddle until it reaches the lines, fill and melt that it until it reaches the lines, advance, and repeat. Use the lines to help train you for how filler to add, how long to wait until the "toes" of the weld wet in, and then move along.

Most of your beads show as slightly cool, some are too much filler. Some are combos of both. 3/32 filler will flatten out nicely within an 1/8" for stringer beads so focus on that dimension. Overall, things look really good for a self taught beginner! Those heat scars on the aluminum are from mill scale on the back getting hot enough to char the ally. A bit of scotchbrite and acetone and it will wipe right off.
Datsun510
  • Posts:
  • Joined:
    Fri Feb 16, 2018 1:10 am

cj737 wrote:You do not want grind marks on your tungsten. And if you have them, they want to be inline with the tungsten, not at an angle. It may not make a lot of difference as you learn the basics, but it will haunt you when it matters.

A helpful thing to do as you learn to add filler, scribe 2 parallel lines on your practice metal about 1/8" wide. Establish your puddle until it reaches the lines, fill and melt that it until it reaches the lines, advance, and repeat. Use the lines to help train you for how filler to add, how long to wait until the "toes" of the weld wet in, and then move along.

Most of your beads show as slightly cool, some are too much filler. Some are combos of both. 3/32 filler will flatten out nicely within an 1/8" for stringer beads so focus on that dimension. Overall, things look really good for a self taught beginner! Those heat scars on the aluminum are from mill scale on the back getting hot enough to char the ally. A bit of scotchbrite and acetone and it will wipe right off.
I've always wondered about controlling grind marks. I've been putting the tungsten in a drill and then running it while putting it against the diamond wheel. Would I be correct in thinking that I want minimal RPMs of the drill in relation to the grinding wheel RPM? I've been giving it full trigger and possibly rotating faster than the diamond wheel itself. I think that's why I'm getting spiral grind marks? I'll try rotating by hand and see if that changes the direction of the grind. I could also glue a sheet of 2000 grit to the side of the wheel and do a clean up pass on the tip

The 1/8" puddle exercise sounds good, I'll give that a shot!

I definitely felt the welding was a smoother process but i'm not sure if was because I was finally using proper prep (brush and acetone), a better finish on the tungsten (diamond wheel vs axe sharper), or the use pf a gas lens. Lot's of changed variables, but I felt like my starts were cleaner with less arc scatter,

I suppose it depends on the gauge of metal you're welding... but how much penetration should I be seeing on the backside?
This is a pic from my first attempts a few posts back. In the photo, should I be trying to avoid the oval and aim for the rectangle?
IMG_0501.jpg
IMG_0501.jpg (61.13 KiB) Viewed 3764 times
cj737
  • Posts:
  • Joined:
    Thu Sep 29, 2016 8:59 am

Chocking the tungsten in a drill works well, spin it slowly, and directly inline with the tungsten and you’ll get a super smooth and clean tip. I also use a red scotchbrite afterwards and polish the length and tip when I work with stainless and ally.

As for penetration, it all depends. Thinner material will show quickly, especially while practicing. Thicker stuff, well, good luck with that ;) The sample you circled shows very consistent heat input, so I’d strive for that over “more or less” penetration.
User avatar

cj737 wrote: The sample you circled shows very consistent heat input, so I’d strive for that over “more or less” penetration.
CJ, did you mean to say the sample in the rectangle? That one looks more consistent to me
Richard
Website
cj737
  • Posts:
  • Joined:
    Thu Sep 29, 2016 8:59 am

LtBadd wrote:
cj737 wrote: The sample you circled shows very consistent heat input, so I’d strive for that over “more or less” penetration.
CJ, did you mean to say the sample in the rectangle? That one looks more consistent to me
Yes, the "boxed" red one.
Datsun510
  • Posts:
  • Joined:
    Fri Feb 16, 2018 1:10 am

cj737 wrote:Chocking the tungsten in a drill works well, spin it slowly, and directly inline with the tungsten and you’ll get a super smooth and clean tip. I also use a red scotchbrite afterwards and polish the length and tip when I work with stainless and ally.

As for penetration, it all depends. Thinner material will show quickly, especially while practicing. Thicker stuff, well, good luck with that ;) The sample you circled shows very consistent heat input, so I’d strive for that over “more or less” penetration.
Ah ok, I'll try the red scotchbrite as a finish pass.

Yep, heat consistency makes total sense at this point (boxed example).

Thanks for the feedback!
Datsun510
  • Posts:
  • Joined:
    Fri Feb 16, 2018 1:10 am

Wondering what sort of issue I have going on here.

During arc start, I'm intermittently getting a ton of arc scatter, like a an electrical storm with lightening strikes. It chews up the starting area with porosity.

Once the arc has stabilized I get a sound buzzing sound that cuts in and out (louder than the normal bacon sizzle sound).

Here's the best I could do for a video of it:
https://youtu.be/Sbrw5rukIUk

Welding on thin alum (.003), throughly prepped with dedicated stainless brush and acetone.
Machine is APH 200x
#17 torch with #5 cup. No gas lens.
3/32 2% Thoriated tungsten
15 cfh
Using pedal, 2T, No pulse
Set on AC at 33A
Approx 90-100 AC Freq
45% AC Balance
5s Post Flow
Grinding tungsten with diamond wheel, and slightly blunting tip

Despite me bobbing the tungsten up a down a bit as I travel (I'm working on it..), I feel like I'm holding a decent distance from tungsten-to-surface. The buzzing noise doesn't seem to 100% correlate with arc length.

I'm not using filler at the moment, and the weld lines are bright and shiny, so I think I'm getting good cleaning action.

Sometimes I'm also getting a bright yellow arc that pulses on it's own (no pulse set on box). I had assumed the tungsten had somehow gotten contaminated (I didn't dip into pool) so I'd regrind the tungsten but it would happen again.

That said, I did dip at the end of the video. :oops: I need a better video recording set up and hand holding everything while I try to weld.

Any ideas on what the problems could be?
cj737
  • Posts:
  • Joined:
    Thu Sep 29, 2016 8:59 am

Material that thin will be extremely difficult to weld on aC. Your arc needs a good deal of amps to start, maybe your box isn’t a more “quality” unit so you’ll need to use a truck: set a ore flow of gas for about 2 seconds, then start the arc. The argon helps evacuate atmosphere and stabilize the arc at lower amps. You also need to check the ground clamp. If your material is laid on a steel table but that thin, your welding arc maybe “ground hunting”. Any way to clamp closer to the material you’re welding in lay that on some other ally and clamp there?

Too long an arc will cause an intermittent arc too ;)
Datsun510
  • Posts:
  • Joined:
    Fri Feb 16, 2018 1:10 am

cj737 wrote:Material that thin will be extremely difficult to weld on aC. Your arc needs a good deal of amps to start, maybe your box isn’t a more “quality” unit so you’ll need to use a truck: set a ore flow of gas for about 2 seconds, then start the arc. The argon helps evacuate atmosphere and stabilize the arc at lower amps. You also need to check the ground clamp. If your material is laid on a steel table but that thin, your welding arc maybe “ground hunting”. Any way to clamp closer to the material you’re welding in lay that on some other ally and clamp there?

Too long an arc will cause an intermittent arc too ;)
Haha, yeah I'm still trying to walk and chew gum when I comes to arc length and torch travel.

The welding surface is a big 3/4" plate of aluminum, and I'm using the grounding clamp to hold the work piece to the plate.

Unfortunately I don't have pre-flow control on the box.

I had thought about starting amp being a part of the issue. Do Start Amps and End Amps work on the 2T setting, or is that just 4T?

Would moving to a smaller diameter tungsten help any of this?
IMG_2991.jpg
IMG_2991.jpg (124.75 KiB) Viewed 3671 times
Datsun510
  • Posts:
  • Joined:
    Fri Feb 16, 2018 1:10 am

Was just researching cup sizes, in relation to tungsten dia, and flow rates. Could it be that the #5 cup is too small for the 3/32 tungsten? Charts show #6-8
image_34237.jpg
image_34237.jpg (41.9 KiB) Viewed 3668 times
Post Reply