Tig welding tips, questions, equipment, applications, instructions, techniques, tig welding machines, troubleshooting tig welding process
User avatar
  • Posts:
  • Joined:
    Thu Jan 24, 2013 6:44 am

First welds of 2014. Happy new year!

Image
Derek G by Zanconato Custom Cycles, on Flickr

Image
Derek G by Zanconato Custom Cycles, on Flickr

Image
Derek G by Zanconato Custom Cycles, on Flickr

Image
Derek G by Zanconato Custom Cycles, on Flickr
awill4wd
  • Posts:
  • Joined:
    Thu Jan 31, 2013 3:57 am
  • Location:
    Berwick, Melbourne, Australia

Zank, am I correct in assuming the tubing is 4130 Cr/Mo?
If so, What do you use to linish the tubing with as all the 4130 we use has a slight coating over it?
Regards Andrew from Oz.
We are Tig welders, gravity doesn't worry us.
Miller Dynasty 350
OTC hybrid wave 300 amp inverter Tig at work (Now retired)
Kemppi MLS 2300 inverter, 230 amps of welding brilliance for home use
User avatar
  • Posts:
  • Joined:
    Thu Jan 24, 2013 6:44 am

Hi Andrew,
Some of the tubing I use is 4130, but most of the high end bicycle tubing has less carbon and some other elements added compared to 4130. These other constituents tighten up the grain structure and give the steel more strength. The tubes are also drawn with thicker walls on the ends of the tube and thinner walls in the middle to cut down on weight. One of the final steps most of the mills that make bicycle tubing do is polish the outside. There is still mill scale on the inside, and that has to be removed about an inch or so in prior to welding. You want to make sure you have shiny metal inside and out. Some of the tubing I use is straight gauge 4130, and the mill scale on the exterior that's in proximity to the weld needs to be removed.
Mike
User avatar
  • Posts:
  • Joined:
    Thu Jan 24, 2013 6:44 am

User avatar
  • Posts:
  • Joined:
    Wed Oct 23, 2013 3:30 pm
  • Location:
    Palmer AK

Sorry if you've answered this before, Do you "purge"????
If so, why?
Just a couple welders and a couple of big hammers and torches.

Men in dirty jeans built this country, while men in clean suits have destroyed it.
Trump/Carson 2016-2024
User avatar
  • Posts:
  • Joined:
    Thu Jan 24, 2013 6:44 am

Yes, I backpurge the tubes. At 0.024" wall on some of the tubes, I think it's a good best practice.
User avatar
  • Posts:
  • Joined:
    Wed Oct 23, 2013 3:30 pm
  • Location:
    Palmer AK

does purge help with that "sugar steel/oxidation" etc, you know what I mean :)
Just a couple welders and a couple of big hammers and torches.

Men in dirty jeans built this country, while men in clean suits have destroyed it.
Trump/Carson 2016-2024
User avatar
  • Posts:
  • Joined:
    Thu Jan 24, 2013 6:44 am

Oh yeah. A ton. You look inside a frame and it's bright, shiny, smooth, and no color.
User avatar
  • Posts:
  • Joined:
    Wed Oct 23, 2013 3:30 pm
  • Location:
    Palmer AK

Okay, good to know....
Thanks,
John
Just a couple welders and a couple of big hammers and torches.

Men in dirty jeans built this country, while men in clean suits have destroyed it.
Trump/Carson 2016-2024
User avatar
  • Posts:
  • Joined:
    Thu Jan 24, 2013 6:44 am

A little titanium today.

Image
Titanium by Zanconato Custom Cycles, on Flickr
TTaylor
  • Posts:
  • Joined:
    Thu Dec 19, 2013 10:53 pm

Just going back and forth on some ~1/8" plate... :mrgreen:

Image
Dugg
  • Posts:
  • Joined:
    Tue Jan 14, 2014 5:50 pm
  • Location:
    Bailey, Colorado

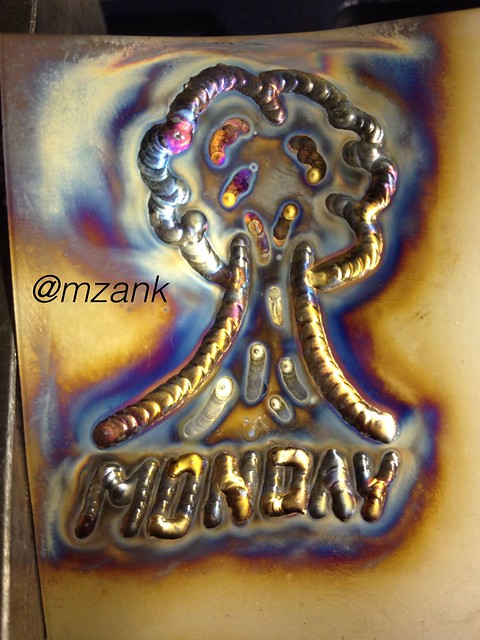
A pix of the frame of my garage potato....Ooops, I mean my rod project.
The tubes welded through the frame rail are stainless and I'll polish the insides of the tubes after the frame is painted.
I make my stuff a tad more complicated so no one thinks I bought it at J.C Whitney.
Attachments
006.JPG
006.JPG (59.2 KiB) Viewed 3271 times
Fly the Big Ones
JDIGGS82
  • Posts:
  • Joined:
    Sun Jul 21, 2013 10:46 pm

IMG_20140121_161539.jpg
IMG_20140121_161539.jpg (46.24 KiB) Viewed 3226 times
some cross members i did https://www.youtube.com/watch?v=0VzM3W228j4
User avatar
  • Posts:
  • Joined:
    Thu Jan 24, 2013 6:44 am

More of the usual.

Image
Derek G by Zanconato Custom Cycles, on Flickr
countryboy1127
  • Posts:
  • Joined:
    Wed May 01, 2013 7:28 pm

Seal welded some winch mounts
Attachments
20140224_142845.jpg
20140224_142845.jpg (53.87 KiB) Viewed 3111 times
20140224_135710.jpg
20140224_135710.jpg (43.14 KiB) Viewed 3111 times
20140224_142907.jpg
20140224_142907.jpg (42.82 KiB) Viewed 3111 times
countryboy1127
  • Posts:
  • Joined:
    Wed May 01, 2013 7:28 pm

Got to weld a little stainless today
Attachments
20140305_152248.jpg
20140305_152248.jpg (47.86 KiB) Viewed 2755 times
20140305_152302.jpg
20140305_152302.jpg (48.71 KiB) Viewed 2755 times
RichardH
  • Posts:
  • Joined:
    Sun Jan 12, 2014 10:45 pm
  • Location:
    Chandler, Arizona, USA

3/16" x 1-1/2" mild steel, TIG, 145A peak, 1/8" 2% Lanth, 3/32" ER70S-2. Some welds came out better than I deserve. The ones visible here are more typical for me - more practice is needed, which was half the reason for the project. Getting the inside corner of the angles clean was a real chore, and it shows in the welds.

Reason for the odd mounting pegs is so the saw can be easily moved between this stand in the shop and an aluminum sawhorse that Dewalt sells as a portable stand. That stand is 5" wide with a 1/2" bullnose, so 1/2" rod worked great here.
Saw Stand.jpg
Saw Stand.jpg (69.32 KiB) Viewed 2708 times
Saw mounts detail.jpg
Saw mounts detail.jpg (44.64 KiB) Viewed 2708 times
Saw Mount.jpg
Saw Mount.jpg (57.54 KiB) Viewed 2708 times
I had the benefit of using a StrongHand table for this project, and man is it nice!

I posted more detail on this project here: http://www.instructables.com/id/Steel-S ... Miter-Saw/

Cheers,
Richard
Grinding discs... still my #1 consumable!
User avatar
  • Posts:
  • Joined:
    Fri Apr 01, 2011 10:59 pm
  • Location:
    Australia; Victoria

Hey,

Dont be too hard on your self for yhe welds inside the angle iron. Its quite difficult. One of those things that learning to weld with both hands will help. When in a tight spot, I put the tig torch in and weld out.

Mick
RichardH
  • Posts:
  • Joined:
    Sun Jan 12, 2014 10:45 pm
  • Location:
    Chandler, Arizona, USA

Thanks, Mike.

Yeah, I'm taking it in stride. I'm actually really pleased with the results, considering my experience level - I just have a lot of practical skill to gain. The welds here are very functional, not too ugly, and I'm downright tickled that the project came out square and flat.

Cheers,
Richard
Grinding discs... still my #1 consumable!
User avatar
  • Posts:
  • Joined:
    Fri Apr 01, 2011 10:59 pm
  • Location:
    Australia; Victoria

Hey,

No worries mate,

Thats the main point isnt it. Keep up the practice, and showing off the cool jobs.

Mick
  • Posts:
  • Joined:
    Sun Feb 02, 2014 6:14 pm
  • Location:
    Near Mt Airy

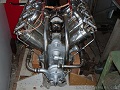
Finally done !!!! Everyone should make one engine mount that welds. Man did I learn a ton. Not the prettiest welds I can do. A lot different than just running beads on a tube for sure. A retired welding instructor told me that he would fly behind it no worries. A relief for me to have it inspected thoroughly firsthand. Now I can finish my engine , blast and get some epoxy / paint on this thing this weekend. What do you think ? I think it will do OK for me. I know I should have better bead placement, but it is harder than you think tying .035" up to a .090" washer and not blow the tube! A great learning experience for me. Thanks to all here who helped me a ton !
Attachments
Washer MIG welded into tube for rubber thrust isolator
PANA0045.JPG (55.65 KiB) Viewed 4014 times
Da whole ting.....
Da whole ting.....
PANA0044.JPG (61.71 KiB) Viewed 4014 times
Tube junction at firewall mount lug
PANA0043.JPG (65.22 KiB) Viewed 4014 times
Building an airplane is at times somewhat like a divorce.....with the exception that she doesn't leave
J.J. Flash
User avatar
  • Posts:
  • Joined:
    Thu Jan 24, 2013 6:44 am

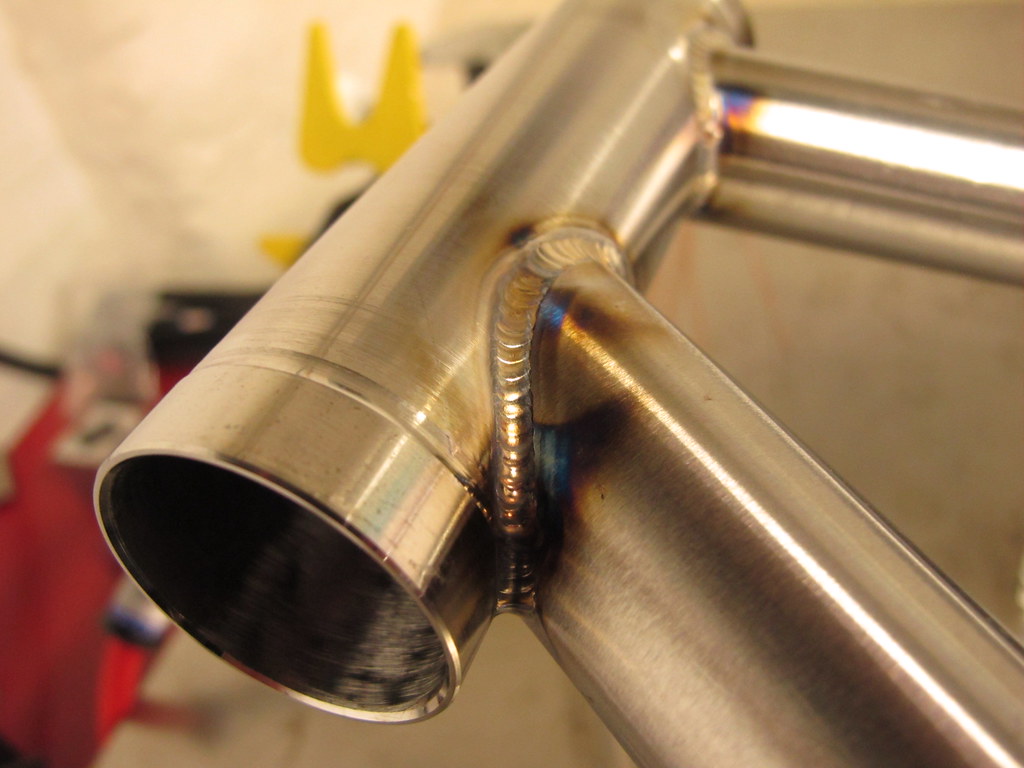
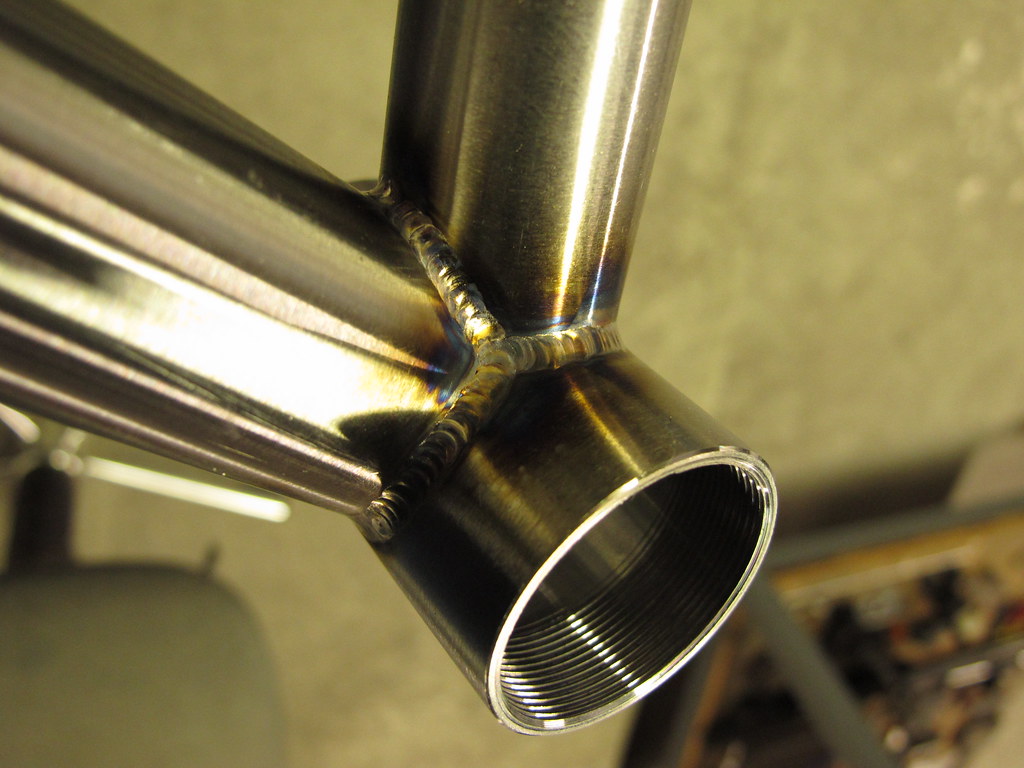
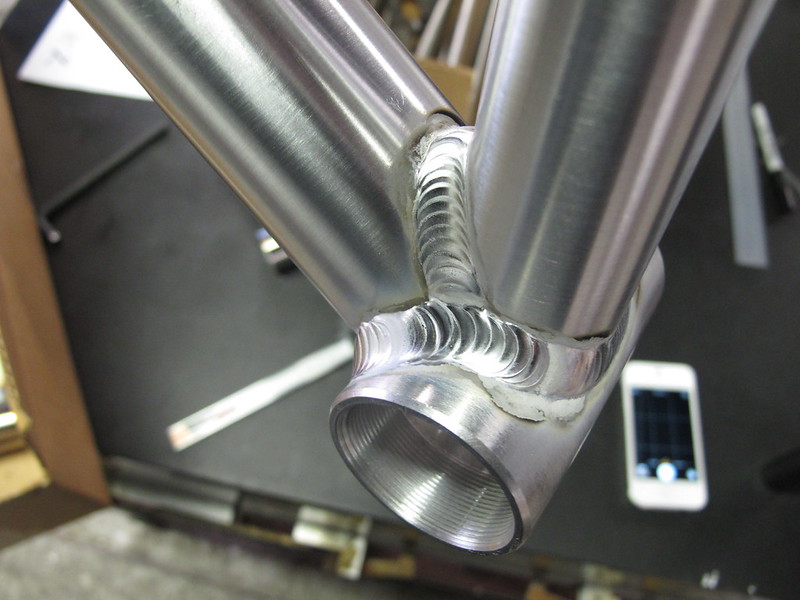
Had the opportunity to try a Dynasty 200DX today. It was my first time with an inverter. I was blown away. The control was amazing. The starts had that nice snap. My machine never starts that easy or quickly. I didn't have a lot of time or material, so I only got to try a couple of setting on the aluminum. Settled in at a balance of 65% EN and a frequency of 100 Hz. This is 7005 tubing and 5183 filler. The tubing is about 0.060" wall and the threaded shell is about 0.120" thick.

Image
Trying out a Dynasty by Zanconato Custom Cycles, on Flickr

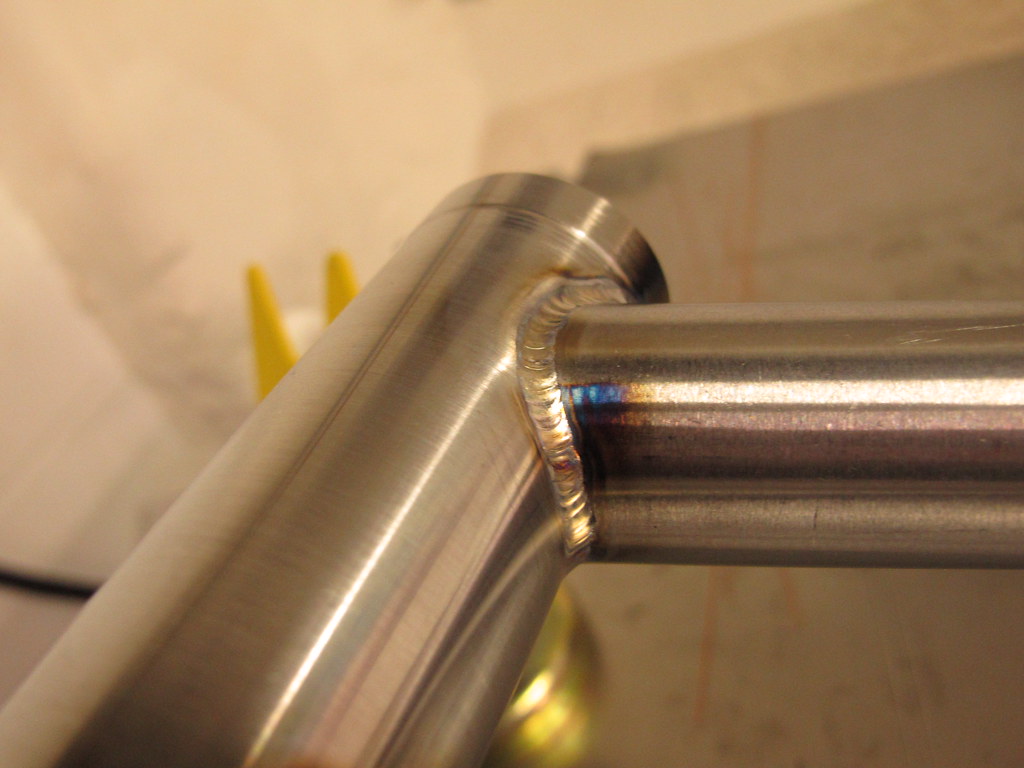
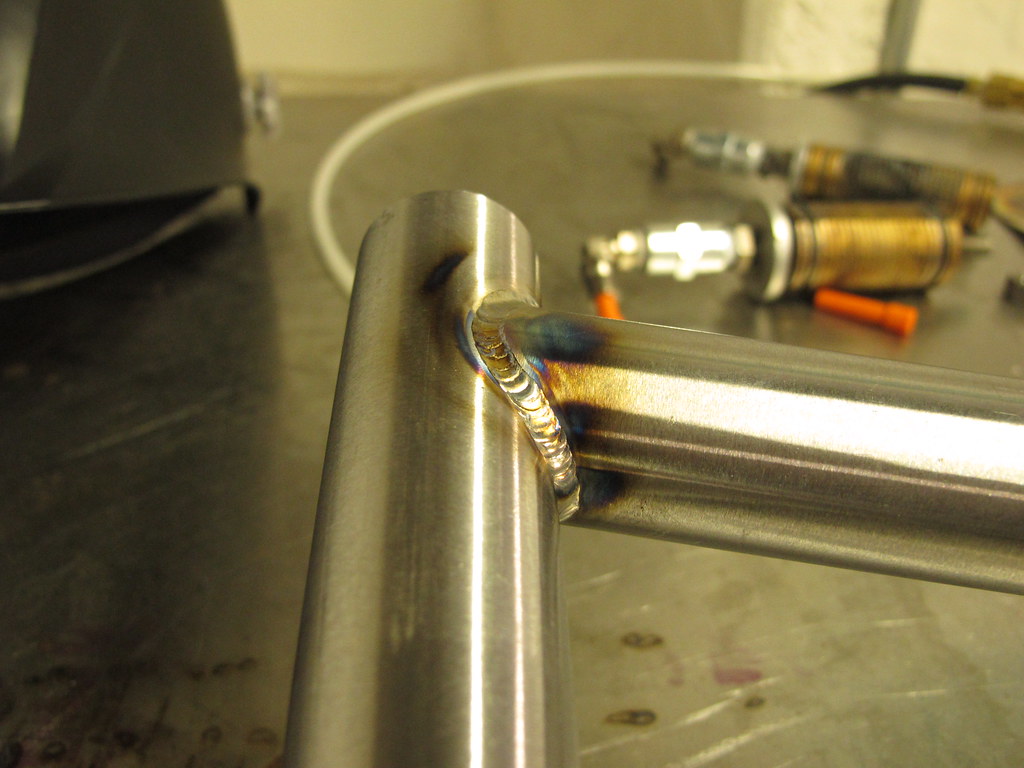
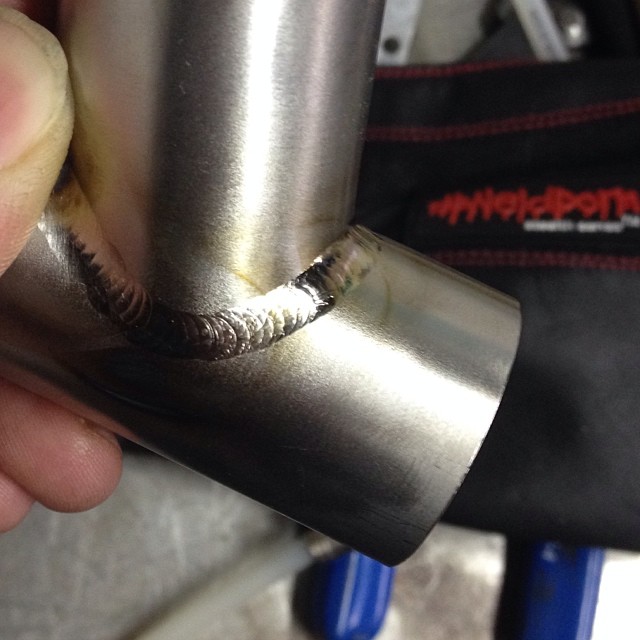
On the steel, I wanted to try high speed pulse. I set the machine to 250 pps, 40% peak time, and 25% background. I was amazed with the control, especially on the edges. This joint is a 0.028" wall tube butted against a 0.055" wall tube. Except for the horrible restart in the middle, I felt like I could put the puddle anywhere I wanted.

Image
Trying out a Dynasty by Zanconato Custom Cycles, on Flickr

I'm totally sold. I'm saving for a new machine.
User avatar
  • Posts:
  • Joined:
    Wed Oct 23, 2013 3:30 pm
  • Location:
    Palmer AK

That's beautiful. :shock:

~John
Just a couple welders and a couple of big hammers and torches.

Men in dirty jeans built this country, while men in clean suits have destroyed it.
Trump/Carson 2016-2024
User avatar
  • Posts:
  • Joined:
    Thu Jan 24, 2013 6:44 am

Thanks, John!
countryboy1127
  • Posts:
  • Joined:
    Wed May 01, 2013 7:28 pm

At first I think I have a pretty weld and then Zank post his pictures lol .just kidding but really nice welds . What amps were you set at for the aluminum ans steel ? If dont mind me asking
Post Reply