Tig welding tips, questions, equipment, applications, instructions, techniques, tig welding machines, troubleshooting tig welding process
Drunken Moose
- Drunken Moose
-
Active Member

-
Posts:
-
Joined:Mon Jan 11, 2016 6:53 am
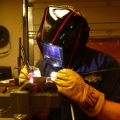
I have so far only done tig with scratch start on mild steel. Its been a few months, so with my new machine (everlast powertig 250ex) i'm getting used to the pedal. Also have always used 1/8th filler. So figured i'd practice with some beads . . . my skills got rusty fast, plus trying to concentrate on foot pedal. Amps set at 80. e70s 1/16 filler. Just playing around with the pedal a bit to play with width and height getting used to keeping a uniform size puddle of different sizes. So here are some pics . . . critique away, i'm thick skinned and can take it (i know these are rough . . . damn, I can run open root much nicer, go figure). Oh, number 6 cup, argon set between 15-20 cf, just using an air cooled torch since I don't have water cooler yet. the thicker one along the edge I was more watching the top edge, so bottom is UGLY. Hope you can forgive me lol. This foot pedal stuff is kinda fun though, just gotta get hang of trying to use it to help control rather than travel speed.
- Attachments
-
- IMG_20160822_022230_edit.jpg (20.85 KiB) Viewed 1307 times
-
- IMG_20160822_022815_edit.jpg (21.62 KiB) Viewed 1307 times
exnailpounder
- exnailpounder
-
Weldmonger

-
Posts:
-
Joined:Thu Dec 25, 2014 9:25 am
-
Location:near Chicago
Your welds are too cold. The top one looks like you lay wired and cooked it but it's hard to tell from the pics. Too cold of amps or trying to jam too much rod in, pours heat into your base and ends up cooking it. Set your amperage to the rule of 1 amp per 1/1000" and then bump it up 10 or 15 amps. You need extra amps with the pedal to be able to feather it to find the "sweet spot" and not have the pedal mashed down the whole time your welding. Your welds look really full and you can't see any wetting in so that's how I can guess you were too cold. Remember, tig welds are usually flatter than other processes. Trying to jam too much filler into your bead will cool off the puddle and make for a "fuller" bead. When you hit the sweet spot and dip your rod, it will melt off just enough rod almost automatically. Trying to jam more rod into the weld just cools off the puddle and it slows your travel speed and you will loose control of the bead and cook your base.You had better control on your second weld. Your puddle will tell you everything you need to know so watch it and adjust the pedal accordingly. Jody has an awesome video that I am too lazy to post the link to about the top 3 things people do wrong when tig welding. I bet I have watched it 100 times.
Ifyoucantellmewhatthissaysiwillbuyyouabeer.

- entity-unknown
-
Ace

-
Posts:
-
Joined:Mon Jul 18, 2016 2:07 pm
-
Location:Mesa, AZ
Nailer has it!
I've got the same pedal as you if you're using the stock one that came with the unit. We've got slightly different units but the pedal is the same. The tension in the spring and the distance to travel from the low to the high amps when pulsing is a lot when you're like right there just about 10-20 amps above where you need to be.
The aluminum I've been doing really calls for about 110-125A generally. I stuck with 140A and I could lay beads but the control was a bit erratic which was somewhat related to the pedal control.
That spring in that pedal is tough so when you have to mash or ride from say 1/2 or higher it's fairly hard to feather the pedal and to go to a reasonable low to high Amp for your pulsing will require more travel which means larger changes in spring tension.
For my Aluminum once I kicked it up to 150A, I only had to press about 3/4 - 4/5 to get my puddle started and then I was campin around 1/4 - 1/3 pedal and things have been so much better. That's with the part at 100F ambient temp starting. If it's 160F starting then I only needed maybe 1/2 pedal. The spring is far from fully compressed so you can truly feather it with some light taps now. It's really all on the operator now.
Everlast even says this pedal kinda sucks but it's the basic version and will get the job done. If you want smoother, more effortless control then they recommend an upgrade. For now since you just dumped all that cash, probably kick the Amps up
Lincoln Electric AC225
Everlast PowerPro Multi-Process TIG/Stick/Plasma 256Si
Everlast W300 WaterCooler
Optrel e684x1
22+ Year Security Engineer developing cool shit and stoppin hackers
Everlast PowerPro Multi-Process TIG/Stick/Plasma 256Si
Everlast W300 WaterCooler
Optrel e684x1
22+ Year Security Engineer developing cool shit and stoppin hackers
Drunken Moose
- Drunken Moose
-
Active Member
-
Posts:
-
Joined:Mon Jan 11, 2016 6:53 am
Thanks for the suggestions all. I'm still trying to get used to this pedal thing. It was on 1/4" bit of scrap plate. I knew it was cold from the crowning. I'm thinking my biggest issue is I am so used to having it full out, and I set a bit low using the pedal. What amps would you suggest setting at using the pedal? And should I start out full on pedal until I get the puddle then back off? I did some autogenous welds on corner joints with pedal full out at 85-90A and they worked out well. Thanks again! I am loving the new challenge with the pedal.
- entity-unknown
-
Ace
-
Posts:
-
Joined:Mon Jul 18, 2016 2:07 pm
-
Location:Mesa, AZ
I'll let the mongers give you the real advice you're asking for. Random n00b suggestion from me is to gently scotchbrite those filler rods and wipe it down well, probably with some acetone and a dust/lint free cloth. Don't use your gloves I could not get anything shiny to ever appear no matter what I did but after doing that almost all my mild steel work has shiny beads when I get something right. Don't remove the copper coating completely, just lighten it up a bit.
Lincoln Electric AC225
Everlast PowerPro Multi-Process TIG/Stick/Plasma 256Si
Everlast W300 WaterCooler
Optrel e684x1
22+ Year Security Engineer developing cool shit and stoppin hackers
Everlast PowerPro Multi-Process TIG/Stick/Plasma 256Si
Everlast W300 WaterCooler
Optrel e684x1
22+ Year Security Engineer developing cool shit and stoppin hackers
Drunken Moose
- Drunken Moose
-
Active Member
-
Posts:
-
Joined:Mon Jan 11, 2016 6:53 am
Not worried about shiny, more about getting used to the pedal. Otherwise I would have cleaned the filler rod up a bit. I do have some background, just nothing ever using a pedal. I think it's more of what to set at with a pedal and go from there.
- entity-unknown
-
Ace
-
Posts:
-
Joined:Mon Jul 18, 2016 2:07 pm
-
Location:Mesa, AZ
Quoting your question so it doesn't get lost. As for the n00b; that's me! I learned not to assume someone's skill level here already so that wasn't me calling you a n00bDrunken Moose wrote:Thanks for the suggestions all. I'm still trying to get used to this pedal thing. It was on 1/4" bit of scrap plate. I knew it was cold from the crowning. I'm thinking my biggest issue is I am so used to having it full out, and I set a bit low using the pedal. What amps would you suggest setting at using the pedal? And should I start out full on pedal until I get the puddle then back off? I did some autogenous welds on corner joints with pedal full out at 85-90A and they worked out well. Thanks again! I am loving the new challenge with the pedal.
Lincoln Electric AC225
Everlast PowerPro Multi-Process TIG/Stick/Plasma 256Si
Everlast W300 WaterCooler
Optrel e684x1
22+ Year Security Engineer developing cool shit and stoppin hackers
Everlast PowerPro Multi-Process TIG/Stick/Plasma 256Si
Everlast W300 WaterCooler
Optrel e684x1
22+ Year Security Engineer developing cool shit and stoppin hackers
exnailpounder
- exnailpounder
-
Weldmonger
-
Posts:
-
Joined:Thu Dec 25, 2014 9:25 am
-
Location:near Chicago
If your just laying stringers then I would go at least 200 amps. You should go over at least 10-15 amps or more with the pedal so you can floor it and then back off and watch your puddle to tell you what to do next. Floor your pedal when you light up and then back off a bit. You don't want that pedal mashed for the whole weld. Pedal and torch switch are different animals. You can get an amperage control on your torch switch but good luck with that. The pedal is for fine control and it takes some practice to get it right. Autogenous corner welds are easy but you should be using filler wire or your weld will be weak. Autogenous has it's place. Not when your learning the pedal. Learn the pedal and EVERYTHING afterwords gets a whole lot easier.Drunken Moose wrote:Thanks for the suggestions all. I'm still trying to get used to this pedal thing. It was on 1/4" bit of scrap plate. I knew it was cold from the crowning. I'm thinking my biggest issue is I am so used to having it full out, and I set a bit low using the pedal. What amps would you suggest setting at using the pedal? And should I start out full on pedal until I get the puddle then back off? I did some autogenous welds on corner joints with pedal full out at 85-90A and they worked out well. Thanks again! I am loving the new challenge with the pedal.
Ifyoucantellmewhatthissaysiwillbuyyouabeer.
Drunken Moose
- Drunken Moose
-
Active Member
-
Posts:
-
Joined:Mon Jan 11, 2016 6:53 am
Thanks exnailpounder. I'll definitely crank my amps up and try that tonight. The autogenous was just to use up some scrap, may as well use as much of it as I can. After that I did the inside corner joint with filler. I am cheap and try to get as much as I can out of everything. Just felt like doing the autogenous outside corner for the hell of it.
I am definitely investing in a water cooler next. I'm new to those as well...curious, is there a special antifreeze to use in them? I'm north, and it's very common for nights to hit -40 during winter, and my work shed isn't heated unless I have the wood stove going.
Thanks again. Oh, also been using the purple tungsten...so far has been pretty good since all I've used before is thoriated.
exnailpounder
- exnailpounder
-
Weldmonger
-
Posts:
-
Joined:Thu Dec 25, 2014 9:25 am
-
Location:near Chicago
What do you need a cooler for? Most hobbyist,light industrial welders hit their duty cycle LONG before the torch gets too hot to hold then you have to wait for the cooldown anyway but spend your money as you see fit.Drunken Moose wrote:Thanks exnailpounder. I'll definitely crank my amps up and try that tonight. The autogenous was just to use up some scrap, may as well use as much of it as I can. After that I did the inside corner joint with filler. I am cheap and try to get as much as I can out of everything. Just felt like doing the autogenous outside corner for the hell of it.
I am definitely investing in a water cooler next. I'm new to those as well...curious, is there a special antifreeze to use in them? I'm north, and it's very common for nights to hit -40 during winter, and my work shed isn't heated unless I have the wood stove going.
Thanks again. Oh, also been using the purple tungsten...so far has been pretty good since all I've used before is thoriated.
Most people would think that higher amps would cause the metal to cook but the opposite is true.. The idea is to weld with the highest amps possible and move quickly. That lessens all the changes in the HAZ. If you stay too long in one spot you will cook your metal. Lay the amps to it and move and the HAZ effects will be minimal. Filler metal cools the puddle and helps you control heat input IF you are doing everything else correctly.
Purple is rare earth tungsten. Never used it so you will have to let us know how it does.
Ifyoucantellmewhatthissaysiwillbuyyouabeer.
Drunken Moose
- Drunken Moose
-
Active Member
-
Posts:
-
Joined:Mon Jan 11, 2016 6:53 am
I have 100% duty cycle at 200A with tig. Although won't be welding at 200 often. Just toys to have. I do have projects in mind that could transfer to more, so rather buy bigger now than spend more later.
Tig is something I need for this project. Dealing with alloys and aluminum. As for the purple, it's been pretty good. I'll try to get some video one day, throw a lense in front of my camera (phone) on mild steel and aluminum.
Tig is something I need for this project. Dealing with alloys and aluminum. As for the purple, it's been pretty good. I'll try to get some video one day, throw a lense in front of my camera (phone) on mild steel and aluminum.
GreinTime
- GreinTime
-
Weldmonger
-
Posts:
-
Joined:Fri Nov 01, 2013 11:20 am
-
Location:Pittsburgh, PA
Purple is Radnor E3 and is junk in my opinion. 2% La tungsten holds up way better towards the upper limit of the Amperage capacity.
Personally, I'll never use an air-cooled torch unless I absolutely have to after switching to a water cooled torch setup. I can weld at 350a on aluminum with a #20 torch for an entire 3/32 rod worth of weld and touch the torch head when I'm done. The cup, gas lens, and tungsten? Different story.
On the topic of padding beads on plate: You do not need to be at 200a on 1/4 plate just to run stringers. You are not going for a full penetration weld. You don't need 1a/thousandth to run a stringer. You can run a stringer at 30a with 0.035 wire on 1/2" plate if you're patient enough. As long as you have enough heat to form a puddle of any size, you can add wire appropriately to start and maintain a weld puddle. Granted, I wouldn't be using 1/8 wire at 30a, as you don't have enough heat to melt the wire and maintain a puddle. As long as you have the Amperage high enough to start a puddle and move it, appropriately sized wire will allow you to make a bead.
Sent from my SM-G900V using Tapatalk
#oneleggedproblems
-=Sam=-
-=Sam=-
Drunken Moose
- Drunken Moose
-
Active Member
-
Posts:
-
Joined:Mon Jan 11, 2016 6:53 am
Well, I got off work at 2am, came home, and ran a couple beads. Took the suggestions and turned my amps up. Turning out MUCH better. Thanks to all the suggestions! Like I said, I've only done scratch start using an IdealArc 250, so the pedal thing is completely new to me. Setting higher amps and getting the puddle going fast then backing off really did make a huge difference, and it was easier to use the pedal to control since I had a wider range than with at lower amps. Didn't get any pics, but I will be posting some again soon. Watched the vid of the 3 tips as well just to refresh. And found the video of the steel drill, so will be doing that with the pedal . . . great idea! http://www.youtube.com/watch?v=uzIF0H02fBw for those who also want to view. And the 3 tips video mentioned for others reading this thread is http://www.youtube.com/watch?v=UNAAhwieNhU I didn't embed the vids just to keep clutter down, copy and paste if you want to watch.
Thanks again for all the advice given.
posted while GreinTime was. I didn't go up to 200A, but did set at 130A, never really went full pedal except to light up. The purple tungsten were free (got 2 of them) . . . so not complaining about price, and running at relatively low amps for practice they work. I can't speak for higher amps though, but you did. I'll keep in mind for sure! I'm going to search around the forum for why to use lanthanated over thoriated (sure I could ask, but the answer is probably here if i search first). Tig was something we only did a little of in my course, so i'm still learning a lot on my own!
Edit: for those that don't know, great way to search forums is using google search. Many forums have a "google search" link. I don't see one here, so you can do it simply by going to google and in the search type "site:http://forum.weldingtipsandtricks.com (your search terms here)" without the " and ().
exnailpounder
- exnailpounder
-
Weldmonger
-
Posts:
-
Joined:Thu Dec 25, 2014 9:25 am
-
Location:near Chicago
As Sam said, you don't need to be at 200 amps for 1/4"plate but with a foot pedal you can be at any amperage you want. The key is watching your puddle and deciding whether to stick you foot in or back off a bit. Running stringers is ok for getting your movement and timing down but doing actual welds is better. I don't set up my machine by the 1 amp per thousandth anymore,I just turn the machine on and set the amps somewhere and watch the puddle but with a torch switch, you need to know the rule.
Torch cooler is a personal choice. I don't tig alot in my daily chores so I have never seen the need for a cooler but if you weld all day, especially aluminum, a cooler wouldn't be a bad idea. The point I try to make is all the toys and bells and whistles that you can buy, can't replace proper technique. When I was learning to play the guitar, I thought different strings or a different guitar or this guitar book or that guitar teacher or these picks or that capo would make me a better player when the whole secret was proper technique and seat time. As far as tungsten, I use 2% lanthanated on everything. I have thoriated which I think is just as good but I only use it when I have to weld something that I had to grind the galvanizing off of so I don't crap up my good tungsten.
Torch cooler is a personal choice. I don't tig alot in my daily chores so I have never seen the need for a cooler but if you weld all day, especially aluminum, a cooler wouldn't be a bad idea. The point I try to make is all the toys and bells and whistles that you can buy, can't replace proper technique. When I was learning to play the guitar, I thought different strings or a different guitar or this guitar book or that guitar teacher or these picks or that capo would make me a better player when the whole secret was proper technique and seat time. As far as tungsten, I use 2% lanthanated on everything. I have thoriated which I think is just as good but I only use it when I have to weld something that I had to grind the galvanizing off of so I don't crap up my good tungsten.
Ifyoucantellmewhatthissaysiwillbuyyouabeer.
- maker of things
-
Guide

-
Posts:
-
Joined:Tue Jul 19, 2016 6:52 am
If you want to run a cooler, us northerners do need antifreeze if you keep your rig in an unheated area. I ran 50/50 distilled water RV antifreeze in my Longevity cooler (5+ years and going). Didn't hit -40, maybe 0 so you may need more antifreeze. When I bought my Miller cooler I bought the Miller branded "Special" mix for $25/ gallon so I wouldn't void my warranty.Drunken Moose wrote:Thanks exnailpounder. I'll definitely crank my amps up and try that tonight. The autogenous was just to use up some scrap, may as well use as much of it as I can. After that I did the inside corner joint with filler. I am cheap and try to get as much as I can out of everything. Just felt like doing the autogenous outside corner for the hell of it.
I am definitely investing in a water cooler next. I'm new to those as well...curious, is there a special antifreeze to use in them? I'm north, and it's very common for nights to hit -40 during winter, and my work shed isn't heated unless I have the wood stove going.
Thanks again. Oh, also been using the purple tungsten...so far has been pretty good since all I've used before is thoriated.
-Jon
I learned how to weld at night, but not last night. (despite how my weld looks)
Lincoln Viking 3350 K3034-2&3
Dynasty 210DX w/cps and coolmate3
Lincoln Power Mig 180c
hermit.shed on instagram
I learned how to weld at night, but not last night. (despite how my weld looks)
Lincoln Viking 3350 K3034-2&3
Dynasty 210DX w/cps and coolmate3
Lincoln Power Mig 180c
hermit.shed on instagram
- entity-unknown
-
Ace
-
Posts:
-
Joined:Mon Jul 18, 2016 2:07 pm
-
Location:Mesa, AZ
The key to coolers seems to be ethyl glycol NOT propylene glycol. You'll find propylene glycol in a lot of auto coolants and generally ethyl glycol in RV coolants. Top it off with some distilled water and you should be good to go. Check out some DIY and other comments from others about their experience. Plenty have said they've run tap water without changing it in like 10 years without issues. I'd say that's a horrible idea since you need some anti-corrosive stuff in there BUT if you ran your stuff every single day for a majority of the day, then things won't ever settle. Just like a pool or fountain, as long as you keep the water moving most of the time corrosion and algae have a hard time to build up. For the weekend warrior, you'll need that anti-corrosion stuff.
With auto, the general assumption is it is a daily driver to some extent and with RVs it is expected your coach will be sitting more often than moving. I'm going to guess this has a lot to do with why ethyl is better because it stands better and corrodes less vs. propylene. This goes in line with why the weekend warrior would need something that can handle sitting more so than a welding shop getting away with tap water for 10 years.
With auto, the general assumption is it is a daily driver to some extent and with RVs it is expected your coach will be sitting more often than moving. I'm going to guess this has a lot to do with why ethyl is better because it stands better and corrodes less vs. propylene. This goes in line with why the weekend warrior would need something that can handle sitting more so than a welding shop getting away with tap water for 10 years.
Lincoln Electric AC225
Everlast PowerPro Multi-Process TIG/Stick/Plasma 256Si
Everlast W300 WaterCooler
Optrel e684x1
22+ Year Security Engineer developing cool shit and stoppin hackers
Everlast PowerPro Multi-Process TIG/Stick/Plasma 256Si
Everlast W300 WaterCooler
Optrel e684x1
22+ Year Security Engineer developing cool shit and stoppin hackers
- maker of things
-
Guide
-
Posts:
-
Joined:Tue Jul 19, 2016 6:52 am
Automotive antifreeze is a big no-no according to all the cooler/weld torch manufacturers (though I'm sure plenty have done it) as it has anti leak additives that can plug the holes in your torch and may attack the aluminum heat exchanger. Distilled or reverse osmosis is usually recommended based on being demineralized. Theoretically the minerals in tap water could encourage the HF to follow weird paths. I have not conducted scientific experiments to verify these statements, I just followed the guidelines.
-Jon
I learned how to weld at night, but not last night. (despite how my weld looks)
Lincoln Viking 3350 K3034-2&3
Dynasty 210DX w/cps and coolmate3
Lincoln Power Mig 180c
hermit.shed on instagram
I learned how to weld at night, but not last night. (despite how my weld looks)
Lincoln Viking 3350 K3034-2&3
Dynasty 210DX w/cps and coolmate3
Lincoln Power Mig 180c
hermit.shed on instagram
- entity-unknown
-
Ace
-
Posts:
-
Joined:Mon Jul 18, 2016 2:07 pm
-
Location:Mesa, AZ
If you ask Everlast (I've heard this from others when reaching out to other MFGs) and you tell them you have no way of purchasing any specialized coolant for welding, they will suggest the next best option is to buy coolant for RV but make sure there is no propylene glycol, it must be completely ethylene glycol based. I think Everlast may even be kind enough to honor your warranty so long as that's what you used but I'd have them tell you that one.
There is some reference in some manuals suggesting isopropyl alcohol and distilled water will get you what you need to and is the ultimate "if you're in a pinch" situation. Anything else and you're likely asking for trouble.
There is some reference in some manuals suggesting isopropyl alcohol and distilled water will get you what you need to and is the ultimate "if you're in a pinch" situation. Anything else and you're likely asking for trouble.
Lincoln Electric AC225
Everlast PowerPro Multi-Process TIG/Stick/Plasma 256Si
Everlast W300 WaterCooler
Optrel e684x1
22+ Year Security Engineer developing cool shit and stoppin hackers
Everlast PowerPro Multi-Process TIG/Stick/Plasma 256Si
Everlast W300 WaterCooler
Optrel e684x1
22+ Year Security Engineer developing cool shit and stoppin hackers
exnailpounder
- exnailpounder
-
Weldmonger
-
Posts:
-
Joined:Thu Dec 25, 2014 9:25 am
-
Location:near Chicago
- 20160823_115943.jpg (52.55 KiB) Viewed 1150 times
- 20160823_114823.jpg (60.28 KiB) Viewed 1150 times
Ifyoucantellmewhatthissaysiwillbuyyouabeer.
- entity-unknown
-
Ace
-
Posts:
-
Joined:Mon Jul 18, 2016 2:07 pm
-
Location:Mesa, AZ
(possible) Cool function straight from the Everlast manual when using the Pedal (I believe your unit will be the same as mine for this):
Start Amps Excerpt:
May be used as a "Hot start" when using the foot pedal to improve starting. If used this way, the amps will start hotter than the minimum amperage set by the foot pedal.
Now there's nothing about upslope control and this feature so I'm not sure if you need it but I'd like to think the manual would call it out since it's the next feature mentioned. I kinda figure it's for a brief moment and then it goes back down. I'll play with it and see what difference I notice but perhaps something you might like to play with too.
Lincoln Electric AC225
Everlast PowerPro Multi-Process TIG/Stick/Plasma 256Si
Everlast W300 WaterCooler
Optrel e684x1
22+ Year Security Engineer developing cool shit and stoppin hackers
Everlast PowerPro Multi-Process TIG/Stick/Plasma 256Si
Everlast W300 WaterCooler
Optrel e684x1
22+ Year Security Engineer developing cool shit and stoppin hackers
Drunken Moose
- Drunken Moose
-
Active Member
-
Posts:
-
Joined:Mon Jan 11, 2016 6:53 am
All great suggestions. Thanks! Been setting the amps higher and using the foot pedal to control puddle. It's taking a bit of getting used to, but i'm picking up quick.
exnailpounder . . great analogy with the guitars, especially since I play as well. First guitar i ever owned was a cheap Hondo acoustic . . . it is now 27 years old and still sounds great (not as good as my fender dreadnought, but still good). Also have an Ibanez X electric with Crate G40-C amp. No matter the equipment, it's the person operating it that makes it sound good, so your analogy was right on the head for me!
Went to run some beads tonight, but damn bugs are still really bad, and it's too hot to work with the shop door closed (if i was getting paid, be a different story, but this is home and my own fun time). What I was able to do though playing with the pedal and setting my amps taught me a lot. It doesn't take much on that pedal to change the puddle!
Drunken Moose
- Drunken Moose
-
Active Member
-
Posts:
-
Joined:Mon Jan 11, 2016 6:53 am
I'm getting the hang of running a little higher amps. I see what you mean now. If I go lower amps, I am having to move much slower, and the heat melts the back side of the plate as well. With higher amps, there is a much nicer puddle, I move quicker, which means there is less being transferred to the back side and only a bit of discoloration on the back side. Problem is i'm still waiting for my electrician to change my breaker over. The wires are all heavy enough, but I only have 15amp so going too high pops the breaker. It will be nice to finally get that done and have more freedom. Sure is different from scratch start open root stuff.
Return to “Tig Welding - Tig Welding Aluminum - Tig Welding Techniques - Aluminum Tig Welding”
Jump to
- Introductions & How to Use the Forum
- ↳ Welcome!
- ↳ Member Introductions
- ↳ How to Use the Forum
- ↳ Moderator Applications
- Welding Discussion
- ↳ Metal Cutting
- ↳ Tig Welding - Tig Welding Aluminum - Tig Welding Techniques - Aluminum Tig Welding
- ↳ Mig and Flux Core - gas metal arc welding & flux cored arc welding
- ↳ Stick Welding/Arc Welding - Shielded Metal Arc Welding
- ↳ Welding Forum General Shop Talk
- ↳ Welding Certification - Stick/Arc Welding, Tig Welding, Mig Welding Certification tests - Welding Tests of all kinds
- ↳ Welding Projects - Welding project Ideas - Welding project plans
- ↳ Product Reviews
- ↳ Fuel Gas Heating
- Welding Tips & Tricks
- ↳ Video Discussion
- ↳ Wish List
- Announcements & Feedback
- ↳ Forum News
- ↳ Suggestions, Feedback and Support
- Welding Marketplace
- ↳ Welding Jobs - Industrial Welding Jobs - Pipe Welding Jobs - Tig Welding Jobs
- ↳ Classifieds - Buy, Sell, Trade Used Welding Equipment
- Welding Resources
- ↳ Tradeshows, Seminars and Events
- ↳ The Welding Library
- ↳ Education Opportunities