MosquitoMoto wrote: because I am finally doing with my welder what I set out to do when I purchased it
Kym
Awesome bro, I sure hope that I get there. I got a welding test in the a.m. and the lady told me to come ready to work because she plans to throw me right into the fire if I pass. But that's just to pay the bills. I want my own fab facility.
You know Rambo, I've pondered this a lot.
I'm kinda jealous of what you're doing - the pressure to succeed and make this your livelihood and the resulting all day, every day welding that you do when you succeed (and you will...) will ultimately result in you becoming a very skilled craftsman indeed. Better than I'll ever be.
While I get none of the pressure - because I'll never weld for a living - nor will I get the seat time you'll get, so I'll probably never be a truly great welder/weldor. But it sure won't stop me trying to be the best 'hobby' welder I can be.
All the very best with your test and your vision of owning a fab shop. Go get 'em!
I am a fitter from downunder (Australia). Started my apprenticeship in food and beverage welding stainless steel and it stuck with me, always loved it.
Still working full time but trying to build a business on the side welding, mainly do marine work. Recently made a 3rd hand and have found it to be a great tool! Also appreciate Jody's vids, very informative.
Anyway, thought I would post some of my work, and some welds messing around trying to get better consistency and heat input. Cheers.
MosquitoMoto wrote: because I am finally doing with my welder what I set out to do when I purchased it
Kym
Awesome bro, I sure hope that I get there. I got a welding test in the a.m. and the lady told me to come ready to work because she plans to throw me right into the fire if I pass. But that's just to pay the bills. I want my own fab facility.
I also have a weld test in the morning! I checked your location to see if we would be at the same place, but alas, we are not, as your state name begins with G and mine begins with P!
OzFlo wrote:Nice work Kym! It's nice to have a reason to weld rather than mere practice.
Thanks Flo!
Yeah, it finally feels like that for every 3 or 4 practise pieces I do nowadays, I do 1 worthwhile repair or fabrication. Not long ago it seemed to be about three dozen practise pieces to every useful fab job!
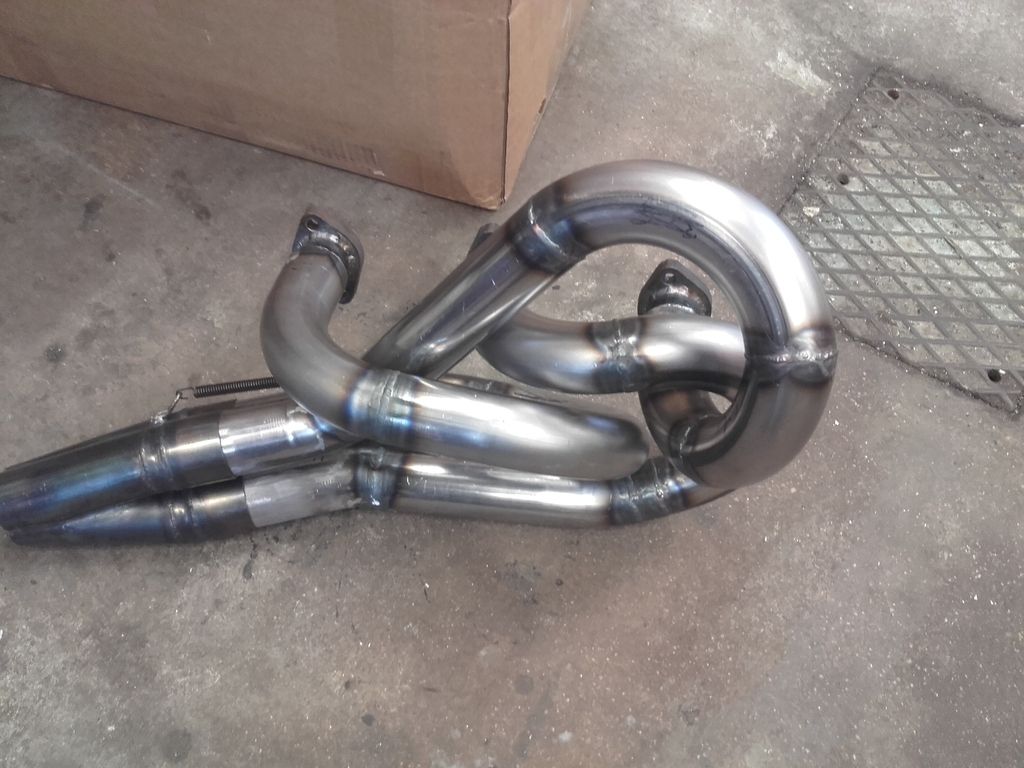
Approx 5hours of sawing and tacking the pipes.
Pipes were pre bend to J shape. Lenght of the pipes is in 15mm of eachother. Looks goofy, but the lenght is far more important than looks.....and that was the easy side. Other side takes like 5hours for just 1 pipe (1 pipe is tacked up...)
I was putting a engine in a GMC C6500 chipper truck when I found the top of the bellhousing had broken off.
Thankfully the piece was held on the back of the block with a bolt. We cleaned up everything and brazed the piece back on using Si Bronze filler with a tig welder.
The whole transmission hangs off the back of the bellhousing in this truck. There's no rear trans mount at all. I wanted to put a reinforcement on the repaired area as I didn't want it to crack later on. I drew it up in CAD and cut out it on our CNC plasma table. After I cleaned it up, I bent it to fit the curve of the bellhousing in our press brake.
I brazed it all up. I think it will be stronger than the original casting now as I've almost doubled the material thickness where the stress is.
I think I got a pretty good bead of filler material but some places I had a hard time getting it to wet into the casting at the edges really well. I think the casting was outgasing where this was happening near the corner. It got real black and sooty right there. I was running on AC with 90% penetration.
I too like tig AC brazing sil,,max penetration.
Nice repair.
coupla rosette welds,might further spread the load.
Everlast 250EX
Miller 250 syncrowave
Sharp LMV Vertical Mill
Takisawa TSL-800-D Lathe
Coupla Bandsaws,Grinders,surface grinder,tool/cutter grinder
and more stuff than I deserve(Thanks Significant Other)
Everlast 250EX
Miller 250 syncrowave
Sharp LMV Vertical Mill
Takisawa TSL-800-D Lathe
Coupla Bandsaws,Grinders,surface grinder,tool/cutter grinder
and more stuff than I deserve(Thanks Significant Other)
I made up a chiller block similar to the one Jody made from copper, only I used aluminium and milled off the corner. Wasn't planning on it but it worked well as a way to prop the cup on to maintain a constant arc length, which can be a pain on corner joints. Also probably helping trap a bit of argon in it. Ran a few practice runs, pretty happy with the results.
Played around with pulse settings. No sugaring on 1.6mm, the back side nearly looked like it had been purged.
I'm senior citizen learning to weld. I have been practicing running stringer beads, but I promoted myself to lap joints this morning. I ran about 50 inches this morning. I was having a really hard time getting the C (or keyhole) puddle shape. I reread the textbook from the intro welding class I took and adjusted the torch angle. After fiddling with the angles a bit I finally started getting the C (or keyhole) shaped puddle. FWIW: 1/8" mild steel, 3/32" 2% lanthanated tungsten, 130amps DCEN controlled with a foot pedal.
Sadly, this is one of my better beads from this morning.