Tig welding tips, questions, equipment, applications, instructions, techniques, tig welding machines, troubleshooting tig welding process

Hey guys I'm new to this forum and welding aluminum. I've been tig welding 4130 for years and need to learn how to weld 6061. I'm going to be welding 1"x .120" wall tubing to 3/8" plate. I'm thinking about practicing on putting beads down on the 3/8" plate but don't know where to start. I use a Thermal Arc 186 AC/DC inverter. I guess my first question is what settings should I start with? Like AC frequency and wave balance. I tried arcing on some 6061 and couldn't even get it to melt. That's when I knew I needed some help. I would appreciate any advice.

300 amps needed and or Helium(DC)
Welder undersized for that thick(3/8) Alum
Even argon/helium mix, skill level, marginal for .250 without preheat.
Clean well,and min electrode positive(balance), large tungsten(1/8+)
forum will help(others will have tried and have opinions)
Welcome
Welder undersized for that thick(3/8) Alum
Even argon/helium mix, skill level, marginal for .250 without preheat.
Clean well,and min electrode positive(balance), large tungsten(1/8+)
forum will help(others will have tried and have opinions)
Welcome
Everlast 250EX
Miller 250 syncrowave
Sharp LMV Vertical Mill
Takisawa TSL-800-D Lathe
Coupla Bandsaws,Grinders,surface grinder,tool/cutter grinder
and more stuff than I deserve(Thanks Significant Other)
Miller 250 syncrowave
Sharp LMV Vertical Mill
Takisawa TSL-800-D Lathe
Coupla Bandsaws,Grinders,surface grinder,tool/cutter grinder
and more stuff than I deserve(Thanks Significant Other)

rick9345 wrote:300 amps needed and or Helium(DC)
Welder undersized for that thick(3/8) Alum
Even argon/helium mix, skill level, marginal for .250 without preheat.
Clean well,and min electrode positive(balance), large tungsten(1/8+)
forum will help(others will have tried and have opinions)
Welcome
Fully agree with all this ^^^. Also, 2%La tungsten sharpened to a long point with a tiny flat in order to really get into the corner of the joint. Otherwise, the arc will jump to the sides/bottom and not into the root. It's gonna take some real skill to manage all the variables just right.


I third all of the above. 3/8" aluminum is some bad ass stuff and it takes a whole lot of heat to weld something like that.....and it's not just he thickness that you have to watch out for because surface area is a major contributing factor with aluminum. It's a heatsink material which means that not only is it trying to draw the heat away from your weld via thermal conductivity but it is also trying to shed that heat to the atmosphere as fast as possible. That's a double whammy brother and your machine just can't keep up.
Sometimes I still find it shocking how quickly aluminum can go from a liquid state to cold enough to ball up my rod when I make contact. Aluminum really takes some getting use to.
Sometimes I still find it shocking how quickly aluminum can go from a liquid state to cold enough to ball up my rod when I make contact. Aluminum really takes some getting use to.
Raymond
Everlast PowerTIG 255EXT
Everlast PowerTIG 255EXT
Thank you to everyone that has replied. It has been very helpful. Just to recap and understand what I've heard, trying to weld the .120" wall tubing to the 3/8" plate is not really doable with my welding unit. And trying to get a puddle on the 3/8" plate alone will not happen because the amperage only goes to 200. Just trying to fully understand. Thanks again
- DLewis0289
-
Ace

-
Posts:
-
Joined:Sun May 01, 2016 7:46 am
-
Location:Fort Myers Florida
You understood, and everyone's advice was right on point but I don't necessarily agree it's impossible. Helium will gain you some where amperage is lacking and pre-heating the 3/8" just might pull it off.
PS....I do know for a fact it doesn't require 300 amps to weld 3/8" aluminum. Maybe 250, maybe.
PS....I do know for a fact it doesn't require 300 amps to weld 3/8" aluminum. Maybe 250, maybe.
Last edited by DLewis0289 on Sat May 28, 2016 5:12 pm, edited 1 time in total.
AWS D1.1 / ASME IX / CWB / API / EWI / RWMA / BSEE
Scientists have substituted mathematics for experiments, and they wander off through equation after equation, and eventually build a structure which has no relation to reality." Nikola Tesla
Scientists have substituted mathematics for experiments, and they wander off through equation after equation, and eventually build a structure which has no relation to reality." Nikola Tesla
It isn't totally undoable but it isnt realistic either. You would need to preheat your plate to about 300 degrees and use helium in your mix. Or you could just use pure helium on dc-en. Since you've never welded aluminum then you're probably not aware of how expensive helium is either. A 250 cuft tank will set you back somewhere in the neighborhood of $250 unless you have a business account and tax id.
Raymond
Everlast PowerTIG 255EXT
Everlast PowerTIG 255EXT

From my experience (which is limited I'll grant you) you CAN run a bead on 3/8" plate for practice purposes without the use of helium. I have a 220amp inverter machine and I am almost certain that I have run some beads on 3/8 thick material with argon. It's obviously not going to have great penetration but for practice it's ok..
I just went out to the garage and had a look and I had some 3/8" thick 7075 Z-section which I had practiced on..
Cardiff43: Just try holding the arc steady for a while as it'll take a few seconds to get the puddle established. I think I used maybe 150-200hz, square wave, and maybe 70% EN AC balance..

- Otto Nobedder
-
Weldmonger

-
Posts:
-
Joined:Thu Jan 06, 2011 11:40 pm
-
Location:Near New Orleans
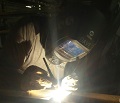
This is 3/16 53xx angle to 3/8 6061, done with 100% Ar at about 250-275A, no preheat. AC balance set at "9" on a Miller SW250DX. Rod was 3/32 5156.
The angle was beveled 45* to a knife-edge for full penetration from the inside, then the outside was back-ground and beveled for complete tie-in of the welds from each side.
Steve S
The angle was beveled 45* to a knife-edge for full penetration from the inside, then the outside was back-ground and beveled for complete tie-in of the welds from each side.
- DSCF0030.JPG (64.09 KiB) Viewed 1119 times
- DLewis0289
-
Ace
-
Posts:
-
Joined:Sun May 01, 2016 7:46 am
-
Location:Fort Myers Florida
See there you go, now that I agree with 
AWS D1.1 / ASME IX / CWB / API / EWI / RWMA / BSEE
Scientists have substituted mathematics for experiments, and they wander off through equation after equation, and eventually build a structure which has no relation to reality." Nikola Tesla
Scientists have substituted mathematics for experiments, and they wander off through equation after equation, and eventually build a structure which has no relation to reality." Nikola Tesla

I hope y'all don't mind me jumping in on this thread but I'm a learning noob (as opposed to a know-it-all noob) and have a question.
In the original post and in Otto/Steve's example it was a case of two different thicknesses (.120 to .375 and 3/16 to 3/8). It seems the amperage requirements was being dictated to the thicker material. Clearly the thinner material won't need that amount of current. So you need the current to get good penetration into the thicker material and yet don't want to blow through the thin material.
Is that correct?
In regards to technique would you bias your torch/arc towards the heavier material and only briefly move onto the thin?
So what happens if one does not use enough current for the thick material? Not enough penetration. The two pieces will "stick" to each other but will be susceptible to failure? What would that joint look like? Cold lap on the thick and a nice looking toe on the thin?
thanks.
steve
Figuring out what I want to be when I grow up.
Better to be a "Learn it all" than a "Know it all"
Better to be a "Learn it all" than a "Know it all"
- DLewis0289
-
Ace
-
Posts:
-
Joined:Sun May 01, 2016 7:46 am
-
Location:Fort Myers Florida
You got it. To "weld" things together you have to alter the solid state of BOTH materials to fuse, sometimes you add filler, sometimes you don't just depends on the process. And yes, you go towards the one requiring the most amperage if there is a mismatch and fuse into the thinner.
And to answer your last question, if you didn't have enough heat for the thick but did for the thin you would have incomplete fusion. (bubblegum)
And to answer your last question, if you didn't have enough heat for the thick but did for the thin you would have incomplete fusion. (bubblegum)
AWS D1.1 / ASME IX / CWB / API / EWI / RWMA / BSEE
Scientists have substituted mathematics for experiments, and they wander off through equation after equation, and eventually build a structure which has no relation to reality." Nikola Tesla
Scientists have substituted mathematics for experiments, and they wander off through equation after equation, and eventually build a structure which has no relation to reality." Nikola Tesla
I find the easiest way to do this is to get a puddle going on the thick piece, dab in a descent sized glob of filler and then quickly roll the torch to the thinner piece. If you see it puddle instantaneously, and it's really thin, then you had better shove some filler in it else you're gonna blow through. I find than angling the torch very slightly back toward the puddle, as opposed to angling it into the joint, helps to keep from blowing through a thin edge. As soon as i add filler i will sweep the torch angle toward the leading edge of the puddle in a motion akin to sweeping a floor with a broom. Sometimes I have to do this several times before adding filler in order to get the puddle to penetrate the root of the joint. Just keep your eye on the puddle and it will tell you everything that you need to know. The same type and thickness of joint doesn't always behave in the same manner for a laundry list of reasons when welding thin to thick. Who the heck knows, maybe It's just me or my machine.
It's a lot to get acustomed to with aluminum because, unlike steel, different thicknesses sometimes behave in dramatically different ways. It acts slugish until you get it adequately preheated, it rapidly builds up heat once preheated and it doesn't give you much warning when it's on the verge of overheating.
It's a lot to get acustomed to with aluminum because, unlike steel, different thicknesses sometimes behave in dramatically different ways. It acts slugish until you get it adequately preheated, it rapidly builds up heat once preheated and it doesn't give you much warning when it's on the verge of overheating.
Raymond
Everlast PowerTIG 255EXT
Everlast PowerTIG 255EXT
since your machine doesnt have the amperage... you can preheat the 3/8 for one....if you still cant get a bead... helium will also help your machine... and start the bead on the 3/8 before going to the .120 ....and get rid of any anodizing if there
Yes, helium will help you do amazing things.....if you can afford it. But you aren't likely to see it attached to many welders outside of a welding shop because it's so damn expensive.
Raymond
Everlast PowerTIG 255EXT
Everlast PowerTIG 255EXT
- Otto Nobedder
-
Weldmonger
-
Posts:
-
Joined:Thu Jan 06, 2011 11:40 pm
-
Location:Near New Orleans
In my case, they'd attempted multiple MIG repairs. Here's the 2X2 angle I replaced with the 2X3 in the previous picture... You'll see, in the last case at least, that each time the repair broke at the edge of the weld on the thinner stuff.AKmud wrote:No MIG option? It would be much easier and way faster.
- DSCF0018.JPG (74.53 KiB) Viewed 885 times
That's not a mig weld.....that's a little pile of metal doo-doo. That looks more like it came unglued rather than a broken weld.
Edit:
Is it just my imagination or are aluminum mig welds much more susceptible to cracking and breaking than are aluminum tig welds?
It just seems like every time i see an aluminum weld break....It's a mig weld and it's almost always due to either lack of fusion or it's a centerline crack as if the weld is very brittle.
Raymond
Everlast PowerTIG 255EXT
Everlast PowerTIG 255EXT
Welding does weaken the parent aluminum in the HAZ by nearly 40%. In my college metallurgy class, we did extensive destructive testing and our results showed around 37% reduction in tensile strength near the weld in the HAZ. The only cure is to re-temper the aluminum to gain the strength back.
- Otto Nobedder
-
Weldmonger
-
Posts:
-
Joined:Thu Jan 06, 2011 11:40 pm
-
Location:Near New Orleans
I suspect it's mostly operator error... Someone trying to MIG aluminum in short-circuit, from the look.Coldman wrote:I suspect the faulty mig welds are due to an undersized machine being used and possibly a faulty operator as well.
What interested me was that the failure was at the edge of the weld in the HAZ each time, causing the repair to grow outward from the original problem. I suppose that's due to the random fusion making tons of stress risers, and a good likelihood (from what I see) that there was not a wrap at the top, allowing the original failure to restart from the most stressed point.
Steve S
- DLewis0289
-
Ace
-
Posts:
-
Joined:Sun May 01, 2016 7:46 am
-
Location:Fort Myers Florida
I don't know, sure looks like spray to me....sprayed with sh*t 
AWS D1.1 / ASME IX / CWB / API / EWI / RWMA / BSEE
Scientists have substituted mathematics for experiments, and they wander off through equation after equation, and eventually build a structure which has no relation to reality." Nikola Tesla
Scientists have substituted mathematics for experiments, and they wander off through equation after equation, and eventually build a structure which has no relation to reality." Nikola Tesla
Coldman wrote:I suspect the faulty mig welds are due to an undersized machine being used and possibly a faulty operator as well.
In our shop if the alum mig machine is not set just right it doesn't weld worth a crap. We use Argon. We usually tig alum.
But setup right I can lay dimes way better than carbon.
Return to “Tig Welding - Tig Welding Aluminum - Tig Welding Techniques - Aluminum Tig Welding”
Jump to
- Introductions & How to Use the Forum
- ↳ Welcome!
- ↳ Member Introductions
- ↳ How to Use the Forum
- ↳ Moderator Applications
- Welding Discussion
- ↳ Metal Cutting
- ↳ Tig Welding - Tig Welding Aluminum - Tig Welding Techniques - Aluminum Tig Welding
- ↳ Mig and Flux Core - gas metal arc welding & flux cored arc welding
- ↳ Stick Welding/Arc Welding - Shielded Metal Arc Welding
- ↳ Welding Forum General Shop Talk
- ↳ Welding Certification - Stick/Arc Welding, Tig Welding, Mig Welding Certification tests - Welding Tests of all kinds
- ↳ Welding Projects - Welding project Ideas - Welding project plans
- ↳ Product Reviews
- ↳ Fuel Gas Heating
- Welding Tips & Tricks
- ↳ Video Discussion
- ↳ Wish List
- Announcements & Feedback
- ↳ Forum News
- ↳ Suggestions, Feedback and Support
- Welding Marketplace
- ↳ Welding Jobs - Industrial Welding Jobs - Pipe Welding Jobs - Tig Welding Jobs
- ↳ Classifieds - Buy, Sell, Trade Used Welding Equipment
- Welding Resources
- ↳ Tradeshows, Seminars and Events
- ↳ The Welding Library
- ↳ Education Opportunities