Tig welding tips, questions, equipment, applications, instructions, techniques, tig welding machines, troubleshooting tig welding process
AFR_Autoworks
- AFR_Autoworks
-
Workhorse

-
Posts:
-
Joined:Mon Nov 30, 2015 2:35 am
-
Location:Red Deer, Alberta, Canada
AFR_Autoworks
- AFR_Autoworks
-
Workhorse
-
Posts:
-
Joined:Mon Nov 30, 2015 2:35 am
-
Location:Red Deer, Alberta, Canada
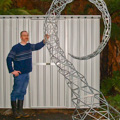
Made my first collector a few days ago
- Attachments
-
- image.jpeg (56.72 KiB) Viewed 1960 times
-
- image.jpeg (35.88 KiB) Viewed 1960 times
-
- image.jpeg (60 KiB) Viewed 1960 times

- MosquitoMoto
-
Weldmonger

-
Posts:
-
Joined:Sat Aug 01, 2015 8:38 am
-
Location:The Land Down Under

- big gear head
-
Ace

-
Posts:
-
Joined:Thu May 07, 2015 11:46 am
-
Location:KY.

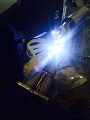
Well, if I only post my best it's just bragging, not learning. So here is my practice for today. Still learning TIG in prep for doing the front half of my rollcage (did the rear a few years back with MIG)
I try to start each session with a 1/8" aluminum fillet as it shows my bad habits and technique problems the most. Was going OK until towards the end of the 2nd one where I started drifting away from the joint and overheated it


The pipe is 1-5/8 .120 erw (the cage material is 1-3/4 DOM but this is all I could find in my metal supplier's offcut pile), using 1/16 er70s at 120 amps 3/32 2% lanth stubby gas lens, not using full pedal most of the time, mainly to start the joint esp for the really deep accute stuff.
Any tips or suggestions welcome! I saw earlier in the thread you guys get that nice shiny rainbow effect while mine just looks like a neat MIG weld. Is it because I'm not cleaning up the pipe? (just gave it a onceover with acetone) Penetration seems good which I guess is what I'm mainly worried about.


I try to start each session with a 1/8" aluminum fillet as it shows my bad habits and technique problems the most. Was going OK until towards the end of the 2nd one where I started drifting away from the joint and overheated it
The pipe is 1-5/8 .120 erw (the cage material is 1-3/4 DOM but this is all I could find in my metal supplier's offcut pile), using 1/16 er70s at 120 amps 3/32 2% lanth stubby gas lens, not using full pedal most of the time, mainly to start the joint esp for the really deep accute stuff.
Any tips or suggestions welcome! I saw earlier in the thread you guys get that nice shiny rainbow effect while mine just looks like a neat MIG weld. Is it because I'm not cleaning up the pipe? (just gave it a onceover with acetone) Penetration seems good which I guess is what I'm mainly worried about.
Went back to get more mileage out of this pipe. Cleaned up the joint, looks much better. Did half the weld with 309. What's the word on joining mild steel with 309, better, worse, same as er70s? Sure looks prettier


- MosquitoMoto
-
Weldmonger
-
Posts:
-
Joined:Sat Aug 01, 2015 8:38 am
-
Location:The Land Down Under
- big gear head
-
Ace
-
Posts:
-
Joined:Thu May 07, 2015 11:46 am
-
Location:KY.
The joint will be stronger with ER70S.
You probably need to clean the surface better with a sander or something. Can you see the puddle good? Is your lens too dark? It looks to me like you might be having just a little trouble seeing the puddle and that might be causing your bead size to vary some. Maybe you are having a hard time propping your hand or getting in a comfortable position. Not trying to be critical, just trying to help.
You probably need to clean the surface better with a sander or something. Can you see the puddle good? Is your lens too dark? It looks to me like you might be having just a little trouble seeing the puddle and that might be causing your bead size to vary some. Maybe you are having a hard time propping your hand or getting in a comfortable position. Not trying to be critical, just trying to help.
Freddie
Haha, thanks Kym!
Got it, will stick to ER70S in practice.
Yeah after I hit the surfaces with a flapper before joining, the weld stayed much shinier.
I do have a bit of trouble seeing the puddle sometimes, I may need to lighten the lens as I darkened it to 12 for doing the aluminum fillets, as my eyes were getting tired. But mainly it's just lack of experience. In practice I will likely do more stops and starts to maintain proper torch angle. Here I was trying to do at 1/8-1/4 circumference at a time and I would sometimes not notice that I'm not perpendicular anymore.
I also have a weird issue with being too ginger with the pedal. It's one of the bigger problems I'm working on that I notice consistently. I road race a very high power car so I've trained my right foot to be very progressive and it doesn't serve me well with the TIG pedal. I notice it's worse with steel because it will seem to puddle fine at lower heat but I then notice that the fillet is too small for my liking and I goose it.
One of the things I love about TIG so far is that you get do-overs. Since feeding filler is up to you, if the weld sucks, do another pass
Please do be critical, I have no delusions.big gear head wrote:The joint will be stronger with ER70S.
You probably need to clean the surface better with a sander or something. Can you see the puddle good? Is your lens too dark? It looks to me like you might be having just a little trouble seeing the puddle and that might be causing your bead size to vary some. Maybe you are having a hard time propping your hand or getting in a comfortable position. Not trying to be critical, just trying to help.
Got it, will stick to ER70S in practice.
Yeah after I hit the surfaces with a flapper before joining, the weld stayed much shinier.
I do have a bit of trouble seeing the puddle sometimes, I may need to lighten the lens as I darkened it to 12 for doing the aluminum fillets, as my eyes were getting tired. But mainly it's just lack of experience. In practice I will likely do more stops and starts to maintain proper torch angle. Here I was trying to do at 1/8-1/4 circumference at a time and I would sometimes not notice that I'm not perpendicular anymore.
I also have a weird issue with being too ginger with the pedal. It's one of the bigger problems I'm working on that I notice consistently. I road race a very high power car so I've trained my right foot to be very progressive and it doesn't serve me well with the TIG pedal. I notice it's worse with steel because it will seem to puddle fine at lower heat but I then notice that the fillet is too small for my liking and I goose it.
One of the things I love about TIG so far is that you get do-overs. Since feeding filler is up to you, if the weld sucks, do another pass
AFR_Autoworks
- AFR_Autoworks
-
Workhorse
-
Posts:
-
Joined:Mon Nov 30, 2015 2:35 am
-
Location:Red Deer, Alberta, Canada
To get a shiny rainbow effect there are a few things you need. Good gas coverage, it helps to use a large gas lense if you can't maintain a good torch angle. Have to have the tubing surgically clean. I use emery cloth around the cope till it is polished. I then use a die grinder with a sanding wheel to polish the inside of the tubing. After that I wipe it down with acetone. The last factor is keeping the overall heat input down. Allot of guys achieve this by either using a pulse setting or setting the welder to around 150 amps and manually pulsing. Also, don't stay welding the same area too long. Weld a bit and then move to a different area. It will take a fair amount of practice before you get the hang of it. Once you get in the car and start welding it is a totally different universe. Keep at it!
Thank you for the tips! Yeah I'm definitely staying in one place too long, you can see it by how close my ripples are located. Part of it is me trying to get the torch moving around the radius awkwardly. Like you said, practice! I've purposefully tried to keep it awkward, the pipe isn't secured to the bench, the angle isn't ideal etc, so that it's as applicable to doing it in the car as possible but I have no illusions about it not being hard in the car. I built a switch that I think will come in handy with a few seconds of downslope and 2T hold. It'll give me time to reposition.AFR_Autoworks wrote:To get a shiny rainbow effect there are a few things you need. Good gas coverage, it helps to use a large gas lense if you can't maintain a good torch angle. Have to have the tubing surgically clean. I use emery cloth around the cope till it is polished. I then use a die grinder with a sanding wheel to polish the inside of the tubing. After that I wipe it down with acetone. The last factor is keeping the overall heat input down. Allot of guys achieve this by either using a pulse setting or setting the welder to around 150 amps and manually pulsing. Also, don't stay welding the same area too long. Weld a bit and then move to a different area. It will take a fair amount of practice before you get the hang of it. Once you get in the car and start welding it is a totally different universe. Keep at it!
The KC/Houston game was a foregone conclusion so I went back for more. Another aluminum fillet and a 90 pipe joint. Screwed up the start of the fillet a bit but recovered. The end was the best I've done yet, tapering the heat as I chase it to the edge. The bead weld on the pipe you see is me experimenting with the switch, pulsing it.


- big gear head
-
Ace
-
Posts:
-
Joined:Thu May 07, 2015 11:46 am
-
Location:KY.
Hollywood1
- Hollywood1
-
Ace
-
Posts:
-
Joined:Mon Feb 23, 2015 9:05 am
-
Location:Washington
- Metal_pig2001
-
Active Member

-
Posts:
-
Joined:Sat Aug 16, 2014 3:21 am
-
Location:Rotorua, New Zealand
Hi to all
I managing to burn out the motor on my horizontal bandsaw after being left on it's own to finish a cut on an aluminium extrusion and the blade getting stuck as the cut was about to finish.
SO time for a new motor.
Also decided that since I was at it I would build a new drive belt guard for it rather than the floppy plastic one. (Another chance to practice my aluminium fabrication skills).


The 'triangle' in the bolted on cover plate is due to all of the sheet being used being scrap that was scrounged from a local fabricator's that also does cnc waterjet cutting. That piece ended up needing a hole that needed filling.


I had made the trolley a while ago with the height of it organised to match the welding table in the third picture and the table with the red and yellow drawers in the first photo. It also rolls back in to the space between the green and white chest of drawers and the table with the red and yellow drawers when finished with.
Regards
Ralph
I managing to burn out the motor on my horizontal bandsaw after being left on it's own to finish a cut on an aluminium extrusion and the blade getting stuck as the cut was about to finish.
SO time for a new motor.
Also decided that since I was at it I would build a new drive belt guard for it rather than the floppy plastic one. (Another chance to practice my aluminium fabrication skills).
The 'triangle' in the bolted on cover plate is due to all of the sheet being used being scrap that was scrounged from a local fabricator's that also does cnc waterjet cutting. That piece ended up needing a hole that needed filling.
I had made the trolley a while ago with the height of it organised to match the welding table in the third picture and the table with the red and yellow drawers in the first photo. It also rolls back in to the space between the green and white chest of drawers and the table with the red and yellow drawers when finished with.
Regards
Ralph
Last edited by Metal_pig2001 on Sun Jan 10, 2016 5:12 am, edited 1 time in total.
- Metal_pig2001
-
Active Member
-
Posts:
-
Joined:Sat Aug 16, 2014 3:21 am
-
Location:Rotorua, New Zealand
Hi to all
finally getting to post this bit of work that was done in time for Christmas. The pergola over our deck needed a refurbishment and I managed to get some aluminium extrusions (rectangular, 100x25mm 2.5 & 3.0 wall thickness).

Doing this also gave me a chance to replace the guttering that had been twisted out of shape by the way that the pergola had originally been constructed. Annoyed me for a while but finally got the materials and the equipment to do something about it with now having AC capability welding equipment and once again another project to learn on.
And yes there are now actually 10 screws of various lengths holding the flat extrusion to the fascia board. The other end of the aluminium extrusion has some more flat extrusion welded to the lower side where it rests on the of the 100x100mm timber and held down with another 4 50mm screws so it is not going anywhere in a hurry.
The cut out section under the guttering has some 3mm flat wrapping round the cut surface and welded in place as well as the rounded end finishing on the outside end.
The extrusions at each end of the deck are doubled up i.e. two extrusions welded side by side to help deal with any side loading from the clothesline line 'cable' being used to help support the vegetation.
One hassle with using this particular extrusion was the clear coat that is on it that needed to be dealt with prior to attempting to weld it. Hence the variation in the finish in some areas.


In case anyone is curious the vegetation growing on it stayed in place while I did the replacement and consists of Wisteria, Clematis and Cocktail Kiwifruit all of which are deciduous so minimal shading during the winter.
Regards
Ralph
finally getting to post this bit of work that was done in time for Christmas. The pergola over our deck needed a refurbishment and I managed to get some aluminium extrusions (rectangular, 100x25mm 2.5 & 3.0 wall thickness).
Doing this also gave me a chance to replace the guttering that had been twisted out of shape by the way that the pergola had originally been constructed. Annoyed me for a while but finally got the materials and the equipment to do something about it with now having AC capability welding equipment and once again another project to learn on.
And yes there are now actually 10 screws of various lengths holding the flat extrusion to the fascia board. The other end of the aluminium extrusion has some more flat extrusion welded to the lower side where it rests on the of the 100x100mm timber and held down with another 4 50mm screws so it is not going anywhere in a hurry.
The cut out section under the guttering has some 3mm flat wrapping round the cut surface and welded in place as well as the rounded end finishing on the outside end.
The extrusions at each end of the deck are doubled up i.e. two extrusions welded side by side to help deal with any side loading from the clothesline line 'cable' being used to help support the vegetation.
One hassle with using this particular extrusion was the clear coat that is on it that needed to be dealt with prior to attempting to weld it. Hence the variation in the finish in some areas.
In case anyone is curious the vegetation growing on it stayed in place while I did the replacement and consists of Wisteria, Clematis and Cocktail Kiwifruit all of which are deciduous so minimal shading during the winter.
Regards
Ralph
Hollywood1
- Hollywood1
-
Ace
-
Posts:
-
Joined:Mon Feb 23, 2015 9:05 am
-
Location:Washington
First practical aluminum welding on the racecar. I used the stock aluminum bumper to use it to hang the splitter. But it came with a plastic moulding in the middle which upon being removed, left a deep ugly trough. I had a strip made to fit the middle and been trying to learn how to weld thin to thick aluminum with no real success. I managed it well enough that I figured I could make it work. To my surprise, it went fairly well. I know it doesn't look great to you guys but I'm super stoked. The bumper is 30 years old, coated in some crap to prevent oxidation, some really hard enamel or something. I ground it off but it's hard to tell if you're through it or if it's just scuffed up, being clear. In places i didn't get all of it and you could see the heat go all around it and the puddle would blacken. Also the bumper varies in thickness from around 1/8 to almost 1/2 in places for various brackets and reinforcements. But I managed to work around it all and in the end got the best of it. I thought about doing a pass over the welds to re-melt them and make them look more uniform but I want it to show my suffering.


This is the car by the way:

This is the car by the way:
- MosquitoMoto
-
Weldmonger
-
Posts:
-
Joined:Sat Aug 01, 2015 8:38 am
-
Location:The Land Down Under
Well done BigD!
I think perhaps you and I are at similar stages with our welding. We can do 'functional', we just have a little way to go on 'pretty'.
Love the car, by the way.
Kym
I think perhaps you and I are at similar stages with our welding. We can do 'functional', we just have a little way to go on 'pretty'.
Love the car, by the way.
Kym
duckhunter27
- duckhunter27
-
New Member

-
Posts:
-
Joined:Tue Jan 05, 2016 9:18 pm
Not really a welded project . But its a knife made from a railroad spike. Heated with a rose bud and forged , then heat treated. And semi polished .
- Attachments
-
- 20150629_145237.jpg (25.81 KiB) Viewed 1908 times
Thanks Kym!MosquitoMoto wrote:Well done BigD!
I think perhaps you and I are at similar stages with our welding. We can do 'functional', we just have a little way to go on 'pretty'.
Love the car, by the way.
Kym
Yeah the skills required to do it well in the real world aren't the same as what you need to do it on a work bench with known materials and convenient setup. Figuring out how to operate out of position, adapting on the fly to changes or problems... But there's only one way to learn it. I'm just happy I'm at the point now where I feel I can at least get the job done, esp for my cage in terms of safety
- Skylineauto
-
Workhorse
-
Posts:
-
Joined:Mon Aug 10, 2015 9:45 am
Because of the nature of my business I get a lot of broken bolts in exhaust manifolds and other engine parts. Over the years I have tried just about every nut and bolt extractor money could buy. More often than not I end up burning out a drill bit out of frustration or when it does drill my hole is not straight. So after much trial and error I have come up with this method that has done well for me. When I was a heavy duty mechanic we used unicrom rods from Arctec. worked awesome at getting broken bolts out. Any way, I never had great success with using tig rod. my welds would always break. so I started to use the unicrom. I break off the coating and weld away.
- Attachments
-
- image4.JPG (73.57 KiB) Viewed 2005 times
-
- image2.JPG (42.29 KiB) Viewed 2005 times
-
- image1.JPG (54.3 KiB) Viewed 2005 times
Sorry for the lazy question but what makes these special?
- Skylineauto
-
Workhorse
-
Posts:
-
Joined:Mon Aug 10, 2015 9:45 am
Im not a welder, I'm just a mechanic that can weld. Quick search of their site rates the rod at 120,000 psi. From what I remember most steel rods are in the 80,000 psi. I do know they have a high chromium content.BigD wrote:Sorry for the lazy question but what makes these special?
Return to “Tig Welding - Tig Welding Aluminum - Tig Welding Techniques - Aluminum Tig Welding”
Jump to
- Introductions & How to Use the Forum
- ↳ Welcome!
- ↳ Member Introductions
- ↳ How to Use the Forum
- ↳ Moderator Applications
- Welding Discussion
- ↳ Metal Cutting
- ↳ Tig Welding - Tig Welding Aluminum - Tig Welding Techniques - Aluminum Tig Welding
- ↳ Mig and Flux Core - gas metal arc welding & flux cored arc welding
- ↳ Stick Welding/Arc Welding - Shielded Metal Arc Welding
- ↳ Welding Forum General Shop Talk
- ↳ Welding Certification - Stick/Arc Welding, Tig Welding, Mig Welding Certification tests - Welding Tests of all kinds
- ↳ Welding Projects - Welding project Ideas - Welding project plans
- ↳ Product Reviews
- ↳ Fuel Gas Heating
- Welding Tips & Tricks
- ↳ Video Discussion
- ↳ Wish List
- Announcements & Feedback
- ↳ Forum News
- ↳ Suggestions, Feedback and Support
- Welding Marketplace
- ↳ Welding Jobs - Industrial Welding Jobs - Pipe Welding Jobs - Tig Welding Jobs
- ↳ Classifieds - Buy, Sell, Trade Used Welding Equipment
- Welding Resources
- ↳ Tradeshows, Seminars and Events
- ↳ The Welding Library
- ↳ Education Opportunities