Tig welding tips, questions, equipment, applications, instructions, techniques, tig welding machines, troubleshooting tig welding process
clayton47
  • Posts:
  • Joined:
    Sun Sep 14, 2014 1:15 pm
  • Location:
    Conroe Texas

I have been searching the internet high and low for anything that can be causing my problem. I have had no luck!

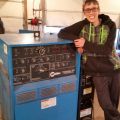
I have some 6063 square tubing, and some 5052 plate. I have been getting seat time on some of those two types of material I have laying around. I have very little experience welding aluminum but it will be my main focus. Just got a new Miller 280 DX, fired it up with the "pro" settings it has 75 on AC balance, 120 on AC Frequency, and the plate is super thin .63 so I have had it at 75 amperage, and the square tubing is 1/8th" thick and I have had it at 120 amperage.

I have two types of filler, the common 4043, and some 5356.

I cannot get the 4043 to do a clean puddle. It has silver specs, (not black) in the puddle and is very foggy. My understanding is it's supposed to be the shiny bead of filler rods.

The 5356 seems to weld just fine to me.

The tubing was cut with a cutting fluid and saw from the metal market. I blew off with air hose any loose shavings. Wiped it down with acetone. Some tests I wired brushed it with a stainless brush that is dedicated to alu. Sometimes I tested with out brushing it.

I clean my tungsten and sharpen with a dedicated belt sander, or a diamond wheel for sharpening chainsaws. Both have never touched anything but the tungsten. I sharpen with the tungsten pointing against the direction of rotation. I then wipe down with acetone. I have also ground a fresh one and wiped with clean cloth and no acetone. Also wipe down filler rod with acetone.

I did find some torch air leaks at the back of the cap. Changed out the collet, and collet body, and back cap. Using a number 7 and tried a 6 cup.

I have swapped out a fresh bottle of Argon gas. Ran my cfh from 10 - 40 trying every spectrum in between. I read on Welding Tips and Tricks part 2 to run 12-15.

I have grounded directly to my material to rule out a ground issue.

Given my lack of knowledge and experience from what you see in the pics what does it look like it could be? The tubing welds looked way better than the thin plate.

top two welds are 5356 - bottom is 4043
Image

I believe this is all 4043 with the balance turned down to 50 and other misc settings. you can see I am searching. to much heat, to little...
Image

Here is the plate, top bead with 5356, the bottom 4043
Image

this is just a picture of my table incase its a factor. But on the plate picture above it was sandwiched between my ground clamp and table.
Image

here is a pic of carbon steel I ground the mill scale back with wire wheel on grinder. Leaves black soot at the end of the weld. I left the torch over the weld to cover the weld with gas. Shouldn't be doing that either right?
Image

Any help would be great on something else to try, or troubleshoot!
User avatar
  • Posts:
  • Joined:
    Fri Apr 01, 2011 10:59 pm
  • Location:
    Australia; Victoria

Hey,

Try giving the filler rod a rub with scotch brite and acetone. Filler oxidisation causes alot more trouble than people think.

Mick
User avatar
  • Posts:
  • Joined:
    Fri Apr 01, 2011 10:59 pm
  • Location:
    Australia; Victoria

PS, those beads look a heap better than some people will ever get, even if you arnt happy.

Mick
User avatar
  • Posts:
  • Joined:
    Tue Jul 01, 2014 4:34 am
  • Location:
    Skiatook, Oklahoma

I thought they looked great also.

Sent from my SM-G900R4 using Tapatalk
noddybrian
  • Posts:
  • Joined:
    Thu Jan 24, 2013 12:13 pm

For limited aluminum experience I'd say you were doing really well - don't judge your weld against perfection created by a welder that welds aluminum all day everyday !

Observations on bead appearance ( & I don't do enough to be happy with my own ! ) - all your settings sound about right or at least in the ball park but a couple of small points may hold the key - 1st if your not dipping the tungsten on a regular basis I'd guess the arc length is a bit long - it needs to be so close that as you add filler the puddle will grow & touch the tungsten if you don't pull back - watch the guru - he holds the tightest arc possible till the puddle forms - then add filler while backing up with the torch - then take the filler rod out & advance - it's quite different from steel / stainless where you can leave the rod in - 2nd - the cleaned zone looks bigger than needed on clean material - too much electrode positive will tend to etch the weld surface as well as the parent metal causing hazing - try less positive - every machine is a bit different so where we tend to hear use 60 > 70% you need to experiment - use the minimum cleaning action needed for the material - 3rd & I think maybe your problem is you need the filler rod well away from the heat of the torch so it does'nt melt or ball prior to dabbing in the puddle yet must remain within the gas cover - this seems at first very difficult ! - is you allow the filler to melt on or just before the edge of the puddle it will look very much like some of your pictures - the filler was sort of overheated & dripped onto the parent metal which was not quite hot enough to take the filler into the puddle hence the tall arched profile ( please don't take offense at this - I could be wrong & I still do it on tube joints if not paying attention ! ) - all I can say is practice & close attention to rod / torch angle is the key - also using larger filler rod helps at least till you get more practice.

Hope that helps some & good luck with your new machine ( not jealous at all ! )
clayton47
  • Posts:
  • Joined:
    Sun Sep 14, 2014 1:15 pm
  • Location:
    Conroe Texas

noddybrian wrote:For limited aluminum experience I'd say you were doing really well - don't judge your weld against perfection created by a welder that welds aluminum all day everyday !

Observations on bead appearance ( & I don't do enough to be happy with my own ! ) - all your settings sound about right or at least in the ball park but a couple of small points may hold the key - 1st if your not dipping the tungsten on a regular basis I'd guess the arc length is a bit long - it needs to be so close that as you add filler the puddle will grow & touch the tungsten if you don't pull back - watch the guru - he holds the tightest arc possible till the puddle forms - then add filler while backing up with the torch - then take the filler rod out & advance - it's quite different from steel / stainless where you can leave the rod in - 2nd - the cleaned zone looks bigger than needed on clean material - too much electrode positive will tend to etch the weld surface as well as the parent metal causing hazing - try less positive - every machine is a bit different so where we tend to hear use 60 > 70% you need to experiment - use the minimum cleaning action needed for the material - 3rd & I think maybe your problem is you need the filler rod well away from the heat of the torch so it does'nt melt or ball prior to dabbing in the puddle yet must remain within the gas cover - this seems at first very difficult ! - is you allow the filler to melt on or just before the edge of the puddle it will look very much like some of your pictures - the filler was sort of overheated & dripped onto the parent metal which was not quite hot enough to take the filler into the puddle hence the tall arched profile ( please don't take offense at this - I could be wrong & I still do it on tube joints if not paying attention ! ) - all I can say is practice & close attention to rod / torch angle is the key - also using larger filler rod helps at least till you get more practice.

Hope that helps some & good luck with your new machine ( not jealous at all ! )
Thank you all for the compliments. I can say that I try to be a perfectionist, so my OCD with having aesthetic looking welds is definitely a goal I am striving for. There are so many talented welders out there that make some killer looking stuff! I'm just trying to chase them!

No offense taken. I can take criticism all day long. I am not a professional. The work I am doing is a very limited niche anyways, aside of personal projects I am always tinkering with. I HAVE A LOT TO LEARN!

I think you are correct with the filler rod melting before it actually touches the puddle. I would see the 4043 do that, and immediately it looks like I could see crap floating in the puddle.

I know that some passes my tungsten was further away that it should be, and others I held it so close that I did dip a few times. I am pulling back away a bit when filling rod. But must need to pay attention a bit more to torch angle. I do try very hard to focus on all those things. We all know they take a bit of time to perfect. And that is just on a flat surface. Welding around some tubing steps the challenge up a bit more with keeping torch angle to the surface proper!

I did play with the cleaning settings changing it from 75-70. And I did several passes at around 50-55.

I am going to put some more beads down and really focus on arc length and pulling the torch back when filling the rod. I am also going to wipe down with scotchbrite and acetone my filler rod. I picked some up and could still see spots of crap on the filler rod after wiping down with acetone on a cloth!

Thank you very much for the advice, I will follow back up with my results.
clayton47
  • Posts:
  • Joined:
    Sun Sep 14, 2014 1:15 pm
  • Location:
    Conroe Texas

Here are some pics of a few passes this morning.

Balance is set to 65 Freq 120, Amp 110 - material is 1/8th thick 6063 square tubing

Bottom two settings were before I checked my machine's user settings. The base setting for my tungsten size was not set to 3/32 and thats what I am using. So I fixed that. And I also tried the Square wave, with 150 Freq - I REALLY LIKE THAT! The third bead from the bottom is that setting.

I immediately put the machine back to soft wave, and 120 Freq, and continued the top three beads. (since those are the settings I have been doing)

I included a picture of my tungsten in the cup. Seemed like the welds have improved some, but still need some technique work.

Oh, I did scotchbrite my filler rod, then wiped down with acetone.

Image

Image

Image
User avatar
  • Posts:
  • Joined:
    Sun Jan 27, 2013 6:23 am
  • Location:
    Finland

Not bad beads at all!

Just couple of thoughts that came my mind.
- Change your collet body to gas lens. Works far better.
- Your tungsten should ALWAYS stay bright when post flow is long enough. Usually 10 seconds is enough for anything (any amps). If your tungsten still get some colour, then you know that you have a gas leak somewhere in your system.

It's good thing to keep in mind that aluminium is hygroscopic. It likes to suck all kind of inpurities, moisture etc. itself and therefore loosing some of it properties like strength.
-Markus-
User avatar
  • Posts:
  • Joined:
    Thu Jan 06, 2011 11:40 pm
  • Location:
    Near New Orleans

Markus is dead-on about the hygrosopic nature of aluminum; It will absorb anything, including moisture, oils, and other organics.

I disagree with him on "gas lens"... Aluminum that has absorbed contaminants may "puke" on your tungsten, and this will tend to clog the screen of a gas lens. For this reason I prefer a simple collet-body and it's appropriate cup. This is a "personal preference" thing, and entirely up to you.

I tend to agree, the welds you show have few, if any, problems, so you're to the point of deciding little details to improve your work.

Steve S
User avatar
  • Posts:
  • Joined:
    Thu Jan 06, 2011 11:40 pm
  • Location:
    Near New Orleans

I also think you may need more post-flow....

My tungsten is always silver-shiny when I complete a weld (correctly :roll: )... That blue color suggests the tunsten is still hot when the post-flow stops.

Steve S
Tassie Dave
  • Posts:
  • Joined:
    Wed Sep 03, 2014 2:04 am
  • Location:
    Tasmania

I also thank people for their inputs on this subject. I have also just started to weld Aluminium and its a new game i must admit.
Otto you and a few others seem to be Gurus on this subject so cheers guy's for all the help.
My Welds look similar with a slight discolouration when finished and also the crater in the finish, i did try slowing down the take away and dropping the amps but still got a small one. Grrr ( :x ) . All the help given greatly appreciated.
I have an
Esab LHQ 150
Pro Weld TC256 ACDC multi process Tig Cut MMA
WeldSmart Mig 200IGBT Mig Tig MMA and spool gun

User avatar
  • Posts:
  • Joined:
    Thu Jan 06, 2011 11:40 pm
  • Location:
    Near New Orleans

Tassie Dave,

The answer to the "crater" is fairly simple...

As you tail off, and see the crater forming, hit the pedal again, and feed some more rod, to fill (maybe slightly overfill) that crater, and then tail off again.

Steve S
clayton47
  • Posts:
  • Joined:
    Sun Sep 14, 2014 1:15 pm
  • Location:
    Conroe Texas

You know whats weird, some times its purple, sometimes, gold, sometimes silver. Seems the lower amperage it doesn't get as hot. And soon as I lay a bead on the 1/8th material and bump up the amperage it changes colors. Is it possible for it to go back to silver after its been purple already on it own with out re-grinding? I swear it changed on me a time or two on it own.

Its funny Markus recommended the gas lens, I tested one yesterday. And this morning after posting those pics, I went and picked up a size 7 gas lens and just tested a few beads. I have seen a few other people using standard collet body in their torch and seem to be just fine. I agree with it being a "personal preference" with my limited experience and knowledge. I did not notice any improvement in my weld.

I did mention early on that there was a leak in my torch, I believe that has been resolved from the sound of my torch. But I do question that there may still be an issue somewhere being the color of the tungsten is purple at times. *NOTE - I walked over to my machine while writing this, my post flow was at 5. I put it to 10.

The one thing that gets me is how stinking fluid like the 4043 is and I cannot get much better of a puddle (compared to the 5356 rod). I am about to go put some more beads down and play with my torch angle, arc length, and the way I fill the puddle with the rod. I am surely struggling. And I cannot seem to get as good of a puddle on the thin material I have .63 5052. It looks like crap. So-so with the 5356 rod on it. I will post some pictures of that in a bit.

Thanks again to all that are helping me dial in technique and trouble shoot my problems!
User avatar
  • Posts:
  • Joined:
    Thu Jan 06, 2011 11:40 pm
  • Location:
    Near New Orleans

clayton47,

It's just "time", and if you're willing to spend it, we'll help sort it out.

Steve S
Drifta-X
  • Posts:
  • Joined:
    Mon May 26, 2014 2:53 am
  • Location:
    Melbourne Australia

Stick with using square wave instead of sine wave.
Sine wave was the old transformer type thing and square wave the newer inverter thing.
Well more or less.
U won't see many people weld with sine wave for ally if they can choose square wave.
I have a soldering iron!
clayton47
  • Posts:
  • Joined:
    Sun Sep 14, 2014 1:15 pm
  • Location:
    Conroe Texas

Ahhh righton. Its set on square wave now. Balance 60 Freq 200 amperage 110 for the 1/8th material.

Forgive me for not letting the initial puddle "clean" enough and when I went to add filler it doo doo'd up on me. The last pass I made sure I waited longer. (working on building up the end so it doesn't have a crater)

Top two are 5356, bottom two are 4043.
Image

This is the .63 5052 plate. Top bead is 5356, bottom two 4043
Image
kiwi2wheels
  • Posts:
  • Joined:
    Sun Feb 17, 2013 10:27 am

For what it's worth, I've seen a lot of parts ( pressings and machined pieces ) in Europe welded with 4043 that have the surface appearance the OP is questioning. And these are welded by guys who are full time welder /fabricators.

I'm wondering if it's in the rods, as here the 5356 also finishes clean. It would be interesting to see if rods with manufacturer certification of origin would be any different.

Edit . I just looked at the photo of the cup and the aluminum specks on the inside. Just a thought, try a new cup or clean that one and see if there is any difference.

Anyone with a transformer machine getting the same surface ?
Last edited by kiwi2wheels on Mon Sep 15, 2014 5:47 pm, edited 1 time in total.
Tassie Dave
  • Posts:
  • Joined:
    Wed Sep 03, 2014 2:04 am
  • Location:
    Tasmania

Hi Steve.
Thanks for that bit of advice mate. You seem to be very well informed mate, any advice greatly received.
I have an
Esab LHQ 150
Pro Weld TC256 ACDC multi process Tig Cut MMA
WeldSmart Mig 200IGBT Mig Tig MMA and spool gun

clayton47
  • Posts:
  • Joined:
    Sun Sep 14, 2014 1:15 pm
  • Location:
    Conroe Texas

kiwi2wheels wrote:For what it's worth, I've seen a lot of parts ( pressings and machined pieces ) in Europe welded with 4043 that have the surface appearance the OP is questioning. And these are welded by guys who are full time welder /fabricators.

I'm wondering if it's in the rods, as here the 5356 also finishes clean. It would be interesting to see if rods with manufacturer certification of origin would be any different.
What about the base metal I am welding? Does 6063, and 5052 have any issues specifically with the 4043?
User avatar
  • Posts:
  • Joined:
    Sat Jul 06, 2013 11:16 am
  • Location:
    Near Pittsburgh,Pennsylvania. Steel Buckle of the Rust Belt

Yes, I too get it with my old Dialarc HF and usually I have to lower my amps a little and it gets shiny, never as shiny as 5356.

Len


Sent from my iPhone using Tapatalk
Now go melt something.
Instagram @lenny_gforce

Len
User avatar
  • Posts:
  • Joined:
    Tue Sep 02, 2014 9:38 pm
  • Location:
    Toledo, Ohio

For the crater problem, let off the pedal really slow until you have about half the amperage you were running and wait for the puddle to get really small and then continue to let off slow. You may or may not have to add filler. The purple oxidation should not have to be re sharpened, if it get gray you should resharpen and to prevent it as others have mentioned just increase your post flow. The grainy appearance of the 4043 bead, I too have see this and never paid it much mind. I sat down today to try and replicate it and the AC went to hell on the Lincoln V310T I was using (it's no wonder the don't make it any more...) and never did get time to set up another machine. I'll try again tomorrow. As for the 4043 puddle being more fluid I'm not sure but my guess would be more Si in the filler.
Learn 6010 and you will learn to weld
Follow the progress of my students on Twitter @PentaWelding
User avatar
  • Posts:
  • Joined:
    Sun Oct 27, 2013 10:57 pm
  • Location:
    Big Lake/Monticello MN, U.S.A.

Markus wrote:Not bad beads at all!

Just couple of thoughts that came my mind.
- Change your collet body to gas lens. Works far better.
- Your tungsten should ALWAYS stay bright when post flow is long enough. Usually 10 seconds is enough for anything (any amps). If your tungsten still get some colour, then you know that you have a gas leak somewhere in your system.

It's good thing to keep in mind that aluminium is hygroscopic. It likes to suck all kind of inpurities, moisture etc. itself and therefore loosing some of it properties like strength.
I have to admit, chemistry is still not my best subject - could you elaborate on aluminum being hygroscopic please?

I tried to look it up since I had not learned that, but had no luck.

I do know the flux coating on the brand of aluminum SMAW rods I have is hygroscopic - does that count? :)
Dave J.

Beware of false knowledge; it is more dangerous than ignorance. ~George Bernard Shaw~

Syncro 350
Invertec v250-s
Thermal Arc 161 and 300
MM210
Dialarc
Tried being normal once, didn't take....I think it was a Tuesday.
User avatar
  • Posts:
  • Joined:
    Thu Jan 06, 2011 11:40 pm
  • Location:
    Near New Orleans

"Hygroscopic" means "will absorb moisture/humidity"... A Hygrometer is a humidity gauge.

The short form, is that the grain structure of aluminum allows room for the absorption of fairly large molecules, including H2O, and the term, "hygrosopic", means it tends to attract such molecules to fill unoccupied spaces in it's structure.

I tend to use the term a bit more generically, for a grain structure that will absorb any common molecule, including hydrocarbons and organic solvents.

This is what makes the cleaning of aluminum challenging. New metal has few issues. I usually weld on 50xx or 60xx that's been in service (on the road, beat to hell) for 20 years.

Steve S
User avatar
  • Posts:
  • Joined:
    Sun Oct 27, 2013 10:57 pm
  • Location:
    Big Lake/Monticello MN, U.S.A.

Hey thanks for the response Steve - I did know the term hygroscopic actually, but what I had not learned was about aluminum absorbing water.

I believe this is the first I've been exposed to the topic - are there reading resources that you know of where I could do further research? I think this would make for a good educational topic at my school for the science teacher's class.

If would be a mixture of science, shop, and math (Cross curricular) but reduced in complexity for high school.
Dave J.

Beware of false knowledge; it is more dangerous than ignorance. ~George Bernard Shaw~

Syncro 350
Invertec v250-s
Thermal Arc 161 and 300
MM210
Dialarc
Tried being normal once, didn't take....I think it was a Tuesday.
User avatar
  • Posts:
  • Joined:
    Thu Jan 06, 2011 11:40 pm
  • Location:
    Near New Orleans

Dave, even steel will take on water (Braehill will attest to that).

However, I'll have to do as much google as you to source it.

I will do so, because I'm now interested in the physics behind it, and maybe Len can comment with some sources.

Steve S
Post Reply