
As the title says -- can a successful TIG weld be made to a fully hardened 2" ball bearing? The box says the bearing is "Grade 40 Chrome Steel." I'm guessing it is typical bearing steel, 51200 (?).
If not TIG welding, then can anyone suggest another method that might work? I need to attach a short (1/2" long) piece of 3/8" rod to the ball.
Tig welding tips, questions, equipment, applications, instructions, techniques, tig welding machines, troubleshooting tig welding process

- Otto Nobedder
-
Weldmonger

-
Posts:
-
Joined:Thu Jan 06, 2011 11:40 pm
-
Location:Near New Orleans
Yes, it can be done, with little fuss.
You'll change the hardness of the ball, of course, but I doubt that's your biggest concern.
Wait... I was answering that as if it were a 2" bearing ball, not a 2" "ball bearing assembly". The latter takes more care, not from the heat so much as the distortion affecting the bearing race, and the precision of the rotation.
Some clarification might be in order.
Steve S

- weldin mike 27
-
Weldmonger
-
Posts:
-
Joined:Fri Apr 01, 2011 10:59 pm
-
Location:Australia; Victoria
Hey mate,
Welcome to the game. Glad to have you here.
As for your question, it all depends on the use of your bearing. It is entirely possible to weld the bearing, but the resulting weld may be very hard, and crack, maybey even straight away. A usefull process for joining hard to weld metals is tig brazing using silicon bronze. The steel isnt actually melted, so hardness of the weld deposit is not a problem. However, it may not be as strong as a weld, and the overall hardness of the bearing may be lessened.
Another way is brazing or silver soldering with oxy acetylene.
Good luck.
noddybrian
- noddybrian
-
Weldmonger
-
Posts:
-
Joined:Thu Jan 24, 2013 12:13 pm
Aside from the obvious heat treatment issue then both balls & races do weld to a degree - the results unless slow cooled will be extremely brittle - some filler rod works better than others - as Mike says - braze bonds well with it - or in the past I have used an alloy that Esab sold as "almat" - there was more than one number of this - but it's essentially 309 in normal speak - this should take to the ball & the dissimilar rod piece OK - if this is non load bearing such as when Kevin Caron makes sculptures with balls it maybe worth watching his video's on a few - he's a helpful guy & will normally answer any related questions direct off the Utube page - he has done several large pieces that look a bit like molecular models with big ball bearings.
Thanks for the help! To answer a question raised, it is a 2" ball, not a bearing assembly.
To reduce the brittleness of the weld, how much would preheating to 500 degrees help?
I am interested in the silicon bronze route, but have never worked with it. Can anyone point me to some information on technique? I don't have O/A available, so I would have to use the forge to do the silver solder -- again something I've not tried before, and I am leary of over-heating.
The application is for a "Newton's Cradle" that I am helping a friend to build. He had already purchased the balls, so choice of material is not negotiable. The balls don't have to stay at full hardness, but retaining some hardness is desirable.
Thanks again for suggestions, tips, etc.!
noddybrian
- noddybrian
-
Weldmonger
-
Posts:
-
Joined:Thu Jan 24, 2013 12:13 pm
I think the least heat you can put in the better as for this to work well the balls need to stay as hard as possible -as strength is not a concern only needing to hang their own weight either try a fast autogenous weld on one & test the results or if you want to try bronze I think it should work - but I don't use it myself - only real advice is approach it as you would regular Tig weld but you heat the base metal until hot enough to take a dab of bronze - try not to get the arc directly on the filler rod as it tends to vaporize most of the zinc out of it - it's also important to have good gas cover while adding filler rod - a large diameter cup / gas lens will help - if you want to see it done both our own Guru / Wyatt & lanse have videos on You Tube.
- weldin mike 27
-
Weldmonger
-
Posts:
-
Joined:Fri Apr 01, 2011 10:59 pm
-
Location:Australia; Victoria
noddybrian
- noddybrian
-
Weldmonger
-
Posts:
-
Joined:Thu Jan 24, 2013 12:13 pm
Sorry - Wyatt Swain - it's "Mr Tigs " given name - despite his well known annoying habits he does provide some good info in some of his video's - I'll try & find the one I meant & post a link later - he did at least one showing good close up detail with that huge pyrex cup he likes on Tig bronze - also Lanse ( ChuckE2009 ) did one a while back - I think both these guys are worth watching even if their personality grates at times - naturally our own guru is king though !
Not the video I was remembering - but it shows the process fairly clearly - sorry it's from Wyatt - I'm not trying to promote him - just saying sometimes the guy shows useful stuff ( & he uploads every week for free )
F2_hXQ4ABrg
Not the video I was remembering - but it shows the process fairly clearly - sorry it's from Wyatt - I'm not trying to promote him - just saying sometimes the guy shows useful stuff ( & he uploads every week for free )
F2_hXQ4ABrg
- weldin mike 27
-
Weldmonger
-
Posts:
-
Joined:Fri Apr 01, 2011 10:59 pm
-
Location:Australia; Victoria
ah, thanks for that, i have seen both those guys. Chuck e is certainly very passionate . Mr Tig has done a few videos with Kevin Caron. Mig tig also appeared on Jay Lennos garage in a video that earned them both a scathing review from Josh Weldon of Brown dog welding. The old "dont worry about the truth as long as it sounds good" thing. Ah well As we all say Jody can have my vote anytime.
Mick
Mick
- Otto Nobedder
-
Weldmonger
-
Posts:
-
Joined:Thu Jan 06, 2011 11:40 pm
-
Location:Near New Orleans
awakephd,
I'd like to know more about the design... I'm so used to seeing "Newton's Cradles" done with 3/4" balls hanging from monofilament.
Do you intend for the balls to hang from/swing on rods, two each, mimicing the monofilament layout? A single rod with an upper bearing to limit lateral movement? Or a single short rod to be drilled (/tapped?) for an attach point for thin cables/wires?
Can you post up a sketch?
One thought... The striking faces of a Newton's Cradle on a two-inch diameter ball will be one inch from the centerline/tangent point of your attachment. Rather than pre-heat, jig the ball up to be about half-way submerged in water, and use 309 filler (won't rust and will polish up nicely) and a lot of heat to QUICKLY fuze the rod/eyelet/whatever your attach point is to the ball. The loss of hardness from the intense heat, only in the area of attachment, will be a benefit, as the repeated shocks might crack a weld where the hardness is not broken. The water will serve as a heat-sink at the striking faces, assuring you don't break the hardness there. Once the weld is complete, lift the ball, and watch closely for color. You'll see a bit of a "rainbow" moving down the ball away from the weld as the heat distributes. If/when the color approaches the striking face (Think of this as the "equator", and if the color reaches the tropic of cancer, or capricorn, depending on your hemisphere ) dunk it until cool.
I think this will do what you intend. Did your friend order enough 2" balls for practice and experimentation?
Steve S
I'd like to know more about the design... I'm so used to seeing "Newton's Cradles" done with 3/4" balls hanging from monofilament.
Do you intend for the balls to hang from/swing on rods, two each, mimicing the monofilament layout? A single rod with an upper bearing to limit lateral movement? Or a single short rod to be drilled (/tapped?) for an attach point for thin cables/wires?
Can you post up a sketch?
One thought... The striking faces of a Newton's Cradle on a two-inch diameter ball will be one inch from the centerline/tangent point of your attachment. Rather than pre-heat, jig the ball up to be about half-way submerged in water, and use 309 filler (won't rust and will polish up nicely) and a lot of heat to QUICKLY fuze the rod/eyelet/whatever your attach point is to the ball. The loss of hardness from the intense heat, only in the area of attachment, will be a benefit, as the repeated shocks might crack a weld where the hardness is not broken. The water will serve as a heat-sink at the striking faces, assuring you don't break the hardness there. Once the weld is complete, lift the ball, and watch closely for color. You'll see a bit of a "rainbow" moving down the ball away from the weld as the heat distributes. If/when the color approaches the striking face (Think of this as the "equator", and if the color reaches the tropic of cancer, or capricorn, depending on your hemisphere
I think this will do what you intend. Did your friend order enough 2" balls for practice and experimentation?
Steve S
I like Steve's solution above with the water trick.
But since you have access to a forge, you could anneal (1200f) the balls, drill and tap them and then re heat treat and temper them to just about any hardness you desired. If you coated them with anti-scale compound, there would be very little clean up and you could polish them to a mirror finish if desired.
But since you have access to a forge, you could anneal (1200f) the balls, drill and tap them and then re heat treat and temper them to just about any hardness you desired. If you coated them with anti-scale compound, there would be very little clean up and you could polish them to a mirror finish if desired.
Miller ABP 330, Syncrowave 250, Dynasty 300 DX.
Honorary member of the Fraternity of Faded Tee Shirts.
Honorary member of the Fraternity of Faded Tee Shirts.
Sorry for the long silence -- a little something called work keeps getting in the way of my fun. 
I decided to order some silicon bronze rod and do some experimenting with TIG brazing. The rod has arrived, so hopefully I will get a chance to experiment tomorrow evening after work. Unfortunately my friend only bought 5 balls, so I need to make my mistakes on some scrap before tackling the real thing. Based on the video shown above (thanks, noddybrian), it looks like the process lays down a "bead" of the bronze, rather than wicking bronze into the joint as would happen in regular brazing. Is that correct?
Otto, the only sketch at this point is a back-of-the-napkin sort. However, the design is loosely based on the pictures and stated dimensions of the "giant newton's cradle" on this site: http://www.giantnewtonscradle.com/execu ... ons-cradle
As with the examples shown on that site, we plan to suspend the balls from steel cable. Friday I plan to do a bit of turning on the lathe to create a 1" radius on the bottom of 5 short stainless "pegs." The exact height of the pegs will depend on what I learn from experimenting with the TIG brazing. There will be a 1/8" hole drilled through each peg to accept the steel cable.
If our rendition works satisfactorily, I will post pictures and a sketch.
- Otto Nobedder
-
Weldmonger
-
Posts:
-
Joined:Thu Jan 06, 2011 11:40 pm
-
Location:Near New Orleans
Thanks for the update!
TIG Bronze "should" wick. It's a brazed joint. However, don't expect the 100% penetration you get with sweat-copper or silver-brazing. Much of the strength will come from what I'd best compare to a fillet weld of the bronze to the parent metal.
Having the metal very clean, and using preflow of gas to displace any oxygen will help with wicking and add strength to the joint.
I've seen no discussion of using a brazing flux in the joint for thorough wicking with a TIG braze... Doesn't seem practical, but perhaps someone will comment?
Steve S
Well, best laid plans go awry -- I ordered some silicon bronze rods, but what I received was regular zinc brazing rods. 
Fortunately the seller gave a prompt refund, and I have ordered some more silicon bronze (hopefully correct this time), but in the meantime, my friend wanted to go ahead and complete the project. So I decided to go with welding using some 308L filler that I had on hand.
I made little "hats" to go on each ball -- each hat consisted of a .300" long section of SS rod turned to .400" diameter, with another .100" long section turned to .5" diameter. I drilled a 1/8" hole through in the middle of the .300" section. I radiused the bottom of each hat to fit the 2" radius of the balls.
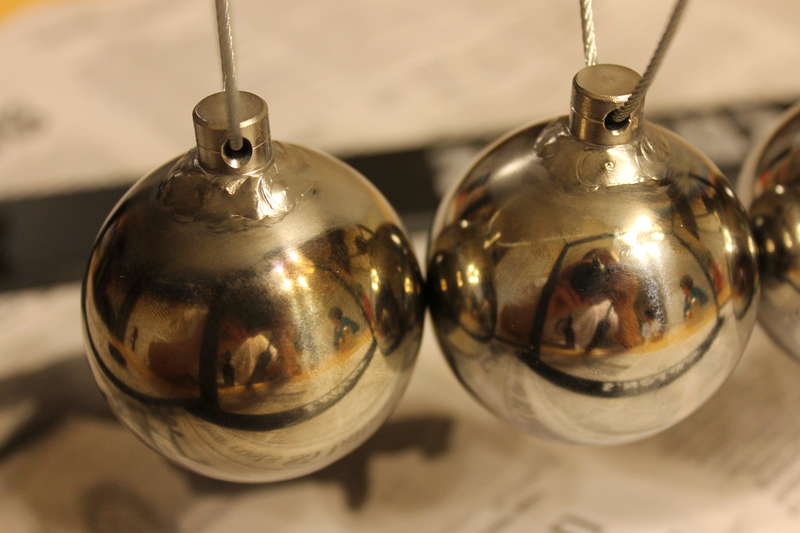
To weld the hat to the ball: I drilled a 1/2" hole through some scrap 1/4" steel plate and used this to set the ball on. Using one of the insect-like hold-downs that Jody featured in a recent video, I held the hat down on the ball. I made a tack on either side, just fusing some of the "hat brim" into the ball. Then I welded all around using 1/16" 308L filler. The results were a long, long way from pristine, but they are serviceable. Here are pictures of the results:
The complete unit: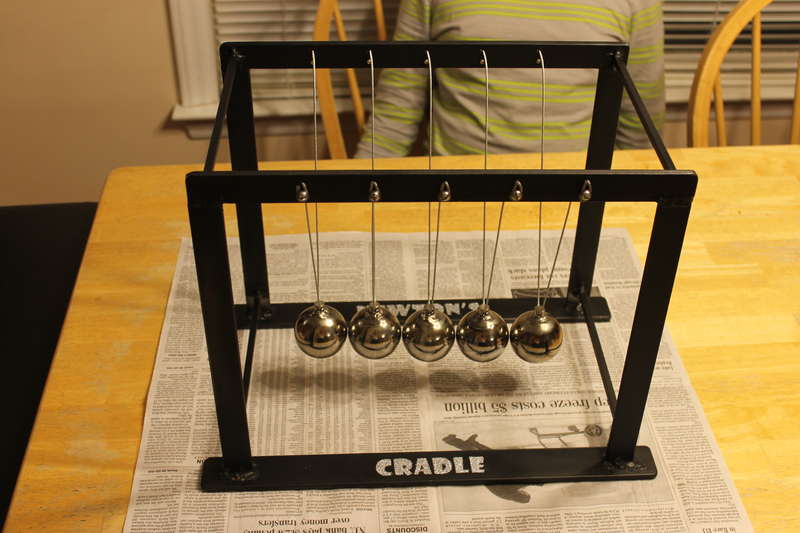
Dimensions are 12" high, 14.5" long, 9" wide. Constructed from 1/4" thick x 1" wide mild steel bar for the uprights and top pieces; 1/4" thick x 1.5" wide mild steel bar for the "feet"; and 1/4" x 1/4" bar for the cross pieces. Welding was done (not very neatly) with 6011 stick -- I was out of argon when we did this part. My friend painted it as shown.
The top pieces were drilled with 5 1/8" diameter holes 1/4" from the top, spaced 2" apart; at the same spacing, but 1/4" from the bottom, they were drilled and tapped for #10-24 screws. The steel wire used to hang the balls was fed through the top hole and looped around a machine screw+washer which was screwed down firmly to hold the wire in place.
Closeup of the system used to hang the balls: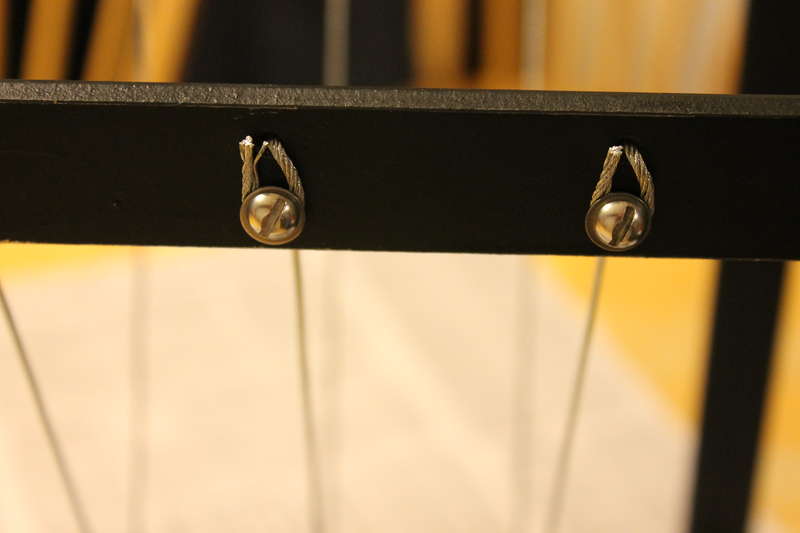
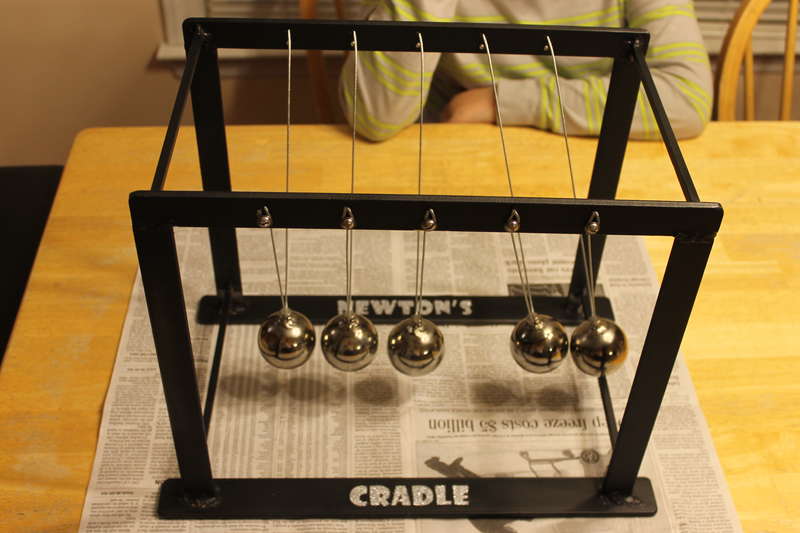
Balls in motion (one ball lifted and let go):
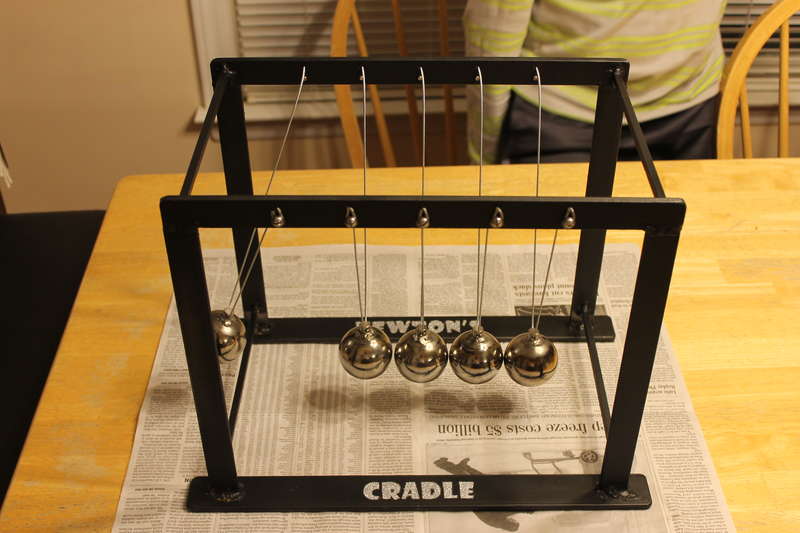
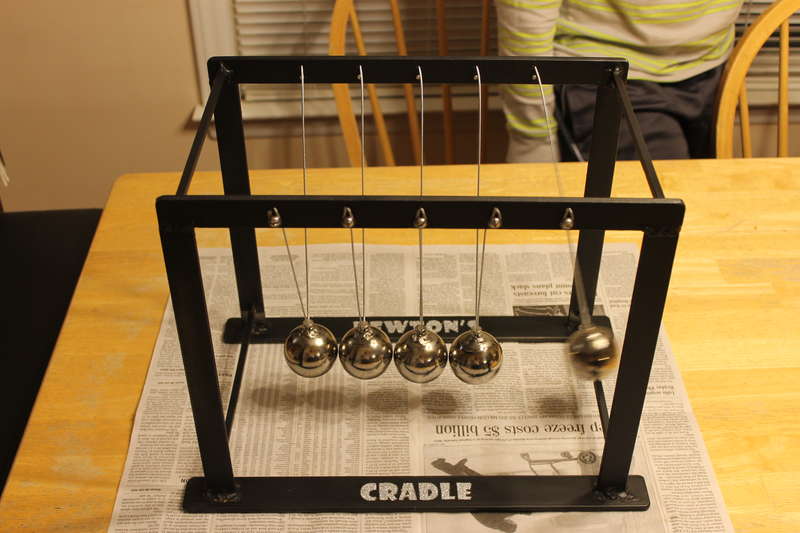
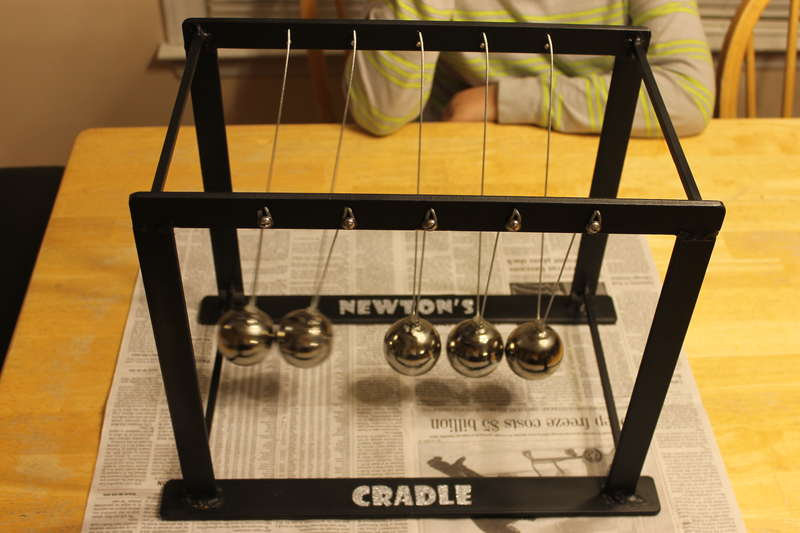
Balls in motion (two balls lifted and let go):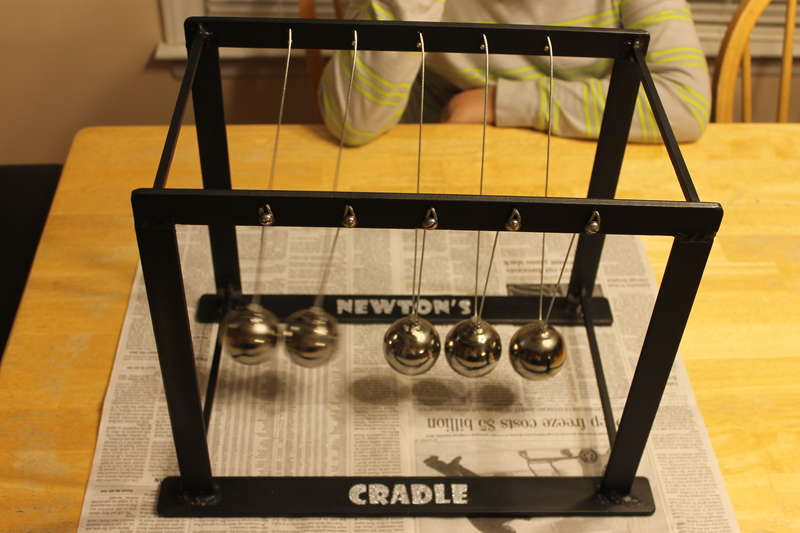
Closeup of the hats welded to the balls. Not very pretty, but it works!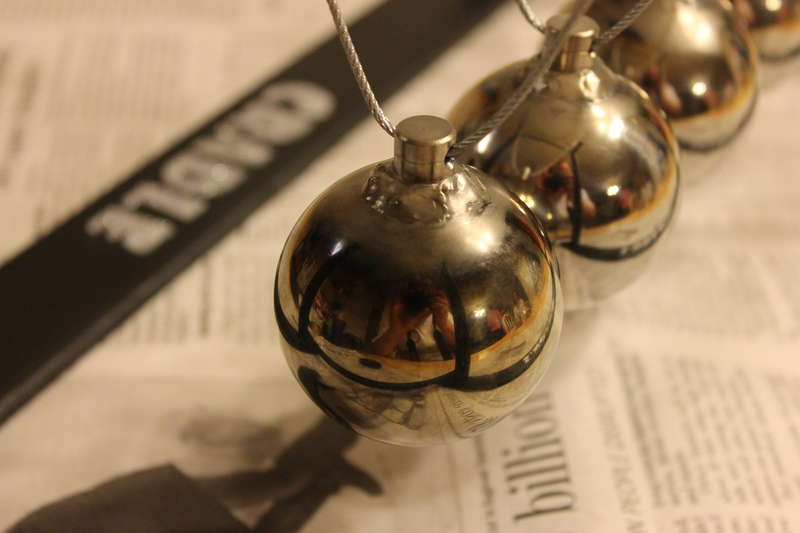
Thanks for the help. My friend and his young son and daughter are delighted with the results!
Fortunately the seller gave a prompt refund, and I have ordered some more silicon bronze (hopefully correct this time), but in the meantime, my friend wanted to go ahead and complete the project. So I decided to go with welding using some 308L filler that I had on hand.
I made little "hats" to go on each ball -- each hat consisted of a .300" long section of SS rod turned to .400" diameter, with another .100" long section turned to .5" diameter. I drilled a 1/8" hole through in the middle of the .300" section. I radiused the bottom of each hat to fit the 2" radius of the balls.
To weld the hat to the ball: I drilled a 1/2" hole through some scrap 1/4" steel plate and used this to set the ball on. Using one of the insect-like hold-downs that Jody featured in a recent video, I held the hat down on the ball. I made a tack on either side, just fusing some of the "hat brim" into the ball. Then I welded all around using 1/16" 308L filler. The results were a long, long way from pristine, but they are serviceable. Here are pictures of the results:
The complete unit:
Dimensions are 12" high, 14.5" long, 9" wide. Constructed from 1/4" thick x 1" wide mild steel bar for the uprights and top pieces; 1/4" thick x 1.5" wide mild steel bar for the "feet"; and 1/4" x 1/4" bar for the cross pieces. Welding was done (not very neatly) with 6011 stick -- I was out of argon when we did this part. My friend painted it as shown.
The top pieces were drilled with 5 1/8" diameter holes 1/4" from the top, spaced 2" apart; at the same spacing, but 1/4" from the bottom, they were drilled and tapped for #10-24 screws. The steel wire used to hang the balls was fed through the top hole and looped around a machine screw+washer which was screwed down firmly to hold the wire in place.
Closeup of the system used to hang the balls:
Balls in motion (one ball lifted and let go):
Balls in motion (two balls lifted and let go):
Closeup of the hats welded to the balls. Not very pretty, but it works!
Thanks for the help. My friend and his young son and daughter are delighted with the results!
- Otto Nobedder
-
Weldmonger
-
Posts:
-
Joined:Thu Jan 06, 2011 11:40 pm
-
Location:Near New Orleans
Don't beat yourself up on those welds at all. The product is the goal, and the result is brilliant!
Steve S
Steve S
Return to “Tig Welding - Tig Welding Aluminum - Tig Welding Techniques - Aluminum Tig Welding”
Jump to
- Introductions & How to Use the Forum
- ↳ Welcome!
- ↳ Member Introductions
- ↳ How to Use the Forum
- ↳ Moderator Applications
- Welding Discussion
- ↳ Metal Cutting
- ↳ Tig Welding - Tig Welding Aluminum - Tig Welding Techniques - Aluminum Tig Welding
- ↳ Mig and Flux Core - gas metal arc welding & flux cored arc welding
- ↳ Stick Welding/Arc Welding - Shielded Metal Arc Welding
- ↳ Welding Forum General Shop Talk
- ↳ Welding Certification - Stick/Arc Welding, Tig Welding, Mig Welding Certification tests - Welding Tests of all kinds
- ↳ Welding Projects - Welding project Ideas - Welding project plans
- ↳ Product Reviews
- ↳ Fuel Gas Heating
- Welding Tips & Tricks
- ↳ Video Discussion
- ↳ Wish List
- Announcements & Feedback
- ↳ Forum News
- ↳ Suggestions, Feedback and Support
- Welding Marketplace
- ↳ Welding Jobs - Industrial Welding Jobs - Pipe Welding Jobs - Tig Welding Jobs
- ↳ Classifieds - Buy, Sell, Trade Used Welding Equipment
- Welding Resources
- ↳ Tradeshows, Seminars and Events
- ↳ The Welding Library
- ↳ Education Opportunities