Tig welding tips, questions, equipment, applications, instructions, techniques, tig welding machines, troubleshooting tig welding process
All the welding that I normally do is "saving the day" for someone. I don't build or make anything. I just repair cracked and broken stuff. Here is a high dollar intake manifold. It's for an Olds, so it's already a pricey item and its's been ported.
- Attachments
-
- Here's the finished job
- final weld olds 1.jpg (68.14 KiB) Viewed 3222 times
-
- The crack cut out. I usually can play my over the suspect area. The black line is the crack. Now that I can see the ends of it I can finish cleaning.
- grooved out.jpg (71.16 KiB) Viewed 3222 times
-
- Here is the original crack. Cracked across the crossover.
- cracked olds.jpg (49.1 KiB) Viewed 3222 times

Just the usual...

Matt A by Zanconato Custom Cycles, on Flickr

Matt A by Zanconato Custom Cycles, on Flickr

Matt A by Zanconato Custom Cycles, on Flickr
Matt A by Zanconato Custom Cycles, on Flickr
Matt A by Zanconato Custom Cycles, on Flickr
Matt A by Zanconato Custom Cycles, on Flickr
Nice work on the manifold and the bike frame. I have welded a bit of both of those in my day as well. We had a customer who used to either buy kits, or design his own, including a recumbent bike that was really funky looking, in a lawn furniture sort of way.
Miller ABP 330, Syncrowave 250, Dynasty 300 DX.
Honorary member of the Fraternity of Faded Tee Shirts.
Honorary member of the Fraternity of Faded Tee Shirts.

- Otto Nobedder
-
Weldmonger

-
Posts:
-
Joined:Thu Jan 06, 2011 11:40 pm
-
Location:Near New Orleans
Spent 16 hours repairing someone else's previous "repairs".
Never seen anyone destroy the base metal attemping a reair weld, but such was the case in several places...
Here's what the base metal for one repair looked like with dye penetrant:
LONG two days...
Steve S
Never seen anyone destroy the base metal attemping a reair weld, but such was the case in several places...
- GEDC1039.JPG (180.36 KiB) Viewed 3080 times
- GEDC1042.JPG (190.38 KiB) Viewed 3080 times
Steve S

- weldin mike 27
-
Weldmonger
-
Posts:
-
Joined:Fri Apr 01, 2011 10:59 pm
-
Location:Australia; Victoria
Steve49suzuki
- Steve49suzuki
-
New Member

-
Posts:
-
Joined:Fri Oct 25, 2013 4:02 pm
Hello im a hobby welder these are some bits I welded for my racebike one is a seat subframe one is a Ti exhaust header I modified and one is a flange. I raced the bike at the manx gp at the isle of man. Nothing broke
- seat subframe
- sub frame 1.jpg (243.15 KiB) Viewed 2968 times
- Attachments
-
- flange
- flange 1.jpg (71.2 KiB) Viewed 2968 times
-
- header
- header 1.png (93.94 KiB) Viewed 2968 times
- Otto Nobedder
-
Weldmonger
-
Posts:
-
Joined:Thu Jan 06, 2011 11:40 pm
-
Location:Near New Orleans
The manifold was 6061-T6, and an unqualified welder attempted to TIG it, using 2% Thoriated, apparently on a transformer machine, too small a diameter, and too much heat. Aluminum should NOT throw sparks as you grind it...weldin mike 27 wrote:Hey,
What caused that?
The base metal was full of tungsten spray.
The easiest solution turned out to be, cutting out the entire affected region (in three places), and adding doublers.
My assumption is there was too litle heat to perform the weld, over too long a time, destoying the properties of the T6, and the tungsten spray. This "repair" was doomed from the start.
Steve S
- weldin mike 27
-
Weldmonger
-
Posts:
-
Joined:Fri Apr 01, 2011 10:59 pm
-
Location:Australia; Victoria
- MinnesotaDave
-
Weldmonger
-
Posts:
-
Joined:Sun Oct 27, 2013 10:57 pm
-
Location:Big Lake/Monticello MN, U.S.A.
Nice job on the repairOtto Nobedder wrote:The manifold was 6061-T6, and an unqualified welder attempted to TIG it, using 2% Thoriated, apparently on a transformer machine, too small a diameter, and too much heat. Aluminum should NOT throw sparks as you grind it...weldin mike 27 wrote:Hey,
What caused that?
The base metal was full of tungsten spray.
The easiest solution turned out to be, cutting out the entire affected region (in three places), and adding doublers.
My assumption is there was too litle heat to perform the weld, over too long a time, destoying the properties of the T6, and the tungsten spray. This "repair" was doomed from the start.
Steve S
Funny you should mention tungsten spray. Never heard it called that.
I just did it on a piece of scrap this weekend. I was checking to see what a 3/32" 2% lanthanated would tolerate on my transformer machine. At 230 amps balanced AC it basically sprayed the end off. Back to 1/8" tungsten! Lol
Dave J.
Beware of false knowledge; it is more dangerous than ignorance. ~George Bernard Shaw~
Syncro 350
Invertec v250-s
Thermal Arc 161 and 300
MM210
Dialarc
Tried being normal once, didn't take....I think it was a Tuesday.
Beware of false knowledge; it is more dangerous than ignorance. ~George Bernard Shaw~
Syncro 350
Invertec v250-s
Thermal Arc 161 and 300
MM210
Dialarc
Tried being normal once, didn't take....I think it was a Tuesday.
Off to paint...

Isaac A by Zanconato Custom Cycles, on Flickr

Isaac A by Zanconato Custom Cycles, on Flickr

Isaac A by Zanconato Custom Cycles, on Flickr
Isaac A by Zanconato Custom Cycles, on Flickr
Isaac A by Zanconato Custom Cycles, on Flickr
Isaac A by Zanconato Custom Cycles, on Flickr
Steve49suzuki
- Steve49suzuki
-
New Member
-
Posts:
-
Joined:Fri Oct 25, 2013 4:02 pm
Just sharing a little job ! I did for a mate im no expert remember. Cracked cylinder head. first time I welded it ground it out a bit preheated it and welded it with helium mix and 4047 rod. Cracked right thru weld ! Ground it right out second time and preheated again welded it everything looked ok cracked again on the toe of the weld. welded it a 3rd time this time took the chill of it rather than preheated it welded it and no cracks. Had it pressure tested and might as well welded it with a tea bag leaked every where. Neveragain !! loads of time and gas and rods. But all good fun I guess and valuable experience.
Pictures are wrong way round
steve
Pictures are wrong way round
steve
- Attachments
-
- head 3.jpg (75.41 KiB) Viewed 3070 times
-
- head 2.jpg (108.4 KiB) Viewed 3070 times
-
- head 1.png (136.49 KiB) Viewed 3070 times
- Otto Nobedder
-
Weldmonger
-
Posts:
-
Joined:Thu Jan 06, 2011 11:40 pm
-
Location:Near New Orleans
Steve49suzuki wrote:Hello im a hobby welder these are some bits I welded for my racebike one is a seat subframe one is a Ti exhaust header I modified and one is a flange. I raced the bike at the manx gp at the isle of man. Nothing broke
Nice looking stuff!
I know nothing about that race, but from the monoshock with the external reservior, I'm assuming there's some "terrain" involved? When you need a shock like that, and you don't break anything, you done good.
Steve S
Steve49suzuki
- Steve49suzuki
-
New Member
-
Posts:
-
Joined:Fri Oct 25, 2013 4:02 pm
Hello Steve s
Basically it's the same coarse as the Isle of Man Tt. The Tt is for professionals and the Manx gp is for amateurs. It's 38 miles a lap on public roads and you do 4 laps. The Tt is at the end of May and Manx end of August. It's definitely a test of man and machine. That bike was a kawasaki er 650. I also ran a triumph 675.
Steve
awill4wd
- awill4wd
-
Active Member

-
Posts:
-
Joined:Thu Jan 31, 2013 3:57 am
-
Location:Berwick, Melbourne, Australia
Not my work but my friends where I work after hours.
He is putting this.

Into this.

Chev LSX/LS7, 427 cubes, steel block, twin turbos but take note of the mirror image turbo's, only one place in the world you can buy mirror image turbos.
1952 Ford Mercury pillarless coupe.
And it all fits in without having to have a bonnet scoop.
Still a long way to go but it's well on the way.
Regards Andrew from Oz.
He is putting this.
Into this.
Chev LSX/LS7, 427 cubes, steel block, twin turbos but take note of the mirror image turbo's, only one place in the world you can buy mirror image turbos.
1952 Ford Mercury pillarless coupe.
And it all fits in without having to have a bonnet scoop.
Still a long way to go but it's well on the way.
Regards Andrew from Oz.
We are Tig welders, gravity doesn't worry us.
Miller Dynasty 350
OTC hybrid wave 300 amp inverter Tig at work (Now retired)
Kemppi MLS 2300 inverter, 230 amps of welding brilliance for home use
Miller Dynasty 350
OTC hybrid wave 300 amp inverter Tig at work (Now retired)
Kemppi MLS 2300 inverter, 230 amps of welding brilliance for home use
- weldin mike 27
-
Weldmonger
-
Posts:
-
Joined:Fri Apr 01, 2011 10:59 pm
-
Location:Australia; Victoria


GreinTime
- GreinTime
-
Weldmonger
-
Posts:
-
Joined:Fri Nov 01, 2013 11:20 am
-
Location:Pittsburgh, PA

Big Fat Cup Holder 1 by GreinTime3592, on Flickr

BFCH2 by GreinTime3592, on Flickr

Big Fat Cup in BFCH by GreinTime3592, on Flickr
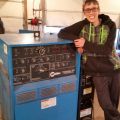
This is the cupholder that Braehill (my father) and myself made. It's a mix of aluminum. The strap around the cup is 6061-T6, but other than that, who knows! It was a spur of the moment thing, because I was pi$$ed that I had to try and walk with my walker down the hallway, or around the house. I haven't welded since probably September, as I lost my left lower leg due to a firearms accident at the beginning of October. This was the first time I had welded since, so some of them are a little shaky.
I didn't realize how much I used my left leg while welding until I welded some steel (and burnt through my helmet), and almost fell off of the stool about 30 times because I had no way to stabilize after I had moved my walker. It was especially difficult when doing a cover pass on 2" Sch. 80 in 6G. I had to cheat and turn the pipe in the little fixture that I was holding it in :/ You don't think about how much that would throw you off until you don't have one to use!
#oneleggedproblems
-=Sam=-
-=Sam=-
- Otto Nobedder
-
Weldmonger
-
Posts:
-
Joined:Thu Jan 06, 2011 11:40 pm
-
Location:Near New Orleans
Welcome, GreinTime,
Your dad told me some of what happened to you. While I can't pretend to know how this affects you, I can tell you from my experience with workers of all kinds in all crafts, you will improvise, adapt, and overcome.
Steve S
Your dad told me some of what happened to you. While I can't pretend to know how this affects you, I can tell you from my experience with workers of all kinds in all crafts, you will improvise, adapt, and overcome.
Steve S
jwmacawful
- jwmacawful
-
Heavy Hitter

-
Posts:
-
Joined:Fri Aug 13, 2010 1:23 pm
-
Location:the city that never sleeps
ajlskater1
- ajlskater1
-
Ace

-
Posts:
-
Joined:Thu Feb 02, 2012 5:32 am
- 20131119_185811.jpg (77.12 KiB) Viewed 2808 times
- 20131119_185811.jpg (77.12 KiB) Viewed 2808 times
- 20131119_185837.jpg (101.53 KiB) Viewed 2808 times
coldman
- coldman
My job today was to fabricate a refrigeration bypass regulator assembly around an existing motorised expansion valve. The existing pipe is 1-1/2" sched 40 and the bypass to be from 1/2" sched 40. I need to pump out the existing line and make safe prior to tie in. (full of 250psi ammonia).
- This is the concept.
- P0.jpg (6.03 KiB) Viewed 2753 times
- Root passes done. 80amps 3/32" ER70S-4 wire & 2% Lanthanated electrode. Gapped with 3/32" wire and 35 degre bevel no land,
- P1.jpg (7.5 KiB) Viewed 2753 times
- Fitting up theaded sockets. Butts capped with 1/16" ER70S-2 wire at 70 amps.
- P2.jpg (8.75 KiB) Viewed 2753 times
coldman
- coldman
This next photo is the coping of the ends for 1-1/2" pipe
- P3.jpg (8.33 KiB) Viewed 2753 times
- Completed assembly ready for tie in.
- P4.jpg (6.5 KiB) Viewed 2753 times
- Assembly tied in to main 1-1/2" line and in service. Sorry for wierd angle but it was a tight t squeeze to get it all in the shot. I used a CK Flexlok torch to help me get around to tie ins gecause of access restrictions.
- P5.jpg (7.44 KiB) Viewed 2753 times
ajlskater1
- ajlskater1
-
Ace
-
Posts:
-
Joined:Thu Feb 02, 2012 5:32 am
Very easy little aluminum chasis on friday. .062 5052 al the only thing that is critical us all the welds must be fully penetrated because they get ground, used 1/16 5356 filler for color matching and strength. Have 700 to do welld about 200 per day so should be done on wednesday.
- Attachments
-
- 20131127_235127.jpg (88.35 KiB) Viewed 2728 times
-
- 20131127_235113.jpg (91.17 KiB) Viewed 2728 times
Return to “Tig Welding - Tig Welding Aluminum - Tig Welding Techniques - Aluminum Tig Welding”
Jump to
- Introductions & How to Use the Forum
- ↳ Welcome!
- ↳ Member Introductions
- ↳ How to Use the Forum
- ↳ Moderator Applications
- Welding Discussion
- ↳ Metal Cutting
- ↳ Tig Welding - Tig Welding Aluminum - Tig Welding Techniques - Aluminum Tig Welding
- ↳ Mig and Flux Core - gas metal arc welding & flux cored arc welding
- ↳ Stick Welding/Arc Welding - Shielded Metal Arc Welding
- ↳ Welding Forum General Shop Talk
- ↳ Welding Certification - Stick/Arc Welding, Tig Welding, Mig Welding Certification tests - Welding Tests of all kinds
- ↳ Welding Projects - Welding project Ideas - Welding project plans
- ↳ Product Reviews
- ↳ Fuel Gas Heating
- Welding Tips & Tricks
- ↳ Video Discussion
- ↳ Wish List
- Announcements & Feedback
- ↳ Forum News
- ↳ Suggestions, Feedback and Support
- Welding Marketplace
- ↳ Welding Jobs - Industrial Welding Jobs - Pipe Welding Jobs - Tig Welding Jobs
- ↳ Classifieds - Buy, Sell, Trade Used Welding Equipment
- Welding Resources
- ↳ Tradeshows, Seminars and Events
- ↳ The Welding Library
- ↳ Education Opportunities