Tig welding tips, questions, equipment, applications, instructions, techniques, tig welding machines, troubleshooting tig welding process
diasim
  • Posts:
  • Joined:
    Wed Jun 06, 2018 12:54 pm

Hello everyone

I hope you won’t mind my English, it is not my first language so please be patient :)

My company is working on a new product which requires some very long corner joints, material is 20 ga stainless steel. (~0,80 mm for us Europeans :D ).
It’s basically some sort of box, made with a “C” shaped body closed on the top and bottom with two rectangular sheets.
Users of this specific product require very high cleanability of the part - ideally, the inside of the joint should resemble a fillet. They must not have any gap or undercut or interstice where dust and dirt can settle.

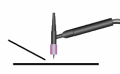
We’re trying very hard and practicing on a sample shaped like this:
Image
Dimensions are 23*15*15 inches, corner joints are highlighted. But the actual product will be more than twice the size :(

Unfortunately for us stainless steel is not our area of expertise (we mainly work on aluminum), so we have several questions to which we cannot find an answer. We basically know that we need to TIG weld this but that's it :lol:
But hopefully you can help me!

Based on the box shape and dimension, would you recommend an outside or inside corner weld?
Is argon back purge really necessary? We do have some copper to use but we never tried argon purge.
Parts fit up should be for an open corner joint or closed? Without filler?

Jody’s videos have been really helpful so far, in fact most of the questions come from things I learned by watching them. But there is only so much I can do without experience and any advice will be very much appreciated.

I'll see if I can post some pictures of what we managed to do.

Many thanks to anyone who will spend its time to read this long post, any feedback will be very much appreciated.
If this is not the right section of the board could the topic be moved?
cj737
  • Posts:
  • Joined:
    Thu Sep 29, 2016 8:59 am

If you want a super clean inside, then I would weld outside corners. I strongly encourage you to make a purge box and clamp it to the inside corner, run Argon on the interior while welding the outside. This will eliminate any contamination of the inside corner (which will be extremely difficult to clean afterwards) and make the outside weld easier too. You can also come back weld the inside too with a lay wire technique after, just purge the outside too after the entire box cools off.

I recently did a job of stainless countertops. I took a 2”x2”x0.25” piece of square tubing. I welded some angle iron to it to make an inside square jig. I then milled off the outside edge of the tubing, and welded flat pieces on the ends. Milling the edge off opened a slot for Argon to wash the inside corner.

I went a little farther and tapped a hole to screw a quick disconnect in so I could plug a spare hose to it when I want flow, disconnect when I was not welding. Spare tank, spare hose, 1 person Argon purge.i used aluminum 0.25” material to act as a clamp, heat sink, and non-contaminating material against the stainless. This worked great for me. Customer order another $9,000 of countertops for the same work.

A little time up front making a jig made the job easy, successful, and repeatable. Plus, the jig/box I made from scrap, so that was free.
User avatar
  • Posts:
  • Joined:
    Sun Nov 19, 2017 10:09 am

I also would think you will have a lot of warpage due to heat.
Lincoln MP 210, Lincoln Square Wave 200,
Everlast 210 EXT
Thermal Dynamics 25 Plasma cutter

" Anything that carries your livelihood wants to be welded so that Thor can’t break it."
CJ737
diasim
  • Posts:
  • Joined:
    Wed Jun 06, 2018 12:54 pm

cj737 wrote:If you want a super clean inside, then I would weld outside corners. I strongly encourage you to make a purge box and clamp it to the inside corner, run Argon on the interior while welding the outside. This will eliminate any contamination of the inside corner (which will be extremely difficult to clean afterwards) and make the outside weld easier too. You can also come back weld the inside too with a lay wire technique after, just purge the outside too after the entire box cools off.
It would be better and more cost effective if we could not weld the inside afterwards...

I agree that cleaning the inside is very hard to do, especially without proper tools.
We tried some tools provided by a supplier, for a demo in our shop, which pickled and passivated the inside. But this only highlighted how poor our weld was, with no penetration on most of the weld. And no penetration means that there is a gap, which is not considered clean and thus will not be accepted by customers :(

But that is our problem: we do not know how to improve the inside. We need good penetration, which ensures the cleanability of the piece.
Clearly we're making some mistakes along the way, but is it the fit-up? Or the lack of purge?
cj737 wrote:I recently did a job of stainless countertops. I took a 2”x2”x0.25” piece of square tubing. I welded some angle iron to it to make an inside square jig. I then milled off the outside edge of the tubing, and welded flat pieces on the ends. Milling the edge off opened a slot for Argon to wash the inside corner.

I went a little farther and tapped a hole to screw a quick disconnect in so I could plug a spare hose to it when I want flow, disconnect when I was not welding. Spare tank, spare hose, 1 person Argon purge.i used aluminum 0.25” material to act as a clamp, heat sink, and non-contaminating material against the stainless. This worked great for me. Customer order another $9,000 of countertops for the same work.
Our jig is similar as well. We used some aluminum square tubes for the inside jig, which is basically a "U" shaped structure.
Then we clamp the parts with some copper plates as well and tack them every few inches.

I have a question: do you prefer an open corner or a closed corner fit-up?
I guess you did not use filler for yor job.


tungstendipper wrote:I also would think you will have a lot of warpage due to heat.
Actually with aluminum tubes and copper chill bars we do not have any noticeable warpage.
cj737
  • Posts:
  • Joined:
    Thu Sep 29, 2016 8:59 am

Lack of purge in your case is why the inside looks poor.

For 20ga stainless, you don't need much heat, and you should only use a thin filler wire. Honestly, if the fit is tight, you could simply run without filler and fuse the outside. With a back purge, you should see a very clean inside (especially if passivated).

For open or closed corner: with 20ga, closed corner due to thin material. BUT, if you only want to weld 1 side, you could try open, back purge, and use an 0.045 filler wire, 1/16" tungsten, #12 cup, gas lens, and 25CFH of Argon. Purge interior at around 8-10CFH. Just adjust the "open" gap to be about equal to the filler, keeping both filler and gap less than material thickness.
diasim
  • Posts:
  • Joined:
    Wed Jun 06, 2018 12:54 pm

cj737 wrote:Lack of purge in your case is why the inside looks poor.

For 20ga stainless, you don't need much heat, and you should only use a thin filler wire. Honestly, if the fit is tight, you could simply run without filler and fuse the outside. With a back purge, you should see a very clean inside (especially if passivated).

For open or closed corner: with 20ga, closed corner due to thin material. BUT, if you only want to weld 1 side, you could try open, back purge, and use an 0.045 filler wire, 1/16" tungsten, #12 cup, gas lens, and 25CFH of Argon. Purge interior at around 8-10CFH. Just adjust the "open" gap to be about equal to the filler, keeping both filler and gap less than material thickness.
Thanks for the suggestions, we'll try that as well.

Here's what we managed so far:
1) Half-closed corner, with the top sheet covering half of the body thickness. No filler.
Outside, polished with bristle disks
Image
Inside, passivated
Image
No back purge, just copper chill bars inside and outside

2) Open corner with no gap, with just the sheets edge making contact. No filler, low pulse.
Outside, passivated
Image
Inside, passivated
Image
No back purge, just copper chill bars inside and outside


Sample 1) has many dips/gaps. Sample 2) seems better but maybe we need to increase pulse frequency and travel speed.
What do you think?
cj737
  • Posts:
  • Joined:
    Thu Sep 29, 2016 8:59 am

I would go with sample 2 AND purge the inside. Purging it will help eliminate the weld bumps a little.

The copper chill bars are great to help control distortion, but do nothing for eliminating contamination.

After welding the outside, you could still come along the inside and "wash" the inside welded seam with no filler, full pulse and that will blend the corners. I don't know if you want a square inside corner, but washing does prevent a "trap area".
Coldman
  • Posts:
  • Joined:
    Mon Dec 15, 2014 2:16 am
  • Location:
    Oz

If you have an extruded aluminium angle and can clamp it inside the corner joint, this will minimise inside contamination without purging. With a good gapless fitup I would run pulse 2.5pps, 50% on time and 50% background current without filler except on the ends to keep the end corners intact. I would also use a peddle to maintain bead profile against heat build up. Works for me with outstanding results.


Sent using Tapatalk
Flat out like a lizard drinkin'
User avatar

cj737 wrote: I recently did a job of stainless countertops. I took a 2”x2”x0.25” piece of square tubing. I welded some angle iron to it to make an inside square jig. I then milled off the outside edge of the tubing, and welded flat pieces on the ends. Milling the edge off opened a slot for Argon to wash the inside corner.
CJ, can you post a couple pics showing this fixture?
Richard
Website
diasim
  • Posts:
  • Joined:
    Wed Jun 06, 2018 12:54 pm

cj737 wrote:I would go with sample 2 AND purge the inside. Purging it will help eliminate the weld bumps a little.

The copper chill bars are great to help control distortion, but do nothing for eliminating contamination.

After welding the outside, you could still come along the inside and "wash" the inside welded seam with no filler, full pulse and that will blend the corners. I don't know if you want a square inside corner, but washing does prevent a "trap area".
The inside would be perfect if it could resemble a fillet, where you can't see any dip or "trap area" as you called it.
But full penetration with no bumps would be a great start :D

Thanks for all the advice you've given. I'll contact our supplier next week for the gas lens!
Coldman wrote:If you have an extruded aluminium angle and can clamp it inside the corner joint, this will minimise inside contamination without purging. With a good gapless fitup I would run pulse 2.5pps, 50% on time and 50% background current without filler except on the ends to keep the end corners intact. I would also use a peddle to maintain bead profile against heat build up. Works for me with outstanding results.
We use an aluminum square tube, with copper plates (half inch thick), then clamp the sheets to the fixture. What current would you use in your setting? 30A?


I forgot to mention an important detail: we use a shearing machine to cut the pieces. Should we deburr the edges before welding?
cj737
  • Posts:
  • Joined:
    Thu Sep 29, 2016 8:59 am

diasim wrote: I forgot to mention an important detail: we use a shearing machine to cut the pieces. Should we deburr the edges before welding?
Here's some 11ga (nearly 3.2mm) stainless that was sheared, open root, fuse welded. I recall being right about 94 amps, 1.2pps, 50%, 25%, #12 cup, 3/32 2%. On the inside, I clamped 2"x2"x0.25" aluminum angle (a la Coldman) because this was a letterbox.
Attachments
IMG_2224.jpg
IMG_2224.jpg (62.05 KiB) Viewed 4497 times
cj737
  • Posts:
  • Joined:
    Thu Sep 29, 2016 8:59 am

LtBadd wrote: CJ, can you post a couple pics showing this fixture?
Nothing fancy, but very effective.

The milled slot is the length of the countertop lip. Set up for "inside" corners.
Attachments
IMG_3217.jpg
IMG_3217.jpg (66.98 KiB) Viewed 4499 times
IMG_3216.jpg
IMG_3216.jpg (98.57 KiB) Viewed 4499 times
User avatar

Thanks CJ, I have something similar at work and was curious to see yours.
Richard
Website
Coldman
  • Posts:
  • Joined:
    Mon Dec 15, 2014 2:16 am
  • Location:
    Oz

diasim wrote:
cj737 wrote:I would go with sample 2 AND purge the inside. Purging it will help eliminate the weld bumps a little.

The copper chill bars are great to help control distortion, but do nothing for eliminating contamination.

After welding the outside, you could still come along the inside and "wash" the inside welded seam with no filler, full pulse and that will blend the corners. I don't know if you want a square inside corner, but washing does prevent a "trap area".
The inside would be perfect if it could resemble a fillet, where you can't see any dip or "trap area" as you called it.
But full penetration with no bumps would be a great start :D

Thanks for all the advice you've given. I'll contact our supplier next week for the gas lens!
Coldman wrote:If you have an extruded aluminium angle and can clamp it inside the corner joint, this will minimise inside contamination without purging. With a good gapless fitup I would run pulse 2.5pps, 50% on time and 50% background current without filler except on the ends to keep the end corners intact. I would also use a peddle to maintain bead profile against heat build up. Works for me with outstanding results.
We use an aluminum square tube, with copper plates (half inch thick), then clamp the sheets to the fixture. What current would you use in your setting? 30A?


I forgot to mention an important detail: we use a shearing machine to cut the pieces. Should we deburr the edges before welding?
IMG_2435.JPG
IMG_2435.JPG (57.75 KiB) Viewed 4478 times
This was 1.2mm.
For 0.8mm I would set to 34amps and use the peddle to adjust as I go.
I also prefer a number 12 gas lense cup for these outside corner joints. I use the fupa cups from Jody’s weldmonger store.
Sheared edge on 0.8 should be fine without deburring. You’re going to fully penetrate anyway.
With the aluminium angle clamped firmly right into the joint you are not going to get a fillet type bead on the inside but you will get a complete shiny joint if you do it right. Practice first and fine tune your settings. Every power source is different.


Sent using Tapatalk
Flat out like a lizard drinkin'
diasim
  • Posts:
  • Joined:
    Wed Jun 06, 2018 12:54 pm

Coldman wrote:This was 1.2mm.
For 0.8mm I would set to 34amps and use the peddle to adjust as I go.
I also prefer a number 12 gas lense cup for these outside corner joints. I use the fupa cups from Jody’s weldmonger store.
Sheared edge on 0.8 should be fine without deburring. You’re going to fully penetrate anyway.
With the aluminium angle clamped firmly right into the joint you are not going to get a fillet type bead on the inside but you will get a complete shiny joint if you do it right. Practice first and fine tune your settings. Every power source is different.
Thanks There is almost no discoloration on your weld, good job.
As for the angle on the inside:
Image
We have 2 of those plates screwed on an aluminum tube, to form a copper angle.
The plates have a small fillet on the edge, so this is what could happen with our current fit-up:
Image
Should we mill these plates to remove the fillet and have no gap on the inside?
Coldman
  • Posts:
  • Joined:
    Mon Dec 15, 2014 2:16 am
  • Location:
    Oz

diasim wrote:
Coldman wrote:This was 1.2mm.
For 0.8mm I would set to 34amps and use the peddle to adjust as I go.
I also prefer a number 12 gas lense cup for these outside corner joints. I use the fupa cups from Jody’s weldmonger store.
Sheared edge on 0.8 should be fine without deburring. You’re going to fully penetrate anyway.
With the aluminium angle clamped firmly right into the joint you are not going to get a fillet type bead on the inside but you will get a complete shiny joint if you do it right. Practice first and fine tune your settings. Every power source is different.
Thanks There is almost no discoloration on your weld, good job.
As for the angle on the inside:
Image
We have 2 of those plates screwed on an aluminum tube, to form a copper angle.
The plates have a small fillet on the edge, so this is what could happen with our current fit-up:
Image
Should we mill these plates to remove the fillet and have no gap on the inside?
Definitely mill it to a corner. That’s why I suggested the extruded aluminium angle. It has a sharp corner to fill any voids without the need for machining.


Sent using Tapatalk
Flat out like a lizard drinkin'
diasim
  • Posts:
  • Joined:
    Wed Jun 06, 2018 12:54 pm

I'm working now on improving the jig based on your suggestions, I will post updates once we have welded some more samples.

But I wanted also to ask about grinding and polishing: given the strict requirements (fillet-like bead on the inside, good looking bead on the outside) what would you recommend for grinding?
cj737
  • Posts:
  • Joined:
    Thu Sep 29, 2016 8:59 am

A Dynafile with a few differing grits.
diasim
  • Posts:
  • Joined:
    Wed Jun 06, 2018 12:54 pm

Quick and small update for anyone interested: we did try to mill the jig to an angle but the end result was not what we require.
We actually made a small chamfer on the edge, so that the weld pool can "collapse" on it and take its shape,
Meaning that our product will have a chamfer on the inside, if we manage good penetration.

Besides, we cleaned and polished the parts way better than we did before, and now the inside of the weld looks very shiny with almost no discoloration, even without back purge :D

Amperage ended up slightly above 30A with a 1/16" tungsten.

I'll try the Dynafile two weeks from now as we arrange a demo with the supplier.
Leejohnson1313
  • Posts:
  • Joined:
    Thu Jun 13, 2013 9:59 am

Although not addressing welding methods directly, if you can change the way you bend up the pieces of the "box", you can greatly reduce the length of weld bead to make the finished part. Less weld length should = less chance of flaws!

Current configuration gives 2 x (15 + 23 + 15) =106 inch weld length < made from a "U" piece 15 x (15 + 23 + 15) & 2 flat pieces (15 x 23).>

2 lesser weld length options I can see are:

A. <Make the "U" piece 15 x (23 + 15 + 23) + an "L" piece 15 x (15 + 23)> Now have 2 x (15 + 23) = 76 inch weld length (71.7% of original design)

B. < make a box/pan shape fold up so only 4 each x15 inch seams need to be welded> 4 x 15 inch = 60 inch weld length (56.6% of original design) {this will involve some tight tolerance sheet metal bending, so may be too hard in practice}.

Best of luck,
Lee
diasim
  • Posts:
  • Joined:
    Wed Jun 06, 2018 12:54 pm

Leejohnson1313 wrote:Although not addressing welding methods directly, if you can change the way you bend up the pieces of the "box", you can greatly reduce the length of weld bead to make the finished part. Less weld length should = less chance of flaws!

Current configuration gives 2 x (15 + 23 + 15) =106 inch weld length < made from a "U" piece 15 x (15 + 23 + 15) & 2 flat pieces (15 x 23).>

2 lesser weld length options I can see are:

A. <Make the "U" piece 15 x (23 + 15 + 23) + an "L" piece 15 x (15 + 23)> Now have 2 x (15 + 23) = 76 inch weld length (71.7% of original design)

B. < make a box/pan shape fold up so only 4 each x15 inch seams need to be welded> 4 x 15 inch = 60 inch weld length (56.6% of original design) {this will involve some tight tolerance sheet metal bending, so may be too hard in practice}.

Best of luck,
Lee
Thanks for the suggestions!

A. Unfortunately that is not possible as we already made the fixture to weld as per our current design. Besides, making an L+U design will require two different fixtures, whereas we can currently use the same jig for both top and bottom welding

B. That would be the best solution, but consider that the final product dimensions will be bigger than the sample we're making now. We do not have the machines to work with the resulting dimensions of a folded box :|

Anyway, this is the inside of one of the pieces we made while testing various parameters:
Image
Not the best one but for us progress is noticeable! With the dynafile i hope we'll get to the final result we need.
Post Reply