Hi gang
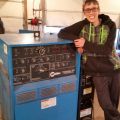
I just received my first welder. Went the very cheap route with an Everlasting 140. Did some first welds today. Boy do I have work to do. I would appreciate some feedback on the attached pics. I know you have to crawl before you walk and walk before you run. Having fun making mistakes.
Thanks in advance!
Peter
Welcome to the forum. I would say you need to lower the amperage and let the molten puddle melt he filler wire. Be sure to take your time when your welding.
A student now but really want to weld everyday. Want to learn everything about everything. Want to become a knower of all and master of none.
Instagram: @farmwelding
Nick
Beg to disagree again, the OP has not given us information about material thickness, preparation, amps used, gas flow rate etc.
Peter,
like all of us starting out with tig, there are lots of things going on at the same time that you have to be aware of and learn to control.
So in view of little information provided:
- keep a tight arc at about 10 degrees off perpendicular
- keep your filler wire in the gas shield and near to horizontal for a joint like this.
- use enough gas flow to keep the puddle shielded
- clean your steel to shiny both sides and edges (flap disc or grinder) to avoid contamination
- watch Jody's "tig basics" series a few times
- I would probably increase amps and travel faster for a joint like this.
The more information you give us about your rig setup and welding settings, the better and more targeted advice will be from experienced members.
Thank you all for the input. I am having great fun "failing" at my starting welds. I have started just running some beads on flat material. I will post some more results as I keep messing around
Pblevy wrote:Thank you all for the input. I am having great fun "failing" at my starting welds. I have started just running some beads on flat material. I will post some more results as I keep messing around
Yeah run a lot more till you get comfortable. The more you fail, the more you suceed in life.
Try cranking it up between 80 & 100 amps (the thickness and type of metal that your welding table is made of will effect how quickly your base metal heats up due to quenching effect). The base metal should puddle almost instantly. The reason you have those little balls at the beginning of your welds is due to lack of heat. It's called cold lap. Basically the filler isn't tying into the base metal and is just balling up, rolling over and sitting on top of the base. The reason it finally starts to tie into the plate is because the plate begins to heat soak after a bit and the amperage begins to become sufficient. Let it cool off for a moment and the process begins all over again.
You need to have enough amperage so that the steel begins to melt in less than one second. You don't want to begin dabbing in filler wire until you have a molten puddle in the base. Otherwise you get cold lap when you dab. If you ever get to use a machine that is capable of welding aluminum you will see the same effect greatly magnified (it's about ten times as bad as steel). With aluminum the rod will ball up and burn back. This ball won't even fall off the rod as if the base metal is repelling it - kind of like those dawn dishwashing liquid commercials where one drop of dawn pushes away all of the grease that is floating on top of the water.
MinnesotaDave wrote:My preference on 1/8" is 125-140 amps.
This range will work for what you are doing and for t-joints and lap joints.
Butt joints can be lower.
As you lower amps and slow down travel speed, your total heat input is higher and the heat affected zone (HAZ) gets wider.
He has to lower heat and slow down until he gets the hang of it. His second photo isn't of a joint, just a single plate, so total amperage needs to be lower anyway. Besides, the machine he bought doesn't come with a foot peddle so he's probably using scratch start with no amperage control.
Thanks RamboBaby and Minnesota Dave. Your feedback is appreciated. I will most definitely bump up the amperage. When I did my very first welds I did have the amps turned up but the metal slightly stuck to my table. I assume I was just moving too slow. Will post pics with the higher setting.
Pblevy wrote:Thanks RamboBaby and Minnesota Dave. Your feedback is appreciated. I will most definitely bump up the amperage. When I did my very first welds I did have the amps turned up but the metal slightly stuck to my table. I assume I was just moving too slow. Will post pics with the higher setting.
The metal welded to your table because your table isn't very conductive. As such, it develops hot spots. If you can find some aluminum to lay on on your table then you will eliminate that problem because aluminum is extremely conductive. My table is an old steel transmission build table but I layed a sheet of 3/32" aluminum on top and it stopped all that nonsense.
Ok guys I tried the higher settings. I did both 70 and 80 amps. That is as high as my little machine will go with 110.
Here is the pic of a typical bead. I don't think it looks like it is supposed to. I wonder if I am still moving too slow.
RamboBoy I love the table. Very jealous.
If that's your max amps then try running a narrower bead. How thick is your filler rod? You might try using something thinner than 3/32 so that it takes less heat. Also you can gain some benefits if you preheat your part with a propane torch. Even if this is just a practice plate it will cause the weld to act more like if you were running more amps. Your getting closer.
Pblevy wrote:Ok guys I tried the higher settings. I did both 70 and 80 amps. That is as high as my little machine will go with 110.
Here is the pic of a typical bead. I don't think it looks like it is supposed to. I wonder if I am still moving too slow.
RamboBoy I love the table. Very jealous.
Based on the pic it looks like something is wrong.
Arc length needs to be very tight.
Torch angle just leaned back enough to see.
Puddle, dab filler, move ahead and pause, add filler, move ahead and pause, add filler, etc
The "pause" is very short - just long enough to let the puddle wet out and add the filler - under a second.
If you were in the Bemidji area I could hook you up with the initial basics pretty quickly
Dave J.
Beware of false knowledge; it is more dangerous than ignorance. ~George Bernard Shaw~
Syncro 350
Invertec v250-s
Thermal Arc 161 and 300
MM210
Dialarc
Tried being normal once, didn't take....I think it was a Tuesday.
All of your constructive criticisms have been very helpful. Hear is my latest. I think I am getting closer. This time I used a thinner sheet of material slowed down and used about 40 amps. My machine is a lift start ( no foot pedal) and so I just have to play around with the settings.
Looking better. You want that tungsten as close to puddle as possible without actually touching the puddle. I've had some people watch me weld and say the tungsten is in the puddle. I tell them them no it's not. Then proceed to show them what it looks like if I put the tungsten in the puddle lol
Jesse James wrote:Looking better. You want that tungsten as close to puddle as possible without actually touching the puddle. I've had some people watch me weld and say the tungsten is in the puddle. I tell them them no it's not. Then proceed to show them what it looks like if I put the tungsten in the puddle lol